Difference between revisions of "ECM Elektronika II Profi"
From Whole Latte Love Support Library
(removed preinfusion info) |
|||
| (16 intermediate revisions by 5 users not shown) | |||
| Line 1: | Line 1: | ||
| − | + | {{Getting-Started | |
| − | | | + | |product_banner = [[File:Wiki_ProductPageBanner_1200x175_ECMElectronika_v1.jpg|link=]] |
| − | + | |product_page_title = ECM Electronika II Profi | |
| − | | | + | |machine_type = Prosumers |
| − | | | + | |page_type = set up |
| − | | | + | |section1 = Install It |
| − | | | + | |anchor1 = Install |
| + | |section2 = Get it Good & Hot | ||
| + | |anchor2 = Heating | ||
| + | |section3 = Get a Handle on your Tamp | ||
| + | |anchor3 = Tamping | ||
| + | |section4 = Brew Better | ||
| + | |anchor4 = Brew Better | ||
| + | |section5 = Brew the Best You Can Brew | ||
| + | |anchor5 = Brew Best | ||
| + | |section6 = Get Frothing | ||
| + | |anchor6 = Get Frothing | ||
| + | |section7 = Froth Better | ||
| + | |anchor7 = Froth Better | ||
| + | |section8 = Frothing and Habits to Avoid | ||
| + | |anchor8 = Frothing Mistakes | ||
| + | |section9 = Steam & the Heating Sweet Spot | ||
| + | |anchor9 = Steaming Temperature | ||
| + | |section10 = Steam with Thermometers | ||
| + | |anchor10 = Steam with Thermometers | ||
| + | |section11 = Steam Tip Compatibility | ||
| + | |anchor11 = Steam Tip Compatibility | ||
}} | }} | ||
| − | + | {{Set-Up-Content | |
| − | + | |dual_boiler = | |
| − | + | |e61 = no | |
| − | {{ | + | |
| − | + | ||
| − | + | ||
| − | + | ||
| − | + | ||
| − | + | ||
| − | + | ||
| − | + | ||
| − | + | ||
| − | + | ||
| − | + | ||
| − | + | ||
| − | + | ||
| − | + | ||
| − | + | ||
| − | + | ||
| − | + | ||
| − | + | ||
| − | + | ||
| − | + | ||
| − | + | ||
| − | + | ||
| − | + | ||
| − | | | + | |
| − | | | + | |
}} | }} | ||
| − | + | ---- | |
| − | + | ===Steam Tip Compatibility=== | |
| − | + | {{Content-Columns | |
| − | + | |column_1 = | |
| − | + | : There are several different steam tips for ECM and its sister brand Profitec, some of which are interchangeable and others not. Consult this comprehensive document on the topic for more information. | |
| − | + | |column_2 = | |
| − | + | [[File:ECM_and_Profitec_Steam_Tip_Compatibility.pdf|center|link=https://wiki.wholelattelove.com/File:ECM_and_Profitec_Steam_Tip_Compatibility.pdf]] | |
| − | + | |media_caption = | |
| − | === | + | Steam Tip Compatibility |
| − | + | ||
| − | {{ | + | |
| − | + | ||
| − | + | ||
| − | + | ||
| − | + | ||
| − | + | ||
| − | + | ||
| − | + | ||
| − | | | + | |
| − | | | + | |
| − | | | + | |
| − | | | + | |
| − | + | ||
| − | + | ||
}} | }} | ||
| − | + | [[Category:ECM]] | |
| − | + | ||
| − | + | ||
| − | + | ||
| − | + | ||
| − | + | ||
| − | + | ||
| − | + | ||
| − | + | ||
| − | + | ||
| − | + | ||
| − | + | ||
| − | + | ||
| − | + | ||
| − | + | ||
| − | + | ||
| − | + | ||
| − | + | ||
| − | + | ||
| − | + | ||
| − | + | ||
| − | + | ||
| − | + | ||
| − | + | ||
| − | + | ||
| − | + | ||
| − | + | ||
| − | + | ||
| − | + | ||
| − | + | ||
| − | + | ||
| − | + | ||
| − | + | ||
| − | + | ||
| − | + | ||
| − | + | ||
| − | + | ||
| − | + | ||
| − | + | ||
| − | + | ||
| − | + | ||
| − | + | ||
| − | + | ||
| − | + | ||
| − | + | ||
| − | + | ||
| − | + | ||
| − | + | ||
| − | + | ||
| − | + | ||
| − | + | ||
| − | + | ||
| − | + | ||
| − | + | ||
| − | + | ||
| − | + | ||
| − | + | ||
| − | + | ||
| − | + | ||
| − | + | ||
| − | + | ||
| − | + | ||
| − | + | ||
| − | + | ||
| − | + | ||
| − | + | ||
| − | + | ||
| − | + | ||
| − | + | ||
| − | + | ||
| − | + | ||
| − | + | ||
| − | + | ||
| − | + | ||
| − | + | ||
| − | + | ||
| − | + | ||
| − | + | ||
| − | + | ||
| − | + | ||
| − | + | ||
| − | + | ||
| − | + | ||
| − | + | ||
| − | + | ||
| − | + | ||
| − | + | ||
| − | + | ||
| − | + | ||
| − | + | ||
| − | + | ||
| − | + | ||
| − | + | ||
| − | + | ||
| − | + | ||
| − | + | ||
| − | + | ||
| − | + | ||
| − | + | ||
| − | + | ||
| − | + | ||
| − | + | ||
| − | + | ||
| − | + | ||
| − | + | ||
| − | + | ||
| − | + | ||
| − | + | ||
| − | + | ||
| − | + | ||
| − | + | ||
| − | + | ||
| − | + | ||
| − | + | ||
| − | + | ||
| − | + | ||
| − | + | ||
| − | + | ||
| − | + | ||
| − | + | ||
| − | + | ||
| − | + | ||
| − | + | ||
| − | + | ||
| − | + | ||
| − | + | ||
| − | + | ||
| − | + | ||
| − | + | ||
| − | + | ||
| − | + | ||
| − | + | ||
| − | + | ||
| − | + | ||
| − | + | ||
| − | + | ||
| − | + | ||
| − | + | ||
| − | + | ||
| − | + | ||
| − | + | ||
| − | + | ||
| − | + | ||
| − | + | ||
| − | + | ||
| − | + | ||
| − | + | ||
| − | + | ||
| − | + | ||
| − | + | ||
| − | + | ||
| − | + | ||
| − | + | ||
| − | + | ||
| − | + | ||
| − | + | ||
| − | + | ||
| − | + | ||
| − | + | ||
| − | + | ||
| − | + | ||
| − | + | ||
| − | + | ||
| − | + | ||
| − | + | ||
| − | + | ||
| − | + | ||
| − | + | ||
| − | + | ||
| − | + | ||
| − | + | ||
| − | + | ||
| − | + | ||
| − | + | ||
| − | + | ||
| − | + | ||
| − | + | ||
| − | + | ||
| − | + | ||
| − | + | ||
| − | + | ||
| − | + | ||
| − | + | ||
| − | + | ||
| − | + | ||
| − | + | ||
| − | + | ||
| − | + | ||
| − | + | ||
| − | + | ||
| − | + | ||
| − | + | ||
| − | + | ||
| − | + | ||
| − | + | ||
| − | + | ||
| − | + | ||
| − | + | ||
| − | + | ||
| − | + | ||
| − | + | ||
| − | + | ||
| − | + | ||
| − | + | ||
| − | + | ||
| − | + | ||
| − | + | ||
| − | + | ||
| − | + | ||
| − | + | ||
| − | + | ||
| − | + | ||
| − | + | ||
| − | + | ||
| − | + | ||
| − | + | ||
| − | + | ||
| − | + | ||
| − | + | ||
| − | + | ||
| − | + | ||
| − | + | ||
| − | + | ||
| − | + | ||
| − | + | ||
| − | + | ||
| − | + | ||
| − | + | ||
| − | + | ||
| − | + | ||
Latest revision as of 12:41, 23 August 2019


Install It
- Find a swanky spot in your home for your new machine to live, preferably where the morning sun can strike the mirror-finished housing so you can fully appreciate the bright idea that is your purchase.
- Get the power cord and the accessories out of the box.
- Plug the machine directly into an outlet. Don't plug it into surge protectors, extension cords, or timers.
- Fill the water tank.
Get it Good & Hot
It's time to get heated.
- Turn on the machine.
- Lock the portafilter into the group head.
- Wait 30 minutes.
- Take this time to start reading up on how to brew and froth below, if this is your first machine or you're new to pulling shots.
Get a Handle on your Tamp
- Level off the grounds in your portafilter
- Keep your tamper level with the basket
- Apply consistent force downward, evenly, and level with the portafilter
- 30 lbs. of pressure is a good rule-of-thumb to follow for beginners
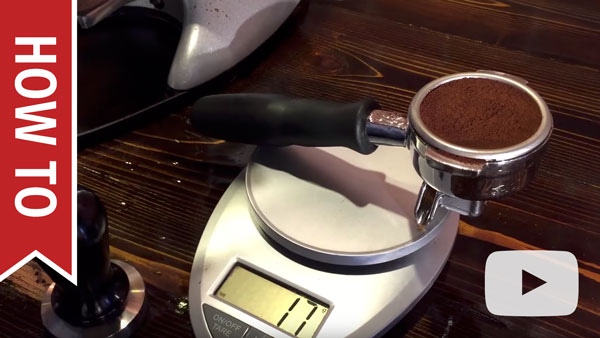
How To: How Do You Tamp for Espresso?
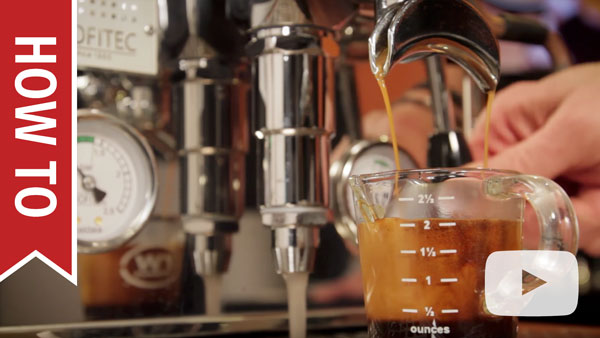
Brew Better
- Lock the portafilter into the brew group.
- Lift the brew lever all the way up.
- Aim for 2 to 2.5 oz. in about 25 seconds.
- Drink your shot to test.
- Repeat until properly motivated to get work done.
The big secret to finding that exact flavor you're after, that big punch-in-the-mouth feel, is dialing in your grind. For a basic rule-of-thumb, a coarser grind makes for a lighter, fluffier coffee, and a finer grind makes for a more intense, flavorful espresso. Check out the video on the right for more info.

How To: Basic Espresso Technique - Dialing in Grind Size
Brew the Best You Can Brew
For more control, you'll want to know about how brew ratios and weighing your shots can help you keep a recipe so you can repeat your favorite results. Brew rations and weighing take all the guesswork out of the process so you always know what you're going to get.
How To: Basic Espresso Technique - Brew Ratios & Weight
Get Frothing
If you like cappuccinos, lattes, Flat Whites, and other milk drinks, you're gonna need to know how to froth.
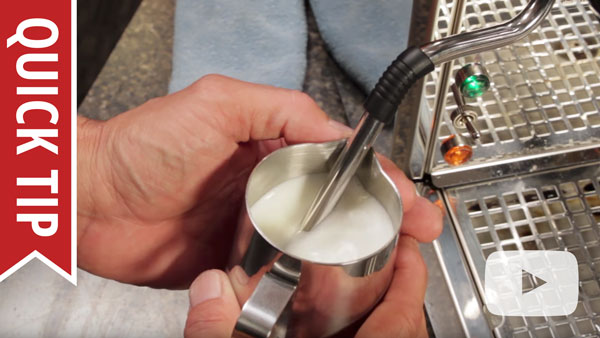
Milk Frothing for Beginners
Froth Better
For a few quick tips to improve your frothing technique, check out the video on the right. You'll learn a few tricks to make your drinks even better.
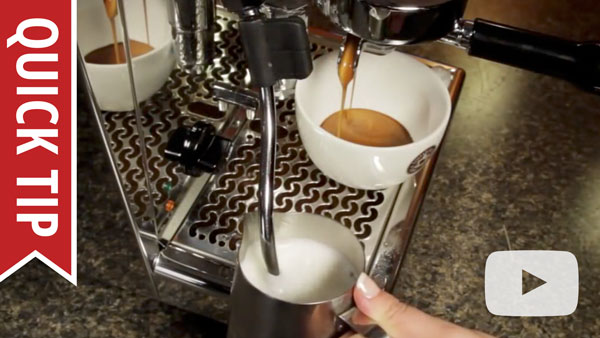
Quick Tip: Five Basic Tips for Frothing Milk
Frothing and Habits to Avoid
Frothing can be a delicate process. There's a number of mistakes you can make that really bring down the quality of your drinks. Check out the video on the right to learn some easy things you can avoid going forward.

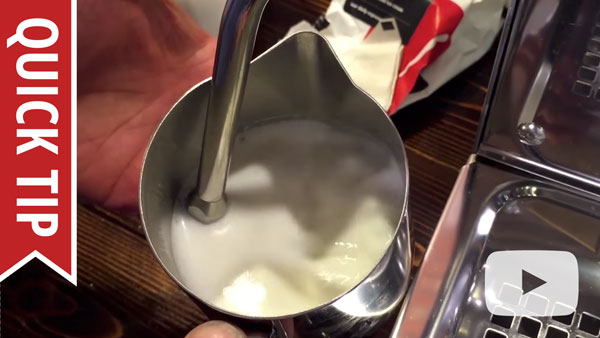
Quick Tip: Six Common Milk Frothing Mistakes
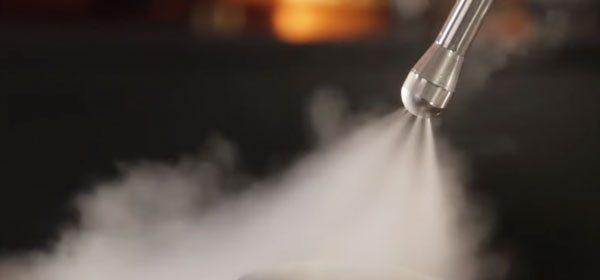
Steam & the Heating Sweet Spot
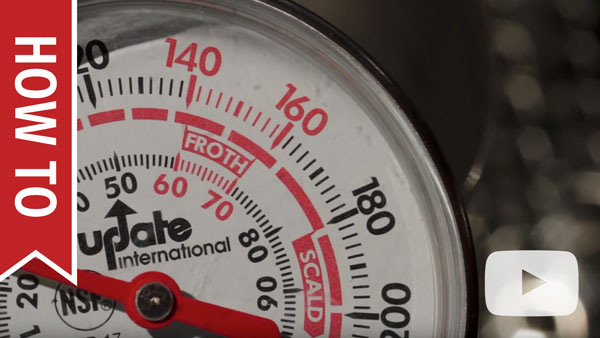
The literal sweet spot for steaming milk falls between 140°F and 155°F, with smaller drinks on the lower end and larger drinks on the higher end. A quick rule-of-thumb we follow is to steam just until the frothing pitcher becomes a little too hot to hold comfortably.
What is the Best Temperature for Latte Milk?
Steam with Thermometers
If you're using a thermometer, you'll want to learn about lag time and how to read a frothing thermometer to correctly gauge the steaming process.
How to Use a Thermometer When Frothing Milk for Latte and Cappuccino
Steam Tip Compatibility
- There are several different steam tips for ECM and its sister brand Profitec, some of which are interchangeable and others not. Consult this comprehensive document on the topic for more information.

Steam Tip Compatibility