Expobar Brewtus IV/troubleshooting
From Whole Latte Love Support Library
- Housing Removal
- No Power
- Steam Boiler Not Heating
- Brew Boiler Not Heating
- No Water Flow
- No Flow Out of Hot Water Valve
- Clean Steam & Hot Water Valve
- No Steam
- No Flow from Brew Group
- Low Steam Pressure
- Low Brew Pressure
- High Brew Pressure
- Group Head Won't Flush
- OPV Leaking
- Pump Keeps Running
- PID Not Working
- Machine Leaking
- Program PID
- PID Reads 1.05
- Portafilter Too Tight
- Coffee Tastes Bad
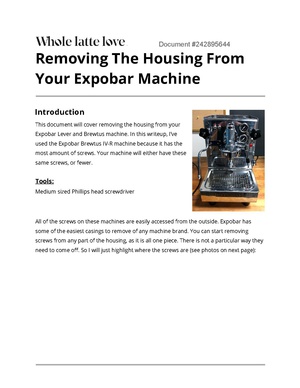
Removing the Housing on Your Machine
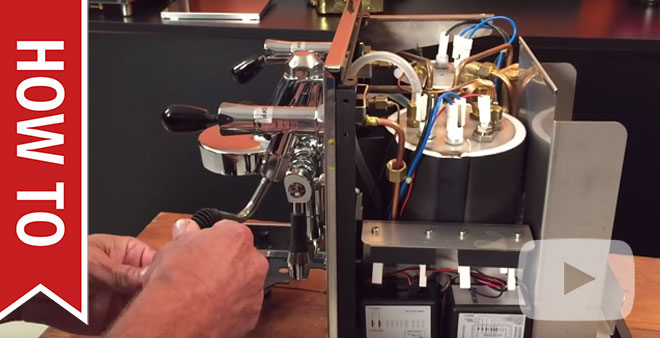
Sometimes while troubleshooting, it can be necessary to go inside your machine, whether to inspect for an unfamiliar noise, an ever elusive leak, or just for routine maintenance. You won't need to remove the housing of your machine for every scenario, but these instructions will come in handy in case you find yourself in a situation where you do. If you don't feel comfortable working inside of your machine, feel free to contact a member of our technical support team for further assistance.
My Machine Has No Power, Pops GFCI
- Make sure the water tank is full. When it runs low it will cut power to the machine. The tank is not heavy enough when near empty, to press down on the weighted microswitch.
1. Is the machine plugged in to a GFCI outlet?
- Yes.
- If you’d like to get in to the machine yourself, let’s rule out heating elements on the Brewtus, first. On the bottom of the machine, you will see two black plastic access panels. Begin by unplugging the machine. Remove the access panel to the rear boiler (steam boiler). This is direct access to the heating element. There will be two plastic connectors with two wires attached to the prongs of the heating element. Remove these and let them dangle, not touching anything else. Turn the machine back on. If it keeps power, and doesn’t blow out a GFCI, then the heating element is bad in the steam boiler and needs to be replaced. If the machine still blows the GFCI, or loses power, unplug it again, reattach the wires to the rear boiler element, and remove them from the front element. Plug the machine back in, and see if it has power. If the machine maintains power with one or the other heating element unplugged, the unplugged heating element is bad.
- Try testing another appliance on the same outlet. Does this appliance have power?
- Yes. Electrical testing will need to be done to check the power cord of the espresso machine. If the power cord is bad, we recommend professional repair.
- No. The problem is your outlet.
My steam boiler is not heating/ Not Steaming and no Hot Water At All
- Confirm that water is coming through the group head when the lever is lifted, and that this has been isolated to a steam boiler issue. (You can still get water out of the group head without the boiler being full.We should be making sure the autofill function has successfully filled the boiler. Easiest way, remove the probe from the autofill and let it run for a few seconds, watching the level in the tank and see if it starts to drop. Put probe back on. Do not run this for too long or you will overfill the boiler and water will pour from the safety).
1. Is the steam boiler turned “ON”?
- No. Turn on the steam switch, and wait half an hour to see if the steam boiler will heat.
- Yes. Move on to the next question.
2. Is the red light coming on on the front of the machine?
- No.
- Is the machine plugged in and the power switch on?
- Yes. Move on to the next question
- No. Plug the machine in and turn the power switch on
- Visually inspect the high limit switch.
- Is it melted or broken? Replace it. High Limit Replacement instructions with photos
- If it is not broken, unplug the machine, and reset it. High Limit Replacement instructions with photos
- Power the machine on see if it heats
- Test the high limit switch for continuity.
- Does it have continuity?
- Yes. Move on to the next question.
- No. Replace the high limit switch.
- Is the solenoid valve (also called the auto fill valve) clicking, but not filling the boiler?
- Test voltage out of control board to the pressurestat. Brewtus Electrical Testing Is there voltage?
- No: Replace the board
- Yes. Is there voltage coming OUT of the pressurestat to the heating element?
- No. replace Pressurestat.
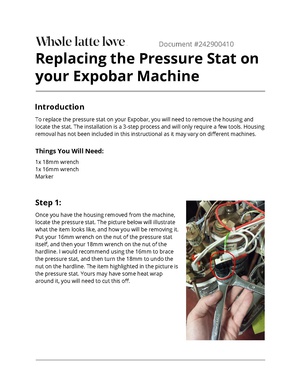
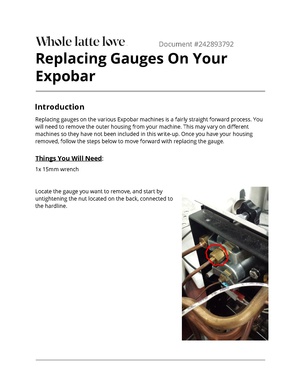
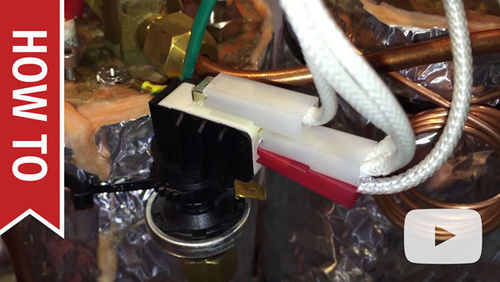
Replacing the Pressurestat on your Expobar
To replace the pressurestat on your Expobar, you will need to remove the housing and locate the stat. The installation is quite simple and will only require a few tools. Housing removal has not been included in this instructional as it may vary from machine to machine.
- Yes.
- Power down the machine and unplug it. Remove the access panel to the rear boiler on the bottom of the machine. Remove the electrical leads to the heating element. Test the heating element for continuity.
- Is there continuity?
- No. Replace the heating element. It is highly suggested that if the machine has a bad heating element that the machine be sent in for repair. Replacement of this element is complex and requires an impact gun. We suggest reviewing the instructions below before purchasing an element. Heating Element Replacement Also take note that a bad element can still have continuity so an element should not be dismissed if it has continuity. However in most cases when the red light is on and the machine is not heating, the element will be completely fractured and display no continuity.
My brew boiler is not heating/ Cold water Comes Through the Group
- The Brewtus prioritizes the steam boiler over the brew boiler. You can turn off the steam boiler, and run only the brew boiler to determine if it is or isn’t working. If the steam boiler is turned on, it must be working at 100% efficiency before moving on to the brew boiler. If the steam boiler has a problem, the brew boiler will not heat, by default.
1. Has the red light come on, heated the steam boiler, then turned off?
- This is when it begins to heat the brew boiler.
- If the red light has not come on, the steam boiler must heat first. Either turn off the steam boiler, or give it sufficient time to heat.
2. Has 20 minutes or so lapsed with the red light off, giving the brew boiler time to heat?
- Yes. Move on to the next question.
- No. Make sure the machine had had 20-30 minutes to fully come to temperature.
3. Is the PID display on?
- No. Check for loose wires to the PID. They will run from the temperature probe on the top of the front boiler to the PID display. They are very thin wires, like speaker wires. They can come loose, or break. Inspect for any damage, and make sure they are tight in the PID.
- Yes. Move on to the next question.
4. Is the PID displaying numbers?
- Yes. The numbers have not been rising. They seem to be stuck at a room temperature setting.
- If the Display is on, and the machine has been sitting for an adequate amount of time without rising, this indicates a heating issue with the brew boiler. Continue on to next question. This could either be a result of the high limit being popped, power not being supplied to the element, or a bad element.
- Yes. The numbers are rising and behaving normally. Move on to the next question.
- No. If the Display is blank, Testing for voltage from the board to the PID is necessary to determine if the control board has failed, or the PID has failed.
- Is the PID displaying any error codes?
- Yes.
- What color is the PID?
- Blue
- Try resetting all of the variables in the PID back to a factory recommended setting.
- If the Error Code is an E1, E2, A1, or A2, the temperature probe will need to be checked for loose wires to the PID. They will run from the temperature probe on the top of the front boiler to the PID display. They are very thin wires, like speaker wires. They can come loose, or break. Inspect for any damage, and make sure they are tight in the PID.
- Replace the temperature probe.
- Red
- The Red PID and probe configuration is older and outdated. They cannot be just swapped out for a new PID or probe. The entire PID KIT upgrade will need to be purchased. This contains the new blue style PID, the temperature probe, a static relay, and instructions on how to install.
5. Is the little dot on the PID solid? Is the green light on the Static relay solid?
- When the machine is on and the steam boiler is heating, the dot on the PID display and the green dot on the static relay will be solid, they will not blink. When the steam boiler heats and the brew boiler starts to heat up, these lights will still be solid. When the brew boiler fully heats all the way, this is when the light on the static relay will be blinking as well as the dot on the PID display. Blinking on one and not the other would indicate a lack of communication between the components. If the green light is not on at all on the static relay, this would indicate either power is not being supplied to the relay, or the relay itself is not directing power and is therefore faulty, however if this is the case, chances are the brew boiler isn't at temp anyway.
There is no Water flow at all
- If the pumps runs, and no water is coming out, make sure both tubes are in the tank. The machine MAY be wired so that the return line from the OPV is hooked to the front of the machine, in which case you may only have one tube in the tank. The water line that draws water should have a notch cut out in the end of the tube, indicating that this is the water inlet tube.
- Remove the water softener if you are using one. Old filters can get mucky and may need to be re-filtered, or may need to be replaced. Try running the machine without a filter.
- Try force priming the water line. We carry priming pumps, but a turkey baster is the most common household object that could work. Fill the turkey baster with water. Lift the brew lever on the machine, and while the pump is running, forcefully squeeze the turkey baster in to the tube. It takes about 6 pounds of pressure to break an air lock.
- Lift the lever. Can you hear the pump?
- No. If the pump does not come on, manually use something to push in the switch behind the brew lever. Can you hear the pump now?
- Yes. Adjust the microswitch behind the lever so it protrudes more, and the lever can reach it when it’s pressing down on it. How to pull out the brew lever microswitch
- Yes. Move on to I Have No Water Flow At All From The Group
There is no water coming out when I open the water valve
- Make sure that the steam valve works, and the issue has been isolated to just the hot water side of the machine.
- Check your steam gauge.
1. Is it showing approx 1.2 bars of pressure?
- Yes.
- Remove the hot water tip. Open the hot water wand. Does water come out?
- Yes. Remove the tip from the hot water tap and test the flow. If flow is restored then the tip needs to be cleaned and reattached. Mineral deposits can easily collect in the screen/holes of the hot water tap, so be sure to clean these thoroughly. Soaking the tip in a solution of hot water and backflushing powder will help remove residues more effectively.
- No. There may be a blockage in the wand of the hot water tap. Clean the wand by using a pipe brush that has synthetic or plastic bristles; metal bristles can damage the wand. Then soak the wand in a solution of hot water and backflushing powder for ten minutes.
- No. Allow machine to cool, remove the housing, remove the copper pipe off the back of the hot water valve and check for a blockage if no blockage is present in the valve or the end of the pipe, a blockage is present on the boiler side. Should be sent in for repair/descale of hydraulic system.
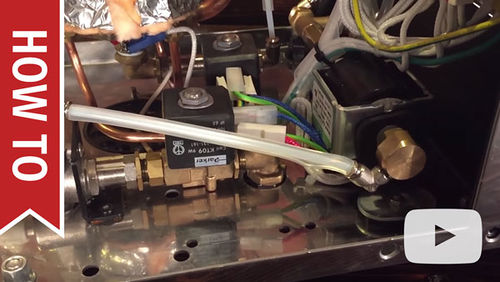
How to Remove, Clean and Lubricate Your Steam and Hot Water Valves
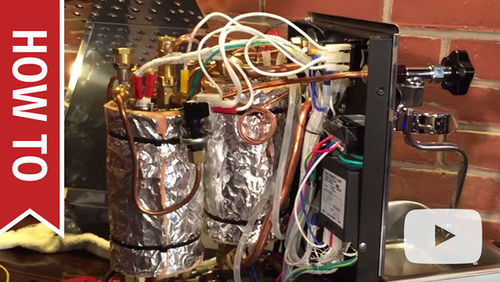
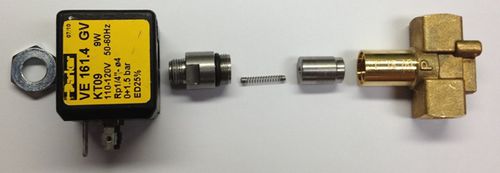
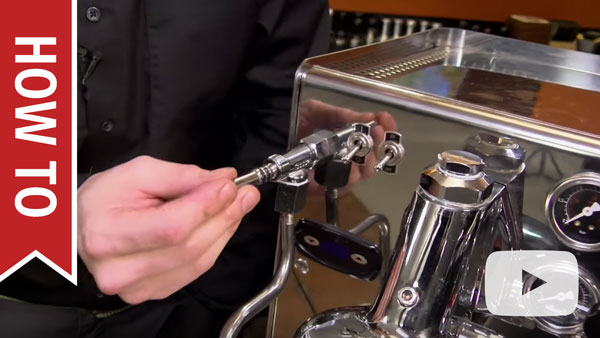
Removing, cleaning and lubricating your valves can be a quick fix for a leaky or sticky valve, and is good for keeping them up and working properly. You will be required to remove the housing from your machine. Watch this video to learn how to rebuild the steam and hot water taps (valves) of the Expobar Brewtus and Lever espresso machines.
DISCLAIMER: Do NOT use any chemical cleaning products. This can strip the chrome plating from the valve. Soap and hot water will be sufficient for cleaning the valve.
Once you’ve sufficiently cleaned and lubricated the valve, you can reassemble to finish the process.
There is no steam coming out when I open the steam knob
- Make sure that the hot water valve works, and the issue has been isolated to just the steam side of the machine.
- Check your steam gauge.
1. Is it showing approx 1.2 bars of pressure?
- Yes. Remove the tip from the steam wand. Open the valve. Is there steam coming out of the steam arm?
- Yes. If flow is restored then the tip needs to be cleaned and reattached. Mineral deposits and milk debris can easily collect in the holes of the steam tip, so be sure to clean these thoroughly. Soaking the tip in a solution of hot water and backflushing powder will help remove residues more effectively.
- Yes. Make sure the teflon “no burn” tube that is inside of the steam arm, is not sticking out too far. It can block the holes of the steam tip. You can push this back up into the wand. You can also trim a little bit of the tubing off at the end, on an angle. This will prevent it from blocking off the holes in the steam tip.
- No. There may be a blockage in the steam arm. Clean the wand by using a pipe brush that has synthetic or plastic bristles; metal bristles can damage the wand. Then soak the wand in a solution of hot water and backflushing powder for ten minutes.
- No. Allow machine to cool, remove the housing, remove the copper pipe off the back of the steam valve and check for a blockage if no blockage is present in the valve or the end of the pipe, a blockage is present on the boiler side. Should be sent in for repair/descale of hydraulic system. How to Remove Hot Water Valve (From Wiki)
I Have No Water Flow At All From The Group
1. Are you using a water softener?
- Yes. Remove it so you can test water flow without it.
- Make sure it is not floating and sucking in air.
- If old replace it.
- Lift the lever. Can you hear the sound of the pump?
- YES.
- Open the hot water valve. Does the pump refill the boiler?
- YES.
- Remove the nut at the top of the group head and check the valve. It is sometimes called a mushroom valve or jet. Inspect this for any scale or mineral deposits. Clean it really well. Hold it up to a window or a light to make sure that the hole is clear of any scale or minerals. If no improvement, move on to the next step.
- While you have this out, check and see if water is sitting in the group head. This would indicate that water is at least making it out of the brew boiler and in to the group head.
- Remove the shower screen. Hold it up to a light, and see if all of the holes are clear. Soak the screen in cafiza, or purchase a new screen and replace it.
- With the screen removed, remove the jet breaker behind it. This will be flat and can be removed with a flathead, or it will have a bolt and will require a 19mm wrench to remove. This should be inspected for any build up that will block it off.
- Neither of the above solutions have fully restored the water flow to the group. Try doing a full group head teardown:
- NO. Is the back of the lever pressing on the microswitch?
- No.
- Press it manually. Is the pump coming on now?
- Yes. Adjust the microswitch so that it sticks out of the front further, so when lifting the lever, it can reach this button, and press down on it.
- No. Remove the housing and look at the microswitch, inspect the wires to make sure they are not disconnected or damaged. Test continuity on the switch.Is there continuity?
- Yes. It’s possible its a bad pump
- Test the pump for continuity.
- Make sure there is voltage going to the pump.
- See My brew pressure is low
- No. Replace the microswitch.
Steam Pressure is Low
1. Can you trust that the gauge is working and reliable?
- Does it drop to 0 when the machine is completely cooled?
- No? The gauge is unreliable and should be replaced.
- While Steaming?
- The steam gauge is going to drop from 1.2 to.8 on average, when the steam knob is opened. This is normal.
- Has the machine had about half an hour or so to fully come to heat?
- Yes. Move on to the next question.
- No. Leave the machine on for a full half hour to let it come to temp.
- Did the machine rise in pressure, and hold steady?
- No. Replace the pressurestat
Replacing the Pressurestat on your Expobar
To replace the pressurestat on your Expobar, you will need to remove the housing and locate the stat. The installation is quite simple and will only require a few tools. Housing removal has not been included in this instructional as it may vary from machine to machine.
- Remove steam tip, hold up to the light and inspect for partial blockage from debris, old milk etc. Clean if necessary.
- Make sure the teflon “no burn” tube that is inside of the steam arm, is not sticking out too far. It can block the holes of the steam tip. You can push this back up into the wand.
My brew pressure is low
1. Do you have the backflush disk in?
- This is the only true test of brew pressure. Coffee has too many variables. The backflush disk gives us a control model. With the backflush disk in, the gauge should rise to 9 bars in 9 to 11 seconds.
- Your brew pressure is truly low, and has been measured with the backflush disk in.
- Try running a test of the vibration pump, and adjusting the OPV:
- If the pump pressure is low, you may want to consider replacing the pump, OPV and deairator as a catch all.
- Does the gauge ever return to zero? If your machine runs off a water reservoir and the gauge never returns to zero, the gauge is unreliable. Sometimes on a plumbable machine, the brew pressure gauge can rest above zero, due to the water line pressure.
Brew Pressure is High
1. Do you have the backflush disk in?
- Do you have the backflush disk in? This is the only true test of brew pressure. Coffee has too many variables. The backflush disk gives us a control model. With a rotary pump, and the backflush disk in, the gauge should rise to 9 bars in 4-6 seconds.
- What is the brew pressure with the backflush disk in? Is it over 9 bars?
- What is your water line pressure at?
- It should be about 35 PSI or lower. If your water pressure is really high in your house, like around 60 PSI, this is going to cause a lot of extra pressure on the pump, and will affect the pressure at the group head.
- Try adjusting your OPV. The OPV may be too open and needs to be adjusted down. The OPV and the Pump need to be adjusted together. Example, If the pump pressure is 8 ½ and opv is open at 9 bar. The OPV will need to be adjusted to open at 11 bar, which will cause the Rotary pump pressure to raise more to 9 bar. Adjust opv to 11 bar, then adjust pump pressure to 8 ½ bar. If these adjustments are not made together it will cause flow issues while brewing. Specific instructions here: Rotary Pump Brew Pressure Adjustment
My group head won't flush when I put the lever down
- Move the lever up and down and see if resistance is felt in any direction from the cam moving between actuators (valves). If it will not drain, and not much resistance is felt, remove the bottom of the E61 group head and inspect the actuators. They may be broken, or ground down from poor maintenance that the cam does not make contact with the top of the actuator.
- Remove cam and inspect for flat spots. If the cam is ground down it may not be making contact with the actuator
My OPV is leaking/ water is running out of it
- The OPV is the little elbow pipe on the front of the machine, below E61.
- If the machine is fully heated and still leaking consistently or water is just pouring out of it. Lift the brew lever up and down and listen for a “click” from the intake solenoid. If the solenoid is clicking, Give our experts a call and we can advise you further.
- With no portafilter in place, lift lever. If no flow out of the group head is present and water is flowing from the Drain, remove the top of the group head and inspect the jet for a blockage.
- If water is just running through out of the discharge and the pump is constantly running. A blockage maybe be present on the intake line into the boiler, this Can be removed and inspected, or the machine will need to be sent in for Repair/ hydraulic system descale.
The Pump Runs Continuously when Machine is Turned On
- This means that the steam boiler is not filling. The pump will run for about a minute and then turn off. To reset it the board you will have to turn off the machine and then turn it back on. If it times out again there is a problem with the water flow.
- If the water leaks out of the top of the boiler then the water sensing circuit is not working properly. It could be:
- Water sensor wire came of the sensor or the board.
- Using mineral free water. Sensors need minerals to operate.
- ADVANCED TECH ONLY:
- Remove the wire off the fill probe and ground it out. Does the pump turn off:
- Yes, Raise the brew lever and see if water comes out of the brew group. If it does we know the pump and water circuit is working fine. The problem is probably in the steam boiler fill solenoid valve. It may be blocked or stuck.
- No: check the wire leading to the probe and make sure it is on the board and has continuity. If the wire is fine it may be the board.
- If the autofill turns on after removing the wire from the probe, the boiler may already be full.
- Move on to “My steam boiler is not heating”
- In very rare cases, an older machine with bad water and terrible maintenance will build scale up on the probe in the boiler, scale is a poor conductor and can cause issues with the autofill circuit functioning properly. Also make sure the connector is tight on the water level probe, if its too loose, use a pair of pliers to tighten the connector more. You can remove the water level probe and check it for scale. If scale is present you can use fine grit sandpaper to remove it.
My PID is missing segments/ PID is not coming on
- Inspect the wires in the back of the PID to make sure they are full in the connectors and the connectors are all tight and nothing is unplugged.
- If the Display is missing segments or flickering and the connections are all fine, Replace PID.
- If the Display is blank, Testing for voltage from the board to the PID is necessary to determine if the control board has failed, or the PID has failed.
My machine is leaking
1. Is coffee coming up and over the portafilter?
- Replace the group gasket. Group Gasket Replacement
- Should I use the 8 mm gasket?
- Older machines would take the 8 mm group gasket, and continue taking the gasket throughout it’s life.
- Should I use the 8.5 mm gasket?
- Newer machines of any model Expobar will use an 8.5 mm gasket. If it does not seem to fit, there is a possible obstructions, coffee, etc, preventing it from sitting all the way in to the group head. Try a thorough cleaning if the 8.5 mm doesn’t seem to fit.
2. Is the leak coming from the lever arm of the machine?
- There are 2 o rings in the lever of the machine. One or both of them may have blown out. You can take apart the lever, and check to see if they are worn. If they seem to be ok, you can lubricate them and see if that resolves the leak. If they are destroyed, they are also easy to replace and very cheap.
3. Is it steaming from above the machine through the vents on top?
- Take apart the vacuum breaker and inspect the components, clean all components and remove any buildup or small pieces of debris. Make sure the small o-ring is not broken or too dried out.
- If cleaning it does not resolve the steam leak, replace the vacuum relief valve.
- Is steam pressure too high? Safety valve will vent when steam pressure exceeds a certain point. Try turning down pressurestat. If this doesn’t work, replace pressurestat.
- If the safety is still leaking, replace the safety valve. Do not take it apart and clean it. Safety valves contain a teflon diaphragm. On older machines, debris and buildup can form here, this will allow steam to escape when steam pressure is built. We strongly advise against removing the copper plug and opening the safety valve. Don't do it. This could result in incorrectly adjusting the safety, which will then prevent it from blowing off excess steam like it should. The safety should just be replaced.
4. Is the leak or drip coming from the large pipe that comes from behind the group head? (The E61)
- There is one valve above the group head, and two below the group head. One of the two valves may be clogged.
-
- If backflushing shows no improvement, try doing a group head teardown, and replace any valves or o rings in the valves, as needed.
5. Is the leak coming from where the two pipes join in the E61?
- If leaking around the fitting or behind the fitting (where the two pipes join), either under pressure or sitting idle, may require tightening. You do not want to use sealant, as these pipes go into the back of the group head and would be in direct contact with consumable water/ coffee. This could also lock the pipes into the back of the group causing damage to the group which would require replacement of the group. Also contacts with metals is what makes the sealant harden, With how direct tightening is with those pipes you could end up cross threading into the group head thinking it's just the sealant getting hard.
- After tightening the leak still continues, Pipe may need to be replaced, or the fitting is cross threaded and the E61 group needs replacement. Under this circumstance, both parts may require replacement.
- The first is that one of the plumb lines connected to the back of the E-61 is not secure resulting in a leak. This will need to be tightened from the inside of the machine. You may see leaking from the bottom of the machine as well if this is the case. Remove the top of the machine and look towards the front of the machine. These lines will be located on the back of the faceplate, opposite to where the grouphead is seated. They are listed as parts 19 and 11 on p.9 of the machine's parts diagram. Use an open ended wrench or adjustable wrench to tighten these down.
- If you have recently done any group head maintenance on the machine, you may just not have tightened the nut down all the way. Try just turning the nut with a wrench and see if it moves.
6. Is the leak coming from around the nut where the steam or hot water wand attaches?
- There is an o ring in there. You can try to tighten the nut first. If that doesn’t stop the leak, take it off, and check on the o ring that sits in there. The O ring should be placed at the bottom of the nut, not necessarily around the ball of the wand.The o ring will have some play to it. It gets tightened in to place when the nut is tightened to the valve.
How to Remove, Clean and Lubricate Your Steam and Hot Water Valves
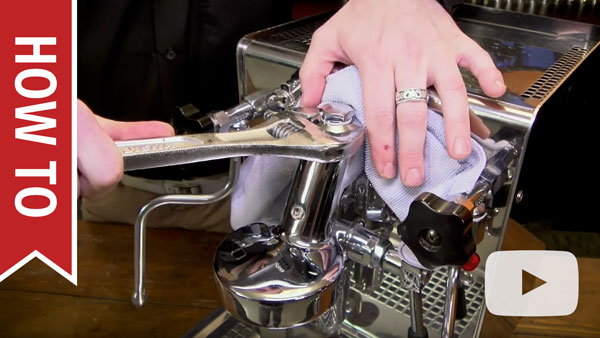
Removing, cleaning and lubricating your valves can be a quick fix for a leaky or sticky valve, and is good for keeping them up and working properly. You will be required to remove the housing from your machine. Watch this video to learn how to rebuild the steam and hot water taps (valves) of the Expobar Brewtus and Lever espresso machines.
DISCLAIMER: Do NOT use any chemical cleaning products. This can strip the chrome plating from the valve. Soap and hot water will be sufficient for cleaning the valve.
Once you’ve sufficiently cleaned and lubricated the valve, you can reassemble to finish the process.
7. Is it dripping or leaking out of the tip of the steam wand?
- Yes. It should leak or drip a little bit after use, and when the machine is first started up. This is normal, and due to condensation in the pipe. It should subside after a few minutes of non use.
- Yes.
- A leak can either be caused by debris in the valve, that is preventing the teflon tape to seal, or the teflon tape itself is worn, been tightened down too much, and will no longer seal and needs to be replaced.
8. Is the leak coming from between the steam tip and the wand?
- There is a rubber o ring or teflon gasket in between them that may need to be replaced.
9. Is the leak coming from the safety valve?
- What kind of water are you using?
- If you are using distilled water, or reverse osmosis, there will not be enough mineral content in the water for the water level probe to send a ground signal, telling the pump to shut off.
- If pump is still running and water comes out of the safety valve, check that the connector did not come off of the level probe, if it did, reconnect.
- Make sure that the green and yellow ground wire did not come loose from the control board. This usually results in the safety valve spraying like a sprinkler, not just a “leak”.
- Make sure that the wire coming from the autofill going to the board, right next to the ground wire, did not come loose.
- If the safety is still leaking, replace the safety valve. Do not take it apart and clean it. Safety valves contain a teflon diaphragm. On older machines, debris and buildup can form here, this will allow steam to escape when steam pressure is built. We strongly advise against removing the copper plug and opening the safety valve. Don't do it. This could result in incorrectly adjusting the safety which will then prevent it from blowing off excess steam like it should. The safety should just be replaced.
10. Is the leak coming from the elbow and teflon tubes that run from the pump to the OPV? There are 2 elbows and a teflon tube that runs between them.
- Remove the elbow and correct with teflon tape or thread sealant. If leak continues replace elbow.
- There are two styles of elbows. The only one used now, is a compression fitting elbow. If the elbow is ALREADY the spring loaded compression fitting, you can replace just the elbow. If you have the older style that did not have the compression elbow, you need the entire upgrade kit. The new teflon tubing is thinner, and will not fit the old elbow on the other end. You will need two elbows, the reducer and the new teflon. It can be purchased here: Elbow Kit (this contains photos) '
- If elbow is receiving a teflon line and is leaking, inspect teflon line for cracks, or breaks.
- Trim back the teflon and reinsert it in to the elbow.
- If trimming it back does not resolve the leak, replace the teflon.
11. Is the leak coming from the boiler itself?
- Is it leaking from where a valve screws in to the boiler?
- Remove the valve, and clean any remnants of sealant. You can use teflon tape, Permabond, or locktite to reseal the valve back into the boiler.
- Is the leak coming from a weld point on the boiler?
- The boiler must be replaced.
12. I cannot find the source of the leak.
- Run the machine to allow it to heat. Some leaks may only be apparent under heat and pressure.
- You can open the machine and send us any photos or videos, so we can determine if we can find the source of the leak.
- Send the machine in for service.
13. Is the leak coming from the top nut on the group head?
- There is an o-ring that is loose, dirty, or worn out. Take out this mushroom valve, clean any scale or debris, and reseat the valve. All of these parts are separated by teflon rings. It could just be loose and slightly tightening could stop the leak, but with heat and age its possible the teflon is no good. Tightening the bit down more will only further deform the teflon allowing a leak to still continue, these should be replaced.If it is still leaking, replace the gasket that separates it from the top of the group head. To access these parts use an open ended wrench or adjustable wrench to remove the smaller top bolt of the E-61. This will give you access to the first o-ring and spring assembly. To access further down into this part of the grouphead use a wrench to remove the large bolt. This will let you access the other o-ring, another spring assembly, and the valve assembly. Inspect all of these components for integrity. Clean any dirty parts and replace any broken parts. Reassemble the grouphead and see if the leaking is resolved.
- If you’ve recently serviced the group head, It’s possible the nut is just loose. Try tightening it.
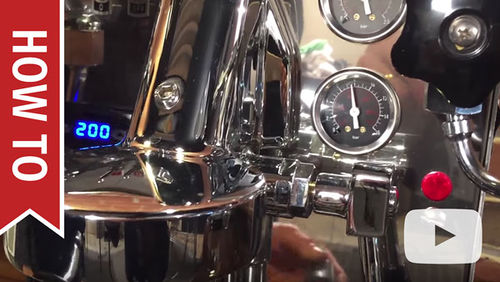
How do I Adjust the PID?
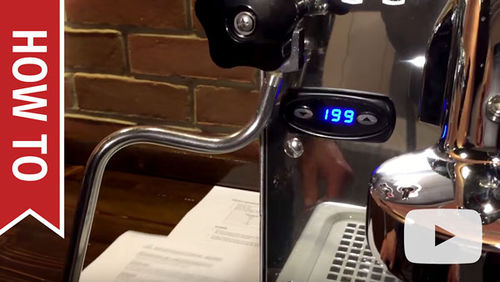
For an in-depth look at programming your PID, watch the video on the right. We'll go over how to program, what the settings mean, and the settings you want.
PID Displays 1.05
- When the machine starts the software version number, i.e. "1.05", will display on the PID. Sometimes this message will not clear. First try powering the machine on and off; powercycling the PID may clear the message. If the message still does not clear then there may be a loose wire. Open the machine and check all of the connections leading to the PID and make sure they are securely attached. Otherwise the PID will need to be replaced.
Portafilter is too tight on brand new machine
- As long as water is not leaking around the portafilter from the group head, this is totally normal. Over time, the portafilter will wear in to a normal 6 o’clock position. It could take about a month or two. As long as it is making a good seal, then it is fine. In another year or so, the gasket will need to be replaced again, and may still be a little off center in the beginning.
My coffee tastes bitter or sour
- Typically, issues with crema or the flavor of the shot do not indicate a malfunction of the machine. Instead, this indicates that an adjustment needs to be made in the brewing process or that different beans need to be used.
- Here is some helpful advice on Tamping: Tamping Tips
- Making adjustments to the grind is going to have the biggest impact on the coffee extraction. If it is too coarse, the coffee is going to come through too fast, and not extract long enough. How to Grind For Espresso
- If the grind is too fine, it is going to extract for too long, results in really bitter shots. How to Grind For Espresso
- It is important to use fresh beans, typically beans roasted within the past two weeks are best. Light and medium roasts are best for espresso brewing and richer crema.
What is Preinfusion?
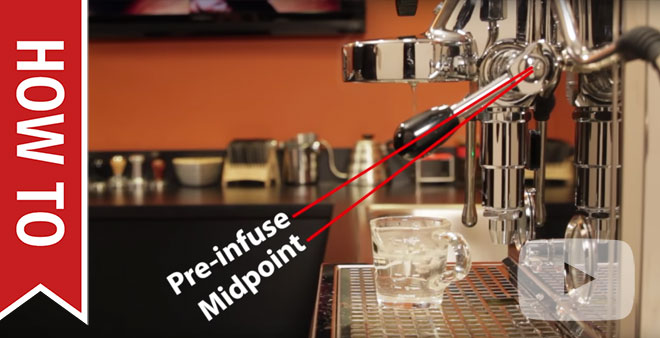
Pre-infusion is what allows a small amount of water through first, before beginning the shot. It allows this water to saturate the coffee and get the grounds equally wet. This can make the coffee extract more smoothly. Water will always take the path of least resistance. By letting the water saturate the grinds before brewing at 9 bars of pressure, this can help prevent channeling.
My rotary pump is really loud!
1. Is the machine plumbed in?
- Yes. Move on to the next question.
- No. The rotary pump is designed to have water pressure build up against it. If it is drawing water out of a bucket, it may be slightly louder than if it were plumbed in. This is normal.
- No. You can try raising the water source to be level or higher than the machine. For example, if you have the line going into a bucket, put it on the counter instead of the floor.
2. Is the pump drawing water?
- If no water is being drawn the pump will be louder. Try priming the machine if water is not being drawn in.
3. Inspect the area around the pump
- Make sure nothing is touching and vibrating off the pump make it appear as loud.
4. Inspect the nuts on the underside of the machine to ensure they are tight, but not too tight.
- If the nuts are loose it will cause the pump motor to be loud from movement.
- If you tighten the nuts and tighten them too much it will cause the pump to be loud due to not being able to adequately absorb the vibration, or the mount will rip.
- If There are no visible signs of anything being loose, the pump is drawing water, and the machine is functioning fine but the pump is too loud. The bearings within the pump may be failing due to wear and tear, etc. Replace.
My vibration pump is really loud!
- It is possible that if the Vibration pump within the machine is loud. This is due to either the pump slipping out of one of the mounts, or the screw has come out of the mount and the motor is moving around. One of the rubber mounts may be ripped, or if the machine is older the mounts could be dried out and hard, causing them to make the machine louder due to not being able to absorb the vibration well. These can all be visually inspected.
- The pump also may be on its way to failure. This is not always the case but it can be one of the symptoms of a failing pump. Run the vibration pump pressure testing to determine if the pump is displaying any other signs of failure.

