|
|
| (9 intermediate revisions by 4 users not shown) |
| Line 1: |
Line 1: |
| − | The Bezzera BZ07 DE is a [[:Category:Prosumers|Prosumer]] espresso machine featuring a PID and volumetric programming. {{Description-Table
| + | {{Getting-Started |
| − | |title = Bezzera BZ07 DE | + | |brand = Bezzera |
| − | |machine_image = [[File:BEZZERA_BZ07.jpg|400px|none]] | + | |machine_type = Prosumers |
| − | |manufacturer = Bezzera | + | |product_banner = [[File:Wiki_ProductPageBanner_1200x175_BezzeraBZ07_v1.jpg|link=]] |
| − | |model_name = BZ07 DE | + | |product_page_title = Bezzera BZ07 |
| − | |type = [[:Category:Prosumers|Prosumer]] | + | |page_type = set up |
| − | |buy_button = Yes | + | |section1 = Install It |
| − | |button_size = 400px | + | |anchor1 = Install |
| − | |button_link = https://www.wholelattelove.com/products/bezzera-bz07-de-automatic-with-pid-and-double-manometer }} | + | |section2 = Get it Good & Hot |
| − | == Machine Description == | + | |anchor2 = Heating |
| − | | + | |section3 = Get a Handle on your Tamp |
| − | At just under 10" wide, the Bezzera BZ07 DE is as elegant in its form as it is robust in function. A heat exchange espresso machine with a PID temperature display and volumetric shot control, the BZ07 is housed in AISI 304 commercial grade polished stainless steel with traditional Italian styling.
| + | |anchor3 = Tamping |
| − | | + | |section4 = Brew Better |
| − | Bezzera's BZ line of espresso machines distinguish themselves with their unique group head. Eschewing the use of thermosiphon heating found in E61 groups, the BZ07 uses two dedicated heating elements and a thermostat to monitor the temperature of both the group head and the boiler to ensure temperature stability from start to finish. This particular model of the BZ07, the DE also features a PID temperature controller that allows you to adjust brew temperatures between 185° - 212° Fahrenheit. On the front of the machine, a dual manometer constantly displays both boiler pressure and brew pressure.
| + | |anchor4 = Brew Better |
| − | | + | |section5 = Brew the Best You Can Brew |
| − | This particular model is also equipped with volumetric controls for programmable espresso brewing. Located on the front of the machine, there are three buttons for pulling single, double, and manual shots of espresso. The single and double shot buttons can both be programmed with specific drink volumes, allowing you to brew your preferred beverage with just one push.
| + | |anchor5 = Brew Best |
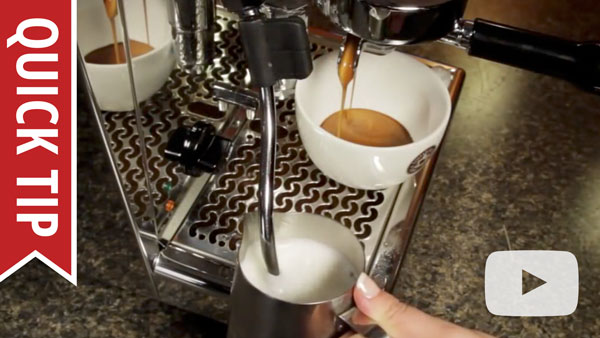
| − | | + | |section6 = Get Frothing |
| − | Brewing is handled in combination by the vibration pump and 1.5 liter nickel-plated copper boiler with brass end plates. The boiler has been plated using the Nistla process, an electrolytic method of applying metal plating that meets NSF food safety standards. The boiler also features a heat exchanger, allowing you to brew and steam at the same time, and up to 20 oz of steam can be produced in one session with a recovery time of only 40 seconds.
| + | |anchor6 = Get Frothing |
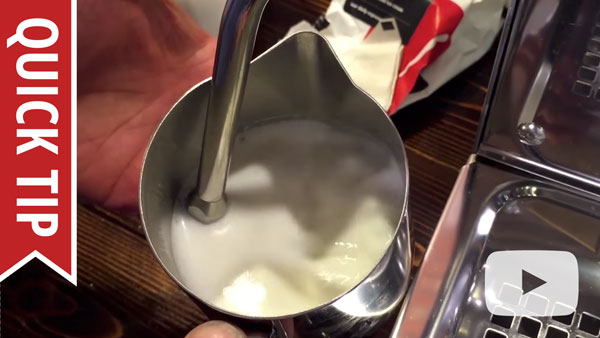
| − | | + | |section7 = Froth Better |
| − | | + | |anchor7 = Froth Better |
| − | ==Basic Usage== | + | |section8 = Frothing and Habits to Avoid |
| − | ===Getting Started=== | + | |anchor8 = Frothing Mistakes |
| − | | + | |section9 = Steam & the Heating Sweet Spot |
| − | {{#ev:youtube|https://www.youtube.com/watch?v=eSAacTxU6Lg|480|center}}
| + | |anchor9 = Steaming Temperature |
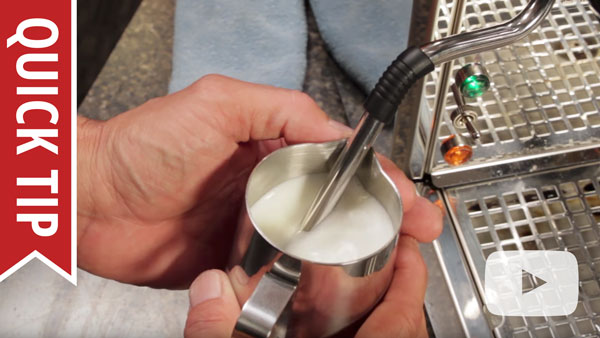
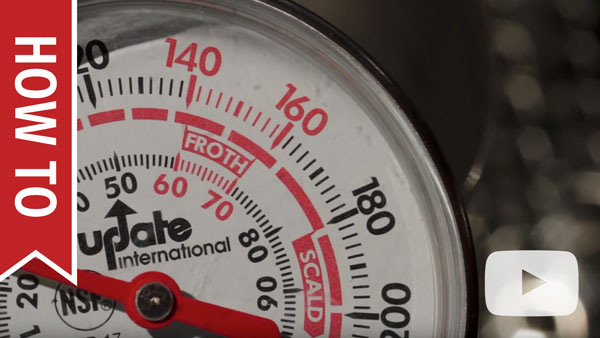
| − | | + | |section10 = Steam with Thermometers |
| − | ===Removing The Cover=== | + | |anchor10 = Steam with Thermometers |
| − | | + | |
| − | #Removing the case is simple. Remove the water tank from the machine and tilt the machine on one side. To prevent the case from being scratched put a soft cloth or towel underneath it before tilting it over.
| + | |
| − | #Unscrew the 4 allen bolts from the bottom of the machine using a 2.5 mm. allen key. [[File:LIVIA G4 Bottom Screws.jpg|480px|thumbnail|center|Remove the allen screws from the four locations circled in red.]]
| + | |
| − | #Once the bolts are removed the case can slide off. The front of the case needs to be pulled downwards and then gently bent outwards in order for the case to slide off. There are screws securing the case from the inside that need to slide down and out of a fitted slot to release the case. A picture of this slot is shown below.
| + | |
| − | [[File:LIVIA G4 Internal Screw Hole.jpg|480px|thumbnail|center|Screw Slot]]
| + | |
| − | | + | |
| − | ===Adjusting Brew Pressure===
| + | |
| − | | + | |
| − | Adjusting the brew pressure on this unit is very simple. Brew pressure is controlled by an over pressure valve (OPV), which is adjusted by turning a bolt on the OPS assembly.
| + | |
| − | #[[#Removing The Cover|Remove the cover]] of the machine and attach the portafilter with the backflush disc in.
| + | |
| − | #The adjustment bolt comes off the side of the OPV, which is located on the right hand side of the machine if you are facing the front of the machine. [[File:LIVIA G4 OPV Adjustment.jpg|460px|thumbnail|center|The adjustment bolt is circled in red.]]
| + | |
| − | #Next, activate the brew circuit using the manual brew button. The brew pressure should raise and then stabilize. Once the pressure is stabilized you can turn the adjustment bolt to change the pressure. Turning the bolt clockwise raises the pressure, counterclockwise lowers it.
| + | |
| − | | + | |
| − | ===Adjusting The PID===
| + | |
| − | | + | |
| − | Adjusting the PID is simple on this machine. Unlike other machines, the PID on this machine does not have separate settings for the brew and steam temperatures. Both brew temperature and steam pressure will be raised/lowered when an adjustment is made to the set temperature.
| + | |
| − | | + | |
| − | #To enter the machine into programming mode first make sure the machine is turned on and the PID is displaying the boiler temperature. If the PID says off press the "+" button to turn the boiler on.
| + | |
| − | #Once the temperature is being displayed the PID can be put into programming mode. Press the "−" button and the screen should change to PrG.
| + | |
| − | #When the screen says PrG press the "+" to program the boiler temperature. The currently programmed temperature will be displayed.
| + | |
| − | #Use the "+" and "−" buttons to lower or raise the temperature. Do not set the temperature above 212 F°, or the machine can overpressurize, and the relief valve on the boiler will begin to relieve steam pressure.
| + | |
| − | #The PID will automatically save the programmed temperature after three seconds of the buttons not being pressed, and then it will go back to displaying the current boiler temperature.
| + | |
| − | | + | |
| − | ===Programming Shots=== | + | |
| − | | + | |
| − | Instructions for programming the different shots can be found on p.28 of the machine manual. An important step in the procedure that these instructions do not cover is that the portafilter needs to be packed with coffee while programming these shots.
| + | |
| − | | + | |
| − | Before beginning the programming, the grind and dosing of the coffee grounds should be honed in first using the machine's manual shot button.
| + | |
| − | | + | |
| − | Once these factors have been properly adjusted the programming procedure can be done with the coffee packed in the portafilter. If the machine is programmed with an empty portafilter it will not properly dose out the right amount of water once coffee is added, and the shot will end prematurely.
| + | |
| − | | + | |
| − | ===Draining The Boilers=== | + | |
| − | | + | |
| − | {{#ev:youtube|https://www.youtube.com/watch?v=ln25nJbyQQc|480|center}}
| + | |
| − | | + | |
| − | | + | |
| − | == Cleaning & Maintenance ==
| + | |
| − | | + | |
| − | {{Maintenance-Prosumer
| + | |
| − | |single_heat_exchange = Yes | + | |
| | }} | | }} |
| − | | + | {{Set-Up-Content |
| − | == Troubleshooting ==
| + | |dual_boiler = |
| − | | + | |e61 = no |
| − | ===No Crema or Bad Tasting Shots===
| + | |
| − | | + | |
| − | {{Troubleshooting-No-Crema-Bad-Shots}} | + | |
| − | | + | |
| − | | + | |
| − | ===Difficulty Frothing===
| + | |
| − | | + | |
| − | {{Troubleshooting-Frothing}}
| + | |
| − | | + | |
| − | | + | |
| − | ===Flow Issues===
| + | |
| − | | + | |
| − | The first place to start with any flow issue is cleaning the machine. Before going through these steps please make sure the machine is cleaned according to the [[#Cleaning & Maintenance|Cleaning & Maintenance]] section of this article.
| + | |
| − | | + | |
| − | ====No Steam From Wand====
| + | |
| − | | + | |
| − | #Check the brew function on the machine and see if water is able to flow through the machine for this function.
| + | |
| − | ##If the brew water is not flowing either refer to the [[#No Flow At All]] section of this article
| + | |
| − | ##If the brew water flows but is not hot refer to the [[#On But Not Heating]] section of this article.
| + | |
| − | #Check the hot water function of the machine. If you are able to draw hot water then the steam boiler must be pressurizing and heating, because hot water is expelled from the machine by steam pressure. The steam pressure gauge should also read 1-1.2 Bar to indicate the boiler is pressurized.
| + | |
| − | ##Remove the tip from the steam wand and test the flow. If flow is restored then the tip needs to be cleaned and reattached.
| + | |
| − | ##If the flow is still blocked then there may be a blockage in the steam wand itself. Clean the wand by using a pipe brush that has synthetic or plastic bristles; metal bristles can damage the wand. Then soak the wand in a solution of hot water and backflushing powder for ten minutes. Test flow again.
| + | |
| − | ##If there still isn't flow then there may be a blockage farther back in the steam circuit. The machine may need to be professionally cleaned to remove the blockage.
| + | |
| − | | + | |
| − | {{Troubleshooting-Prosumer-Brew-Blocked
| + | |
| − | |programmable_shots = Yes | + | |
| − | |grouphead_instr = <br />
| + | |
| − | ##To clean the group head first unplug the machine and let it cool down. The grouphead is actively heated, so it will need time to cool down before it can be safely worked on.
| + | |
| − | ##Place down a soft cloth or towel and tilt the machine on its back.
| + | |
| − | ##Use a flathead screwdriver to remove the screw on the bottom of the grouphead. Once the screw is removed the shower screen and the diffuser plate can be removed.
| + | |
| − | ##Soak the parts that were just removed in a solution of hot water and backflushing powder.
| + | |
| − | ##Take a grouphead cleaning brush, or an old toothbrush, and use it to scrub down the grouphead, especially the group gasket. Remove any buildup of coffee residues or grounds; the gasket in particular needs to be clean in order to seal properly with the portafilter.
| + | |
| − | ##After the components are clean the grouphead can be reassembled and then flushed with water by running the brew function.
| + | |
| − | |backflush_instr = Instructions for backflushing this style of machine are found in the video below: {{#ev:youtube|https://www.youtube.com/watch?v=k1Vkfj83uyg|480|center}}
| + | |
| | }} | | }} |
| − | | + | [[Category:Bezzera]] |
| − | ====No Hot Water From Tap====
| + | |
| − | | + | |
| − | #Check the brew function on the machine and see if water is able to flow through the machine for this function.
| + | |
| − | ##If the brew water is not flowing either refer to the [[#No Flow At All]] section of this article
| + | |
| − | ##If the brew water flows but is not hot refer to the [[#On But Not Heating]] section of this article.
| + | |
| − | #Check the steam function of the machine. If you are able to draw steam then the steam boiler must be pressurizing and heating, because hot water is expelled from the machine by steam pressure. The steam pressure gauge should also read 1-1.2 Bar to indicate the boiler is pressurized.
| + | |
| − | ##Remove the tip from the hot water wand and test the flow. If flow is restored then the tip needs to be cleaned and reattached.
| + | |
| − | ##If the flow is still blocked then there may be a blockage in the hot water wand itself. Clean the wand by using a pipe brush that has synthetic or plastic bristles; metal bristles can damage the wand. Then soak the wand in a solution of hot water and backflushing powder for ten minutes. Test flow again.
| + | |
| − | ##If there still isn't flow then there may be a blockage farther back in the hot water circuit. The machine may need to be professionally cleaned to remove the blockage.
| + | |
| − | | + | |
| − | ====No Flow At All====
| + | |
| − | | + | |
| − | {{Troubleshooting-Prosumer-No-Flow-At-All
| + | |
| − | |water_supply = Reservoir
| + | |
| − | |sensor_instr = Remove the cover of the machine and check the wiring to the sensor to make sure it is connected and in good condition.
| + | |
| − | |pump_instr = Check to make sure there are no loose or disconnected wires on the pump.
| + | |
| − | |valve_instr = The machine may need to be professionally repaired.
| + | |
| − | }}
| + | |
| − | | + | |
| − | | + | |
| − | ===Machine Is Leaking===
| + | |
| − | | + | |
| − | {{Troubleshooting-Prosumer-Bad-Gasket
| + | |
| − | |gasket_instr =
| + | |
| − | }}
| + | |
| − | | + | |
| − | {{Troubleshooting-Prosumer-E61-Leak
| + | |
| − | |lever_style =
| + | |
| − | |lever_leak_instr =
| + | |
| − | |top_valve_leak_instr =
| + | |
| − | |bottom_valve_leak_instr =
| + | |
| − | |E61_group_cleaning_instr =
| + | |
| − | |E61_attach_instr =
| + | |
| − | }}
| + | |
| − | | + | |
| − | {{Troubleshooting-Prosumer-Bottom-Leak
| + | |
| − | |water_source =
| + | |
| − | |tube_reservoir =
| + | |
| − | |level_probe_instr =
| + | |
| − | |drain_line =
| + | |
| − | }}
| + | |
| − |
| + | |
| − | {{Troubleshooting-Prosumer-Top-Steaming
| + | |
| − | |vacuum_cleaning_instr =
| + | |
| − | |vacuum_replace_link =
| + | |
| − | |steam_adjust_style =
| + | |
| − | |pstat_adjust_instr =
| + | |
| − | |relief_stuck_instr =
| + | |
| − | }}
| + | |
| − | | + | |
| − | {{Troubleshooting-Prosumer-Wand-Leak
| + | |
| − | |knob_instr =
| + | |
| − | |descalable =
| + | |
| − | |valve_rep_instr =
| + | |
| − | |tip_instr =
| + | |
| − | |ball_joint_instr =
| + | |
| − | |valve_attach_instr =
| + | |
| − | }}
| + | |
| − | | + | |
| − | ===Machine Not Heating Or Powering On===
| + | |
| − | | + | |
| − | {{Troubleshooting-Prosumer-No-Power}}
| + | |
| − | | + | |
| − | {{Troubleshooting-Prosumer-Brew-Cold
| + | |
| − | |temp_adjust_style =
| + | |
| − | |pid_adjust_instr =
| + | |
| − | |pstat_adjust_instr =
| + | |
| − | |hls_instr =
| + | |
| − | |element_testing_instr =
| + | |
| − | }}
| + | |
| − | | + | |
| − | {{Troubleshooting-Prosumer-Steam-Cold
| + | |
| − | |steam_test_instr =
| + | |
| − | |temp_adjust_style =
| + | |
| − | |pid_adjust_instr =
| + | |
| − | |pstat_adjust_instr =
| + | |
| − | |hls_instr =
| + | |
| − | |element_testing_instr =
| + | |
| − | }}
| + | |
| − | | + | |
| − | {{Troubleshooting-Prosumer-No-Heat
| + | |
| − | |tank_instructions =
| + | |
| − | |dual_boiler =
| + | |
| − | |hls_reset_instr =
| + | |
| − | }}
| + | |
| − |
| + | |
| − | ===Portafilter Handle Not Fitting On Machine===
| + | |
| − | | + | |
| − | {{Troubleshooting-Prosumer-Portafilter}}
| + | |
| − | | + | |
| − | ==Diagrams & Manuals==
| + | |
| − | | + | |
| − | {{Support-Documents
| + | |
| − | |table_style =
| + | |
| − | |title =
| + | |
| − | |electrical_diagram =
| + | |
| − | |hydraulic_diagram =
| + | |
| − | |machine_manual =
| + | |
| − | |parts_diagram =
| + | |
| − | |service_manual =
| + | |
| − | |startup_guide =
| + | |
| − | }}
| + | |
| − | | + | |
| − | ==Specifications==
| + | |
| − | | + | |
| − | {{Specifications-Prosumer
| + | |
| − | |basic_specs = yes
| + | |
| − | |width = 9.84 in.
| + | |
| − | |height = 14.76 in.
| + | |
| − | |depth = 16.73 in.
| + | |
| − | |weight = 42 lbs
| + | |
| − | |watts = 1200
| + | |
| − | |volts = 110
| + | |
| − | | + | |
| − | |housing = yes
| + | |
| − | |housing_material = AISI 304 Stainless Steel
| + | |
| − | |drip_tray_material = Stainless Steel
| + | |
| − | |drip_tray_cover_material = Stainless Steel
| + | |
| − | |drip_tray_capacity = 26 oz
| + | |
| − | |power_cord_length = 52 in.
| + | |
| − | | + | |
| − | |cup_height = yes
| + | |
| − | |max_cup_height = 3.5 in.
| + | |
| − | | + | |
| − | |frothing = yes
| + | |
| − | |wand_material = Stainless Steel
| + | |
| − | |wand_style = Commercial
| + | |
| − | |wand_movement = Articulating
| + | |
| − | |usable_length =
| + | |
| − | |height_off_counter =
| + | |
| − | |number_of_holes = 2
| + | |
| − | |no_burn_wand = No
| + | |
| − | |optional_tips =
| + | |
| − | | + | |
| − | |water_source = yes
| + | |
| − | |source_type = Reservoir
| + | |
| − | |reservoir_capacity = 101
| + | |
| − | |reservoir_material = Plastic
| + | |
| − | |reservoir_removable = No
| + | |
| − | | + | |
| − | |controls = yes
| + | |
| − | |control_type = Push Button
| + | |
| − | |display_type = PID
| + | |
| − | |temp_control = Yes
| + | |
| − | |pre_infusion = Yes
| + | |
| − | |low_water_warning = Yes
| + | |
| − | |energy_saving =
| + | |
| − | |pressure_gauges = Brew and Boiler
| + | |
| − | |steam_control = Yes
| + | |
| − | |brew_temp_display = Yes
| + | |
| − | | + | |
| − | |cup_warmer = yes
| + | |
| − | |warmer_material = AISI 304 Stainless Steel
| + | |
| − | |warmer_size = 9.5 x 6.5 in.
| + | |
| − | |warmer_type = Passive
| + | |
| − | | + | |
| − | |portafilter = yes
| + | |
| − | |portafilter_material = Chrome Plated Brass
| + | |
| − | |portafilter_type = Commercial Style
| + | |
| − | |quantity_included = 1
| + | |
| − | |portafilter_weight =
| + | |
| − | |portafilter_diameter = 58 mm
| + | |
| − | |commercial_baskets = Single & Double
| + | |
| − | |pressurized_baskets =
| + | |
| − | |pod_compatibility =
| + | |
| − | |bottomless_portafilter = No
| + | |
| − | |tamper_size = 58 mm
| + | |
| − | | + | |
| − | |brew_group = yes
| + | |
| − | |group_material = Chrome Plated Brass
| + | |
| − | |group_type = Electrically Heated
| + | |
| − | |preheat = Yes
| + | |
| − | |solenoid =
| + | |
| − | |capsule_friendly =
| + | |
| − | |back_flushable = Yes
| + | |
| − | | + | |
| − | |boiler_data = yes
| + | |
| − | |num_boilers = 1
| + | |
| − | |brew_steam_simultaneous = Yes
| + | |
| − | | + | |
| − | |brew_boiler = yes
| + | |
| − | |brew_boiler_type = Heat Exchanger
| + | |
| − | |brew_boiler_wattage = 1200
| + | |
| − | |brew_boiler_volume = 1.5 Liter
| + | |
| − | |brew_boiler_material = Copper
| + | |
| − | |brew_boiler_orientation = Vertical
| + | |
| − | |brew_element_location = Internal
| + | |
| − | |brew_boiler_autofill = Yes
| + | |
| − | |brew_boiler_insulated =
| + | |
| − | | + | |
| − | |steam_boiler = yes
| + | |
| − | |steam_boiler_type = One Boiler for the Brew and Steam
| + | |
| − | |steam_boiler_wattage =
| + | |
| − | |steam_boiler_volume =
| + | |
| − | |steam_boiler_material =
| + | |
| − | |steam_boiler_orientation =
| + | |
| − | |steam_element_location =
| + | |
| − | |steam_vacuum_relief =
| + | |
| − | |steam_boiler_insulated =
| + | |
| − | | + | |
| − | |pump_data = yes
| + | |
| − | |pump_type = Vibration
| + | |
| − | |pump_wattage = 120
| + | |
| − | |pump_pressure = 15 Bar
| + | |
| − | |pump_pressure_adjust = No
| + | |
| − | |pump_deairator =
| + | |
| − | |pump_self_prime =
| + | |
| − | | + | |
| − | |performance = yes
| + | |
| − | |heat_up = 600 secs
| + | |
| − | |recommended_heat_up = 800 secs
| + | |
| − | |steam_time_8 = 43 secs
| + | |
| − | |hot_water_temp_8 = 199
| + | |
| − | |hot_water_time_8 =
| + | |
| − | |hot_water_recovery = 0 secs
| + | |
| − | |brew_sound_level = 61 Db
| + | |
| − | | + | |
| − | |details = yes
| + | |
| − | |manufacture_country = Italy
| + | |
| − | |nsf_certified = No
| + | |
| − | |recommended_application = Home Use
| + | |
| − | }}
| + | |
| − |
| + | |
| − | <!-- Categories -->
| + | |
