|
|
| (10 intermediate revisions by 3 users not shown) |
| Line 1: |
Line 1: |
| − | {{Description-Table | + | {{Getting-Started |
| − | |title = ECM Casa V | + | |brand = ECM |
| − | |machine_image = [[File:ECM_CLASSIKA_PID.jpg|400px|none]] | + | |machine_type = Semi-Automatics |
| − | |manufacturer = ECM | + | |product_banner = [[File:Wiki_ProductPageBanner_1200x175_ECMCasaV_v1.jpg|link=]] |
| − | |model_name = ECM Casa V | + | |product_page_title = ECM Casa V |
| − | |type = [[:Category:Semi-Automatics|Semi-Automatic]] | + | |page_type = set up |
| − | |buy_button = Yes | + | |page_type = set up |
| − | |button_size = 400px | + | |section1 = Install It |
| − | |button_link = https://www.wholelattelove.com/products/ecm-classika-pid-espresso-machine | + | |anchor1 = Install |
| | + | |section2 = Get it Good & Hot |
| | + | |anchor2 = Heating |
| | + | |section3 = Get a Handle on your Tamp |
| | + | |anchor3 = Tamping |
| | + | |section4 = Brew Better |
| | + | |anchor4 = Brew Better |
| | + | |section5 = Brew the Best You Can Brew |
| | + | |anchor5 = Brew Best |
| | + | |section6 = Get Frothing |
| | + | |anchor6 = Get Frothing |
| | + | |section7 = Froth Better |
| | + | |anchor7 = Froth Better |
| | + | |section8 = Frothing and Habits to Avoid |
| | + | |anchor8 = Frothing Mistakes |
| | + | |section9 = Steam & the Heating Sweet Spot |
| | + | |anchor9 = Steaming Temperature |
| | + | |section10 = Steam with Thermometers |
| | + | |anchor10 = Steam with Thermometers |
| | + | |section11 = Steam Tip Compatibility |
| | + | |anchor11 = Steam Tip Compatibility |
| | }} | | }} |
| − | ==Basic Usage==
| + | {{Set-Up-Content |
| − | ===Getting Started===
| + | |dual_boiler = |
| − | ===Adjusting Brew Pressure=== | + | |e61 = no |
| − | The machine is designed to brew at 9 bar with a flow of about 2 oz in 20-25 seconds. To adjust the brew pressure, install the backflush disc and press the brew button, then turn the adjustment screw located beneath the removable cup warmer until you get to 10 bar on the brew pressure gauge. This will result in 9 bar brew pressure. Turning the adjustment screw clockwise will raise the pressure and turning counterclockwise will lower it.
| + | }} |
| − | | + | ---- |
| − | <blockquote>Note: Brew pressure does not need to be exactly 9 bar for great coffee. It can a little above or below that mark without affecting results in the cup.</blockquote>
| + | |
| − | | + | |
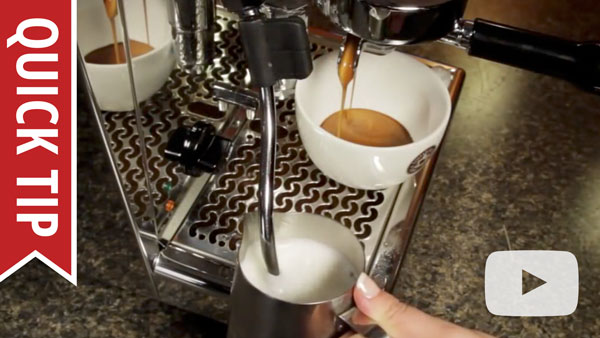
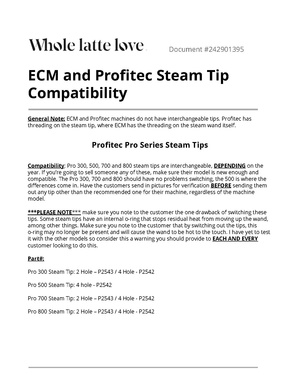
| | ===Steam Tip Compatibility=== | | ===Steam Tip Compatibility=== |
| − | | + | {{Content-Columns |
| − | [[File:Profitec-pro-steam-tip-comp.pdf|250px|thumbnail|center|ECM and Profitec Steam Tip Compatibility]]
| + | |column_1 = |
| − | | + | : There are several different steam tips for ECM and its sister brand Profitec, some of which are interchangeable and others not. Consult this comprehensive document on the topic for more information. |
| − | == Cleaning & Maintenance ==
| + | |column_2 = |
| − | | + | [[File:ECM_and_Profitec_Steam_Tip_Compatibility.pdf|center|link=https://wiki.wholelattelove.com/File:ECM_and_Profitec_Steam_Tip_Compatibility.pdf]] |
| − | {{Maintenance-Semi-Automatic | + | |media_caption = |
| − | |backflushable = Yes | + | Steam Tip Compatibility |
| − | |backflush_instr = Instructions for backflushing the machine can be found in the video below. {{#ev:youtube|https://www.youtube.com/watch?v=k1Vkfj83uyg|480|center}}
| + | |
| − | |descaling_products = [https://www.wholelattelove.com/products/urnex-full-circle-descaling-liquid Urnex Full Circle] | + | |
| | }} | | }} |
| | | | |
| − | == Troubleshooting ==
| |
| − |
| |
| − | ===No Crema or Bad Tasting Shots===
| |
| − |
| |
| − | {{Troubleshooting-No-Crema-Bad-Shots}}
| |
| − |
| |
| − |
| |
| − | ===Difficulty Frothing===
| |
| − |
| |
| − | {{Troubleshooting-Frothing}}
| |
| − |
| |
| − |
| |
| − | ===Flow Issues===
| |
| − |
| |
| − | The first place to start with any flow issue is cleaning the machine. Before going through these steps please make sure the machine is cleaned according to the [[#Cleaning & Maintenance|Cleaning & Maintenance]] section of this article.
| |
| − |
| |
| − | ====No Steam Or Hot Water From Wand====
| |
| − |
| |
| − | #Check the brew function on the machine and see if water is able to flow through the machine for this function.
| |
| − | ##If the brew water is not flowing either refer to the [[#No Flow At All|No Flow At All]] section of this article
| |
| − | ##If the brew water flows but is not hot refer to the [[#On But Not Heating|On But Not Heating]] section of this article.
| |
| − | #The PID may need to be adjusted. Instructions for changing the PID settings can be found in the section of this article that discusses [[#Adjusting The PID|programming the PID]]. The steam setting should be programmed to around 250-260 F°.
| |
| − | #Turn the hot water function for the wand on and see if the machine can pass hot water through the wand.
| |
| − | #If hot water flows through the wand, then there may have been a blockage preventing the steam from coming through. Try steaming again.
| |
| − | #If cold water flows through the wand, then the high limit switch inside the machine is tripped and needs to be reset. Remove the outer casing and top of the machine in order to access the top of the boiler where the high limit switch is located. The switch has a small button in the center that will need to be pressed a few times to reset it. The high limit switch is listed as part 3 on p.6 of the machine's parts diagram.
| |
| − | #Remove the tip from the steam wand and test the flow. If flow is restored then the tip needs to be cleaned and reattached.
| |
| − | #If the flow is still blocked then there may be a blockage in the steam wand itself. Clean the wand by using a pipe brush that has synthetic or plastic bristles; metal bristles can damage the wand. Then soak the wand in a solution of hot water and backflushing powder for ten minutes. Test flow again.
| |
| − | #If there still isn't flow then there may be a blockage farther back in the steam circuit. The machine may need to be professionally cleaned to remove the blockage.
| |
| − |
| |
| − | {{Troubleshooting-Semi-Brew-Blocked
| |
| − | |grouphead_instr = Instructions for cleaning the grouphead can be found on pp.27-28 of the machine manual. Use a grouphead brush or old toothbrush to scrub down the metal components, and then soak them in a solution of hot water and backflushing powder for ten minutes before reassembling the grouphead.
| |
| − | }}
| |
| − |
| |
| − | ====No Flow At All====
| |
| − |
| |
| − | If the machine is not outputting any water follow the instructions below. Once flow is restored make sure to pull a full 8 oz. of water using the hot water function to ensure the machine is correctly primed.
| |
| − |
| |
| − | #Check the water tank to make sure it is filled to the max line.
| |
| − | #Make sure the tank is sitting flush, and that the water tank valve is properly inserting in the socket.
| |
| − | #The water tank magnet may be sitting in the machine incorrectly, or the water tank sensor wiring may be loose or disconnected. The machine will not function unless is senses that water is in the tank.
| |
| − | ##The water tank magnet is embedded in a white plastic float, which can be found in the front left corner of the water tank. The float should be positioned so that the magnet is on the top and is facing the corner of the tank. [[File:ECM Magnet Alignment.png|200px|thumbnail|center|Properly Aligned Magnet]]
| |
| − | ##The magnet needs to be aligned with this sensor. If the magnet is positioned properly but the machine still thinks there is no water, then there may be a wire loose/disconnected on the sensor. [[File:ECM Magnet Sensor.png|200px|thumbnail|center|Water Tank Sensor]]
| |
| − | #Activate the hot water function on the machine. You should hear a vibration noise coming from the machine to indicate that the pump is activated.
| |
| − | ##If you can't hear anything coming from the machine then there may be a loose or disconnected wire inside of the machine. Unplug the machine and remove the casing to inspect the inside for any loose or disconnected wires, particularly at the pump or the front switch panel. Firmly secure any loose wires and test flow again using the hot water function.
| |
| − | ##If you hear the machine vibrating then the pump is turning on. Unplug the machine and remove the casing to inspect the water lines inside the machine. Make sure there aren't any loose, kinked, or disconnected hoses anywhere.
| |
| − |
| |
| − |
| |
| − | ===Machine Is Leaking===
| |
| − |
| |
| − | {{Troubleshooting-Prosumer-Bad-Gasket
| |
| − | |gasket_instr = Instructions for replacing the group gasket can be found on pp.27-28 of the machine manual.
| |
| − | }}
| |
| − |
| |
| − | {{Troubleshooting-Prosumer-E61-Leak
| |
| − | |lever_style = Yes
| |
| − | |lever_leak_instr = A blowout of the lever assembly can be seen on p.8 of the machine's parts diagram. The o-rings that will need to be checked are listed as parts 41 and 39 on this page.
| |
| − | ###To access these o-rings remove the end cap of the lever assembly using a flathead screwdriver.
| |
| − | ###Once this is removed the other components of the grouphead assembly can begin to be slipped off. The bolts that the lever slides into can be removed with open ended wrenches or an adjustable wrench.
| |
| − | ###Inspect the o-rings and make sure they are not damaged. It's possible that they are just dirty and need to be cleaned off and reseated. If they are damaged, broken, or shows signs of chaffing then they will need to be replaced.
| |
| − | ###Inspect the valve components well to make sure they are intact.
| |
| − | ###Reassemble the components and see if leaking is resolved.
| |
| − | |top_valve_leak_instr = A blowout of the top valve assembly, known as the mushroom or trumpet valve, can be found on p.8 of the machine's parts diagram. There are a few components which can be contributing to the leaking. There are three o-rings, listed as parts 20, 24, and 26 on this page of the diagram. There is also a valve assembly shown as assembly 28 on the same page.
| |
| − | ###To access these parts use an open ended wrench or adjustable wrench to remove the smaller top bolt of the E-61. This will give you access to the first o-ring and spring assembly.
| |
| − | ###To access further down into this part of the grouphead use a wrench to remove the large bolt. This will let you access the other o-ring, another spring assembly, and the other valve assembly.
| |
| − | ###Inspect all of these components for integrity. Clean any dirty parts and replace any broken parts.
| |
| − | ###Reassemble the grouphead and see if the leaking is resolved.
| |
| − | |bottom_valve_leak_instr = A blowout of the bottom valve assembly, known as the release valve, can be found on p.8 of the machine's parts diagram. There are two o-rings in this assembly, listed as parts 53 and 58 on the diagram, and two valve assemblies, listed as assemblies 50 and 55 on the diagram, that can be causing the leak.
| |
| − | ###To access these parts use an open ended wrench or adjustable wrench to remove the smaller bottom bolt. You will be able to access part 58, the o-ring, and assembly 55, one of the valve assemblies. Inspect the parts. If they are dirty clean them off, if they are broken replace them.
| |
| − | ###To access the next o-ring and valve assembly use a wrench to remove the larger of the bolts. Again, inspect the parts for cleanliness and damage. Clean or replace as needed.
| |
| − | ###Reassemble the release valve and test to see if the leaking is resolved.
| |
| − | |E61_group_cleaning_instr = Instructions for cleaning an entire E-61 can be found by clicking [http://coffeetimex.wikidot.com/e61-group-servicing here].
| |
| − | |E61_attach_instr = There are two possible reasons for the machine to be leaking from here.
| |
| − | ##The first is that one of the plumb lines connected to the back of the E-61 is not secure resulting in a leak. This will need to be tightened from the inside of the machine. You may see leaking from the bottom of the machine as well if this is the case. Remove the top of the machine and look towards the front of the machine. These lines will be located on the back of the faceplate, opposite to where the grouphead is seated. They are listed as parts 6 and 8 on p.6 of the machine's parts diagram. Use an open ended wrench or adjustable wrench to tighten these down. If the leaking persists you may need to apply white teflon plumbers tape or a sealing compound such as food safe permabond.
| |
| − | ##The other possibility is that the E-61 group chassis gasket is not sealing tightly, or is worn out or damaged and will need to be replaced. The chassis gasket is listed as part 34 on p.8 of the parts diagram. There are two bolts which secure the E-61 to the machine chassis, causing it to press on the gasket and create a seal. First try tightening these two bolts down. The bolts assembly is listed as parts 29-33 on p.8 of the parts diagram. If tightening these bolts does not resolve the leak, then the chassis gasket will need to be replaced.
| |
| − | }}
| |
| − |
| |
| − | ====From Bottom Of Machine====
| |
| − |
| |
| − | #Check the water tank and drip tray to make sure that are no cracks or breaks where water can escape. Make sure they are properly positioned on the machine; the valve on the bottom of the water tank needs to be fully inserted into the corresponding socket for it to seal properly.
| |
| − | #Unplug the machine and remove the cover and top. Check for any loose or broken water connections, or any valve assemblies that are leaking.
| |
| − | #Examine the pump and boiler assemblies to see if there are any cracks in them. If the machine was exposed to subfreezing conditions without being properly drained it can cause these parts to crack.
| |
| − |
| |
| − | ====From Steam Wand====
| |
| − |
| |
| − | #If the wand is leaking from the tip it means the steam valve is not fully closed.
| |
| − | ##Try tightening the knob down firmly. Pressure from the boiler will leak through the wand if the steam valve is not securely closed.
| |
| − | ##If it feels like the knob is spinning in place then the knob may be broken. Try removing the knob and manually turning the steam valve closed. An adjustable wrench or a pair of pliers can help with this. If this stops the leaking then the square hole in the knob may have been deformed from over tightening, or the bow nut that secures the knob to the valve assembly may be stripped.
| |
| − | ##Descale the machine according to the instructions in the [[#Cleaning & Maintenance|Cleaning & Maintenance]] section of this article. Scale buildup inside of the steam valve will prevent the valve from closing fully and can cause permanent damage to the valve. After the machine has been descaled run 4-6 tanks of water through the wand using the machine's hot water function to ensure any debris or scale in the valve is fully removed.
| |
| − | ##If the leaking persists then the steam valve will need to be replaced.
| |
| − | #If the wand is leaking from behind the knob assembly, then the nut that secures the valve tap needs to be tightened down. Part 5 on p.8 of the diagram needs to be tightened down.
| |
| − | #If the wand is leaking from where it connects to the machine then the wand is not sealing properly to the supply line. Make sure the wand is properly secured to the supply line by tightening part number 33 on p.8 of the diagram.
| |
| − | #If the wand is leaking from the ball joint:
| |
| − | ##First remove the wand arm. This can be done by unscrewing the hex shaped nut at the top of the arm, part 13 on p.8 of the parts diagram.
| |
| − | ##Once the wand is removed there may be parts that stick to the valve assembly. Do not lose these parts.
| |
| − | ##If the leaking was coming from the top of the securing nut, check the o-ring (part 9) to make sure it is clean and not damaged.
| |
| − | ##Inspect the tension spring to make sure it is in good condition. The spring should be really firm. If it is easily compressed then it may need to be replaced. At the bottom of the spring are parts 11 and 12. These mate with the ball joint on the wand to let it pivot. Make sure these parts are clean and reinstall them.
| |
| − |
| |
| − |
| |
| − | ===Machine Not Heating Or Powering On===
| |
| − |
| |
| − | {{Troubleshooting-Prosumer-No-Power}}
| |
| − |
| |
| − | {{Troubleshooting-Prosumer-Brew-Cold
| |
| − | |temp_adjust_style = PID
| |
| − | |pid_adjust_instr = Instructions for programming the PID can be found in the [[#Adjusting The PID|PID adjustment]] section of this article.
| |
| − | |hls_instr = Remove the outer casing and top of the machine in order to access the top of the boiler where the high limit switch is located. The switch has a small button in the center that will need to be pressed a few times to reset it. The high limit switch is listed as part 3 on p.6 of the machine's parts diagram.
| |
| − | }}
| |
| − |
| |
| − | {{Troubleshooting-Prosumer-No-Heat
| |
| − | |tank_instructions = #The water tank magnet may be sitting in the machine incorrectly, or the water tank sensor wiring may be loose or disconnected. The machine will not function unless is senses that water is in the tank.
| |
| − | ##The water tank magnet is embedded in a white plastic float, which can be found in the front left corner of the water tank. The float should be positioned so that the magnet is on the top and is facing the corner of the tank. [[File:ECM Magnet Alignment.png|200px|thumbnail|center|Properly Aligned Magnet]]
| |
| − | ##The magnet needs to be aligned with this sensor. If the magnet is positioned properly but the machine still thinks there is no water, then there may be a wire loose/disconnected on the sensor. [[File:ECM Magnet Sensor.png|200px|thumbnail|center|Water Tank Sensor]]
| |
| − | |hls_reset_instr = Remove the outer casing and top of the machine in order to access the top of the boiler where the high limit switch is located. The switch has a small button in the center that will need to be pressed a few times to reset it. The high limit switch is listed as part 3 on p.6 of the machine's parts diagram. Please note that this machine does not have an auto-fill function for the boiler. The boiler must be manually refilled after any time the steam function has been used. The machine can overheat if the boiler is not filled.
| |
| − | }}
| |
| − |
| |
| − | ===Portafilter Handle Not Fitting On Machine===
| |
| − |
| |
| − | {{Troubleshooting-Prosumer-Portafilter}}
| |
| − |
| |
| − | ==Diagrams & Manuals==
| |
| − |
| |
| − | {{Support-Documents
| |
| − | |title = ECM Classika PID
| |
| − | |machine_manual = [[File:CLASSIKA PID Machine Manual.pdf|150px|none]]
| |
| − | |parts_diagram = [[File:CLASSIKAII&PID_Parts.pdf|150px|none]]
| |
| − | }}
| |
| − |
| |
| − | ==Specifications==
| |
| − |
| |
| − | {{Specifications-Prosumer
| |
| − | |basic_specs = yes
| |
| − | |width = 10 in.
| |
| − | |height = 15.75 in.
| |
| − | |depth = 17.75 in.
| |
| − | |weight = 41 lbs
| |
| − | |watts = 1200
| |
| − | |volts = 115
| |
| − |
| |
| − | |housing = yes
| |
| − | |housing_material = Stainless Steel
| |
| − | |drip_tray_material = Stainless Steel
| |
| − | |drip_tray_cover_material = Stainless Steel
| |
| − | |drain_line_adaptable = No
| |
| − | |frame = Steel
| |
| − | |tall_legs = Yes
| |
| − | |drip_tray_capacity = 32 oz
| |
| − | |power_cord_length = 48 in.
| |
| − |
| |
| − | |cup_height = yes
| |
| − | |max_cup_height = 3.25 in.
| |
| − |
| |
| − | |frothing = yes
| |
| − | |wand_material = Stainless Steel
| |
| − | |wand_style = Commercial Style
| |
| − | |wand_movement = Articulating
| |
| − | |usable_length = 4 in.
| |
| − | |height_off_counter = 4 to 6.5 in.
| |
| − | |number_of_holes = 2
| |
| − |
| |
| − | |water_source = yes
| |
| − | |source_type = Reservoir
| |
| − | |reservoir_capacity = 95 oz
| |
| − | |reservoir_material = Plastic
| |
| − | |reservoir_access = Top
| |
| − | |reservoir_removable = Yes
| |
| − |
| |
| − | |controls = Yes
| |
| − | |control_type = Lever
| |
| − | |display_type = PID
| |
| − | |power_light = Yes
| |
| − | |temp_control = Yes
| |
| − | |low_water_warning = Yes
| |
| − | |pressure_gauges = Brew Only
| |
| − | |brew_temp_display = Yes
| |
| − |
| |
| − | |cup_warmer = yes
| |
| − | |warmer_material = Stainless Steel
| |
| − | |warmer_size = 10 X 10 in.
| |
| − | |warmer_type = Passive
| |
| − |
| |
| − | |portafilter = yes
| |
| − | |portafilter_material = Chrome Plated Brass
| |
| − | |portafilter_type = Commercial Style
| |
| − | |quantity_included = 1
| |
| − | |portafilter_weight = 1.25 lbs
| |
| − | |portafilter_diameter = 58 mm.
| |
| − | |commercial_baskets = Single & Double
| |
| − | |bottomless_portafilter = Yes
| |
| − | |tamper_size = 58 mm.
| |
| − |
| |
| − | |brew_group = yes
| |
| − | |group_material = Chrome Plated Brass
| |
| − | |group_type = E61
| |
| − | |preheat = Yes
| |
| − | |solenoid = Manual
| |
| − | |back_flushable = Yes
| |
| − |
| |
| − | |boiler_data = yes
| |
| − | |num_boilers = 1
| |
| − | |brew_steam_simultaneous = No
| |
| − |
| |
| − | |brew_boiler = yes
| |
| − | |brew_boiler_type = Single Boiler
| |
| − | |brew_boiler_wattage = 1200
| |
| − | |brew_boiler_volume = .5 Liter
| |
| − | |brew_boiler_material = Stainless Steel
| |
| − | |brew_boiler_orientation = Vertical
| |
| − | |brew_element_location = Internal
| |
| − | |brew_boiler_autofill = No
| |
| − |
| |
| − | |pump_data = yes
| |
| − | |pump_type = Vibration
| |
| − | |pump_wattage = 52
| |
| − | |pump_pressure = 15 Bar
| |
| − | |pump_pressure_adjust = Yes
| |
| − | |pump_self_prime = Yes
| |
| − |
| |
| − | |performance = yes
| |
| − | |heat_up = 300 s.
| |
| − | |recommended_heat_up = 600 s.
| |
| − | |steam_time_8 = 45 s.
| |
| − | |hot_water_temp_8 = 177 F°
| |
| − | |hot_water_time_8 = 20 s.
| |
| − | |hot_water_recovery = 74 s.
| |
| − | |brew_sound_level = 63 Db
| |
| − |
| |
| − | |details = yes
| |
| − | |manufacture_country = Italy
| |
| − | |nsf_certified = No
| |
| − | |recommended_application = Home Use
| |
| − | }}
| |
| − |
| |
| − | <!-- Categories -->
| |
| − | [[Category:Semi-Automatics]]
| |
| | [[Category:ECM]] | | [[Category:ECM]] |