Gaggia Anima Prestige
From Whole Latte Love Support Library
The Gaggia Anima Prestige is a super-automatic espresso machine that features beverage programming and an auto-frothing carafe.
| Gaggia Anima Prestige |
|---|

|
| Manufacturer: Gaggia |
| Model Name: Anima Prestige |
| Model Number: RI8762 |
| Type: Super-Automatic |
Contents
- 1 Machine Description
- 2 Basic Usage
- 3 Cleaning & Maintenance
- 4 Troubleshooting
- 5 Diagrams & Manuals
- 6 Specifications
Machine Description
The Gaggia Anima Prestige is part of the newest line of Gaggia super-automatic machines. It features beverage programming, a sleek refined design, and a new Optiaroma system. The Optiaroma system increases the usual three aroma setting traditional to the Gaggia brand to five settings. It also allows for a maximum dosage of 11.5 grams per shot. The machine also features a smart grinder which makes micro-adjustments to the grind dosage for better tasting shots.
To prepare specialty milk drinks, the Anima Prestige uses an automatic frothing carafe which froths your milk and dispenses it into your cup. There is a dedicated button located on the front of the machine to activate the frothing cycle and produce rich, creamy milk foam. A separate nozzle attachment can be inserted into the milk carafe port in order to dispense hot water for drinks like a cafe americano or hot tea.
Basic Usage
Grinder Adjustment
The machine's manual indicates that adjustments for the grinder should only be made while the grinder is running. While this is technically true, the sensor for the bean hopper sensor prevents adjustments from being made, because the grinder will turn of if the machine senses the hopper lid is open. This sensor is an additional safety feature for the U.S. version of the machine to prevent exposure to active grinder burrs; the manual does not reflect this change.
There are two ways to work around this issue. Another magnet can be placed on the hopper sensor so that the machine can be run with the lid open. Alternatively the grinder can be adjusted in small increments. Move the adjustment knob 1 tick, grind a shot, and then move it another tick. Do this until you are at the desired grind setting. This will ensure that any grinds or bean fragments are swept out of the way before the burr plates are moved closer together.
Cleaning & Maintenance
Proper machine maintenance is critical to proper machine functionality. Most machine failures are caused by a lack of cleaning and maintenance. This is vital, as many manufacturer warranties do not cover cleaning/maintenance related breakdowns. To avoid this, it is imperative to keep a regular maintenance schedule. Consult pp. 36-53 in your machine manual for fully detailed cleaning procedures, including descaling, carafe cleaning, and brew group cleaning, as well as the recommended products for machine maintenance. Listed below is a suggested maintenance rundown for most super-automatic espresso machines:
Machine Maintenance
Descaling
Descaling the machine should be done on a bimonthly basis using the product recommended by the manufacturer. Descaling is still required even if reverse osmosis, distilled, or zero water is being used. Refer to your machine manual for specific instructions for this unit.
Brew Unit
The brew unit of the machine should be removed on a weekly basis and rinsed off with cold water. Cold water must be used because hot water can wash away the lubricant that coats the moving parts of the brew unit. It is also important to use plain water; detergents and soaps should not be used. While the brew unit is removed, the brew unit chamber should be wiped down with a moist cloth to remove excess grounds and coffee residues.
Your machine features a brew unit cleaning cycle. This should be done on a monthly basis; refer to your manual for instructions on how to run one.
A complete disassembly, cleaning, and lubrication of the brew unit should be done every 500 cups or every 6 months, whichever comes first. A food safe silicone-based lubricant should be used, such as food grade Petrol-Gel.
Steam Wand Cleaning
Steam wands and nozzle attachments should be cleaned daily, after the machine is finished for the day. Milk residues quickly build up in steam wands and frothing nozzles, so it is important to keep these clean to prevent blockages from forming.
Recommended Cleaning Products
The best descaling product for this machine is Durgol Swiss Espresso Descaler. The suggested tablets for running brew unit cleaning cycles are the Gaggia Coffee Clean Tablets or Urnex Full Circle Espresso Machine Cleaning Tablets.
Milk Carafe Maintenance

Automatic Cleaning Cycle
The automatic carafe cleaning cycle for this machine should be completed on a weekly basis. It is important to keep the carafe clean, in order for the carafe to function properly and produce froth. Unsanitary milk residues can build up in the carafe if it is not maintained properly. A full carafe cleaning cycle can be activated through the machine's maintenance menu.
Manual Disassembly & Cleaning
While the automatic cleaning cycle does remove most residues, it is not a complete cleaning of the carafe. For more thorough cleaning, the carafe should be pulled apart on a daily basis after you are finished making latte drinks for the day. Please see the video below for instructions on how to complete the manual carafe cleaning. The machine featured in the video is different, but the process for disassembling the carafe is identical. There is also a diagram of the carafe disassembly on pp.43-45 of the machine manual.
Recommended Cleaning Products
The automated carafe cleaning cycle requires the use of a cleaning solution intended for removing milk residues. The recommended cleaning solution for the milk carafe is Rinza.
Troubleshooting
No Crema or Bad Tasting Shots
Typically, issues with crema or the flavor of the shot do not indicate a malfunction of the machine. Instead, this indicates that an adjustment needs to be made in the brewing process or that different beans need to be used.
The type of bean that is being used is particularly important for super-automatic machines, because the built in burr grinders only accept certain types of beans. Another consideration is the roast of the bean, which greatly influences how much crema can be produced, as well as the flavor of the shot. Super-automatic machines are not compatible with oily, caramelized, or flavored beans. Properly stored and recently roasted beans are best. You can find more information on why bean selection and storage is important for super-automatic machines by watching the video below.
5 Things New Super Automatic Espresso Machine Owners Should Know
Appropriately adjusting the grinder is also important. Poor shots can also be the result of incorrect grind settings.
- If the shot is too bitter:
- The grind is set too fine. Try adjusting the grind to a coarser setting, typically indicated by a large dot symbol or higher number.
- If applicable, the aroma setting is set too high. Lower the aroma setting so that less coffee is ground per shot.
- The beans being used are over-roasted, and a lighter roast is needed.
- If the shot is too sour or weak tasting:
- The grind is set too coarse. Try adjusting the grind to a finer setting, indicated by a lower number. Whenever moving the grind to a finer setting it is important to make minor adjustments, and to only adjust the grinder while in operation.
- If there is little crema:
- The beans are probably stale and fresher beans need to be used.
- The grind setting does not match the drink that is being made. Smaller drinks such as an espresso require finer grind size; larger drinks such as a longo require a coarser grind.
- Oily or dark roasted beans are being used. These beans are not compatible with the unit, and are not suitable for espresso brewing. The oils and chemicals that are needed to produce a rich crema have been roasted out of the bean. Switch to a drier/lighter roast.
- Keep the machine properly cleaned and maintained for good tasting shots. Your grinder may need to be cleaned or calibrated, or you may need to descale your machine to remove any unwanted residues or flavors.
Difficulty Frothing
Before going through the following steps make sure to try all of the cleaning any maintenance items indicated in the section of this article which discusses how to clean and maintain the milk carafe.
- If there is nothing coming out of the carafe at all:
- Check the carafe to make sure it is securely attached to the machine and that the machine recognizes the carafe is in place.
- Make sure the carafe is properly assembled and the manual cleanings have been completed. Refer to pp. 16-17 of the owner's manual for instructions on how to clean the carafe and properly reassemble it. Inspect the parts to make sure none of them appear broken, damaged, or missing.
- The machine may not be producing steam. If the machine is displaying an E15 or steam thermostat error then the steam thermostat is broken and the machine will require a repair.
- If the carafe is spitting or not producing foam:
- A non-compatible milk is being used. The machine is designed for use with whole or 2% milk, so the best results will be achieved by using these milks.
- Make sure the carafe is properly assembled. Refer to pp. 16-17 of the owner's manual for instructions on how to clean the carafe and properly reassemble it.
Flow Issues
The first place to start with any flow issue is cleaning the machine. Before going through these steps please make sure the machine is cleaned according to the Cleaning & Maintenance section of this article.
Poor Or No Flow Or E05 Error
If you are not able to get water to flow through the machine at all, or if the machine displays an E05 code, then something is blocking water flow through the machine. This issue typically indicates the machine is not being cleaned on a regular basis. Review the cleaning & maintenance rundown for this machine, and make sure maintenance is done at least as often as is suggested with the recommended product. Once flow is restored, even if it is minimal flow, a descaling should be done immediately.
- The water tank is not seating properly. Please remove the tank and reinsert it firmly. Make sure there are no beans or debris beneath the water tank preventing it from seating flush with the machine.
- If you are using an Intenza water filter in the machine then it might be blocking the flow of water. Try removing the water filter and using the machine without it. If the machine works without the water filter, then the filter was blocking the flow of water. Keep the filter out of the machine for the remaining steps.
- Debris has been drawn into the system from the water tank. This kind of debris can get lodged in valves/water circuits and cause flow issues.
- Try cleaning the brew unit check valve using the instructions here.
- If you have been able to restore some flow to the brew circuit, a brew unit cleaning cycle should be completed. The process can be found on pp. 49 of the machine manual.
- The machine may require a manual prime.
No Flow From Milk Carafe Or Hot Water Nozzle
Once the flow issue has been resolved the machine should be immediately descaled with the recommended product and a carafe cleaning cycle should be run. Flow issues and blockages are typically due to lack of maintenance or excessive scale buildup. Also refer to the section of this article which discusses milk carafe issues before proceeding.
- If the milk carafe is attached remove it from the machine and attach the hot water nozzle to the milk carafe port. Set the machine to the hot water dispensing mode. The machine should now begin to heat up, and a thermostat icon will appear on the screen.
- If the machine gets stuck on the thermostat icon for a long period of time or the machine gives an E15 error the machine will require a repair; one of the thermostats has gone bad.
- If the machine heats up properly you should hear the pump start to vibrate.
- Once the pump is activated hot water should begin to flow through the nozzle. If hot water flows through the nozzle stop the machine from dispensing hot water and try using the milk carafe again. There may have been a piece of debris in the steaming circuit which the hot water function dislodged.
Reduced Or No Flow During Brewing
- If there is no flow while brewing specifically, then something is blocked along the brew circuit. Begin by running a descale of the machine using the recommended product. Scale buildup is the most common cause of flow issues. Descaling will most likely resolve the issue.
- If the machine is set to a really fine grind, the grinds can block the flow. Set the grind to a coarser setting and see if flow is restored. Leave the grind on the coarse setting for the remainder of flow testing.
- There may be an issue with the brew unit.
- First remove the unit and rinse it off with cold water. Do not use any sort of detergent or soap to rinse it off or necessary lubricant will be removed.
- Wipe down the brew unit chamber with a damp cloth to remove any leftover grounds. A microfiber cloth is best, to prevent any cloth fibers from remaining behind.
- Clean the check-valve. Here are the instructions to follow.
- Reinsert the brew unit and test for flow.
- This machine allows beverage length to be reprogrammed. Make sure it isn't set to the minimum brew length. If the machine is programmed to the minimum beverage length the machine may not dispense any coffee, or it may only dispense a few drops. Try reprogramming the machine to a longer length drink to see if it resolves the no flow issue.
- Check the brew unit to make sure it is lining up with the spout assembly and connecting with the spout assembly properly.
- If you are noticing a lot of brewed coffee or coffee sprayed inside the brew unit chamber then the brew unit o-ring may be damaged or out of place.
- Remove the brew unit and inspect the large red o-ring attached to the tamping assembly. Make sure it is clean, properly positioned, and not damaged.
- If the o-ring is broken or damaged it should be replaced. A brew unit o-ring can be purchased here.
- Your machine features an e-plus dial which may be blocked. Try brewing a shot and while the pump is activated turn the e-plus dial back and forth. This may clear up the blockage and restore flow.
- The dispensing spout may be blocked. Try very gently cleaning the dispensing spout holes with a toothpick to remove any blockages.
Have Flow But Getting No Flow Error
In some situations, you will be able to get flow through the machine for all functions, but the machine thinks there is no water flowing through. There is a device in the machine called a flow meter, and it tells the machine when water is flowing through or not. The device operates by having small fan-like blades spin when water passes through it. If those blades get stuck from excessive scale buildup or debris, then they will not spin. As a result, even though water is flowing through the machine, you will get a flow error.
If your machine uses a water filter, temporarily remove it from the water tank and add the recommended descaling product to the water tank. The descaler needs to work its way into the system to start dissolving the scale buildup in the flow meter. You may have to keep restarting the machine so that it can keep attempting to prime, which will draw the descaler/water solution into the system. If at any point you are able to clear the flow message then you will want to do an immediate descale of the machine. After you have descaled, run 4-5 tanks of plain water through the hot water function for the wand in order to ensure the system is completely free of debris.
Machine Is Leaking
From The Bottom
- Check the internal drip tray and make sure it is not overfilling. If the drip tray full indicator came on, and the trip tray was removed and reinserted but never emptied, it will reset the machine sensor and possibly result in the tray overflowing.
- The leaking is coming from the water tank chamber.
- If the water tank is not positioned properly it can cause water to continuously drain from the tank, even while the machine is turned off. This happens when the water tank is inserted far enough to open the release valve, but not far enough to seal with the intake line. This water can leak out from the water tank and end up on the bottom of the machine. This particular issue is usually indicated by lots of clear water leaking onto the counter or into the internal drip tray, even though the machine is powered off. Remove the water tank and make sure there isn't anything, such as coffee beans, which could be blocking the tank from seating properly and then firmly reinsert the tank into the machine and press firmly on it to make sure it creates a good seal with the intake line.
- If the machine only leaks while the water tank is attached, but is properly inserted, then the intake line may be broken or disconnected. This will require a repair.
- If this does not resolve the leaking, then the leaking may be coming from an internal component and the machine should be repaired.
Machine Not Heating Or Powering On
No Power
- Make sure the machine is plugged into an appropriate power source.
- Do not use the machine on a surge protector. This machine has a high power draw, more than a typical kitchen appliance such as a refrigerator or a microwave. Surge protectors are typically not rated to handle the amperage this machine requires.
- Make sure the power cord is firmly inserted into the power socket on the machine.
- Try using the machine on a different outlet, and make sure the machine is the only appliance plugged into that outlet.
- Try testing another appliance on the same outlet.
- Make sure the power switches are functioning properly and not broken. If the machine isn't powering on try pressing and holding the power button in the on position to see if the machine turns on. If you are able to power the machine on this way then the power switch needs to be replaced.
- If the machine recently had a leak, had water spilled on it, or any other exposure to moisture then the machine may be shorting out. Try letting the machine sit unplugged for 48 hours to make sure there isn't a short caused by moisture.
Cold Shots or E14 Error
- If the machine is producing shots that are hot, but you would like them to be hotter, check the beverage programming menu. Make sure all of the drinks are set to brew at the highest temperature.
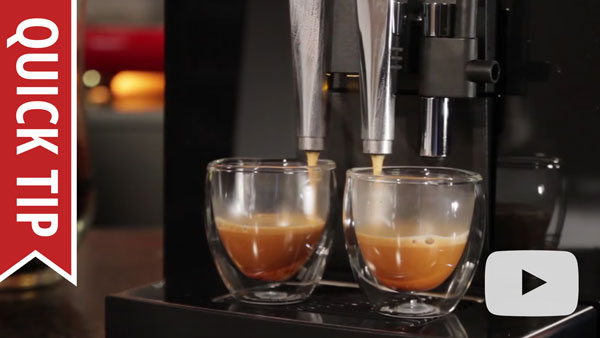
- Make sure you are using a preheated cup. Ceramic cups will sap a lot of heat from the shot resulting in a colder shot. Preheating the cups using the machine's hot water function will allow the cup a great deal more heat. Alternatively, you can brew into a paper, styrofoam, or other well insulated cup. This video explains the importance of a pre-heated cup during espresso brewing:
- If the shots are completely cold, or the machine is displaying an E14 error code, then there is a thermostat issue. Try restarting the machine to resolve the issue. If the error code continues to appear, then the thermostat is damaged and the machine will need to be repaired.
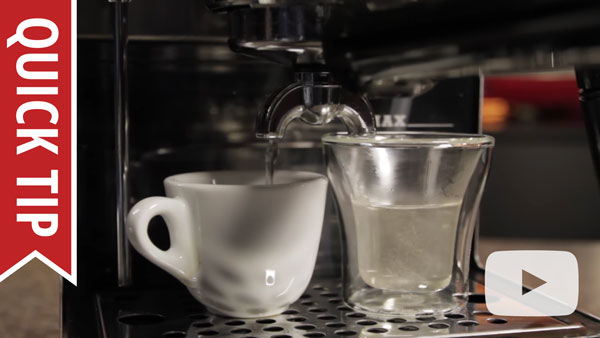
Brew Temperature Comparison: Pre-heated vs. Room Temp Espresso Cups
No Beans, Grinder Blocked, Or E01
All three of these issues share the same root cause. The grinder has become jammed with grounds or coffee residues. These issues are typically a result of incorrect beans being used in the machine. This machine is not compatible with oily, dark roasted, caramelized, or flavored beans. Use of these beans can cause permanent damage to the machine that is not covered under warranty. These beans can be identified easily. They will be shiny and feel slippery or sticky. Dry beans that are appropriate for the machine will look dull and feel rough. This machine does not have a user serviceable grinder so it is very important that the correct beans are used. Follow these steps to fix the behavior:
- Remove all of the beans and set them aside.
- Move the grinder adjustment dial all the way to the coarsest setting.
- Use a vacuum to thoroughly clean out the grinder. In particular vacuum down in the chute where the beans feed into the inside of the machine.
- Clean out the dosing chute using the following instructions: here.
- Add beans back into the machine. The beans must be dry beans. Do not add incompatible beans back into the unit. Make sure the grinder is still set to the coarsest setting.
- Test the machine to see if it can successfully brew a shot. If it successfully brews, run 2-3 more shots on this grind setting so that we can be sure the system is free of the old coffee grounds.
- Once the machine is functional on this setting you can begin adjusting the grind to your preferred setting. Make small, one-tick-at-a-time adjustments, and be sure to brew shots in between. This will prevent the machine from jamming again.

Brew Unit Blocked, Stuck, or E03 or E04 Error Codes
The machine is sensing that the brew unit motor is working too hard to engage the brew unit. This is a fail-safe built into the machine to prevent itself from damaging the brew unit; the machine will stop working and display an error. This issue is typically resolved through normal maintenance.
- First restart the machine to clear the error message and reset the brew unit back to the home position so that it can be removed. If the machine is in an active rinse cycle do not try to remove the brew unit. The rinse cycle must be completed before the brew unit can be removed.
- Try running a blank bypass shot. To do this just run a normal bypass shot but do not add any coffee. You should just have plain water come out of the spouts. If the machine successfully completes this cycle then we know it's a coffee issue. Refer to the section of this article that discusses grinding issues.
- If this happened when you were using the bypass function specifically, then you may have added too much pre-ground coffee. The machine only accepts about a maximum of 8-9 grams per shot. The scoop that comes with the machine doses more than this. To make sure you are adding the appropriate amount take one level scoop of pre-ground coffee and remove a large pinch from it. This should about about 8 grams of coffee and should work in the machine.
How to Remove Stuck Brew Group
- When the machine indicates that it is ready for use open the door to the brew unit chamber.
- Try removing the brew unit. If the brew unit does not come out easily, do not force it out. The brew unit is stuck in an engaged position and will need to be properly reset. Forcing it out of the machine can break the brew unit and possibly cause damage other parts of the machine. Follow the instructions in the video below to reset the brew unit before moving on to the next step. If the brew unit won't reset to the home position, the motor that manipulates the brew unit may be damaged, and the machine may require a repair.
- If the brew unit is easily removed then rinse it off with cold water and let it dry.
- The brew unit will need to be cleaned and lubricated.
- Reinsert the brew unit into the machine and try brewing a shot.
Too Much Steam/Milk Boiling
If you think your wand is producing too much steam, or your milk looks like it is boiling, then you may need to make an adjustment to your frothing technique. Boiling milk, or milk that is getting to hot before frothing is completed is an indication that incorrect frothing technique is being used. Review the section of this article that addresses frothing difficulties for more information.
If you have tried adjusting your technique and the wand still appears to be producing too much steam, then a steam test should be completed.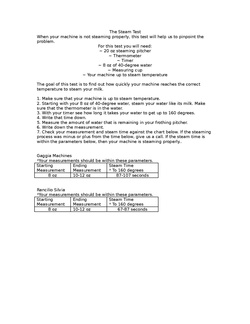
If the machine is within the specified steam test range, then the machine is producing the correct amount of steam and an adjustment to frothing technique is necessary. Using a carafe that is chilled in a freezer before frothing is helpful for keeping the milk cooler for longer, allowing for more time to froth before the milk begins to scald.
Diagrams & Manuals
| Gaggia Anima Prestige | |
|---|---|
| Anima Deluxe Error Codes and Troubleshooting: | 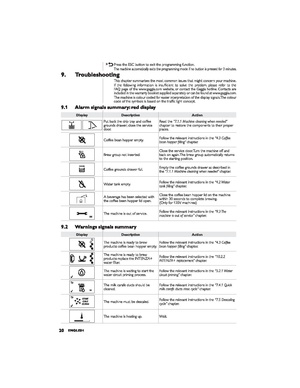
|
| Electrical Diagram: | Not Available |
| Hydraulic Diagram: | Not Available |
| Machine Manual: | 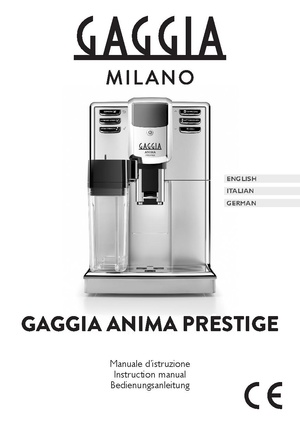
|
| Parts Diagram: | 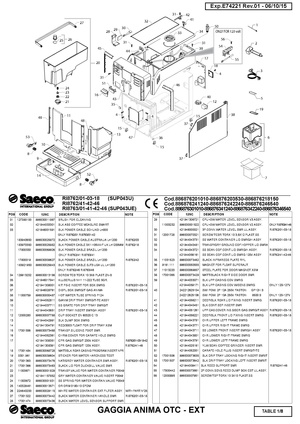
|
| Service Manual | 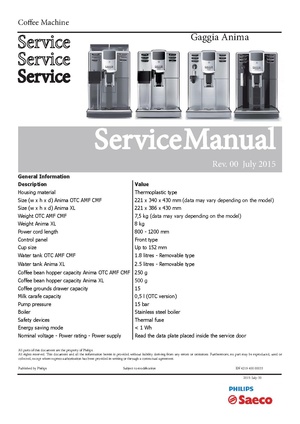
|
| Startup Guide: | Not Available |
Specifications
| Basic Specs | |
|---|---|
| Width: | 8.7 in. |
| Height: | 13.38 in. |
| Depth: | 16.93 in. |
| Weight: | 16 lbs |
| Watts: | 1400 |
| Volts: | 120 |
| Housing | |
| Housing Material: | Stainless Steel/ABS Plastic |
| Bean Hopper Material: | Plastic |
| Drip Tray Material: | Plastic |
| Drip Tray Cover Material: | Stainless Steel |
| Drip Tray Capacity: | 24 oz |
| Ground Coffee Container Material: | Plastic |
| Drain Line Adaptable: | No |
| Spend Coffee Capacity: | 15 |
| Easy To Rotate: | No |
| Tall Legs: | No |
| Power Cord Length: | 48 in. |
| Cup Height | |
| Adjustable Height: | Yes |
| Max Height: | 5.9 in. |
| Min Height: | 4.33 in. |
| One Touch Cappuccino | |
| One Touch Capable: | Yes |
| One Touch Device: | Milk Carafe |
| Adjustable Froth Quality: | No |
| Height: | 5.8 in. |
| Separate Steam Wand: | No |
| Programmable: | Yes |
| Milk Carafe Type: | Plastic Attachable |
| Self-Cleaning: | Yes |
| Dishwasher Safe: | No |
| Water Source | |
| Reservoir or Plumbed: | Reservoir |
| Reservoir Capacity: | 60 oz. |
| Reservoir Material: | Plastic |
| Reservoir Access: | Top |
| Reservoir Removable: | Yes |
| Water Filter: | Mavea Intenza |
| Water Level Visible: | No |
| Controls | |
| Adjustable Coffee Strength: | Yes |
| Type of Controls: | Push Button |
| Display Type: | LCD |
| Programmable Brewing: | Yes |
| Temperature Control: | 3 Settings |
| Adjustable Coffee Dosage: | Yes |
| Digital Display: | Yes |
| Clock/Timer: | No |
| Coffee Dosage Quantity: | 6.5-11 grams |
| Cup Volume Control: | Yes |
| Flow Control: | Yes |
| Auto Shut Off: | Yes |
| Bypass Doser: | Yes |
| Pre-Infusion: | Yes |
| Low Water Warning: | Yes |
| Energy Saving Mode: | Yes |
| Descale Warning: | Yes |
| Multiple Programmability: | Yes |
| Pressure Gauges: | No |
| Brew Temp Display: | No |
| Brew Group | |
| Material: | Plastic |
| Type: | Automatic |
| Removable: | Yes |
| Self-Cleaning: | Yes |
| Boiler Data | |
| Number Of Boilers: | 1 |
| Brew And Steam Simultaneously: | No |
| Rapid Steam: | Yes |
| Type: | Thermoblock |
| Wattage: | 1400 |
| Volume: | Low |
| Material: | Stainless Steel Lined Aluminum |
| Element Location: | External |
| Insulated: | No |
| Pump Data | |
| Type: | Vibration |
| Max Pressure: | 15 Bar |
| Self-Priming: | Yes |
| Grinder Data | |
| Number Of Grind Settings: | 5 |
| Hopper Capacity: | 8.8 oz. |
| Burr Type: | Flat |
| Burr Material: | Ceramic |
| Freshness Lid: | No |
| Details | |
| Maintenance Alerts: | Yes |
| Country of Manufacture: | Romania |
| NSF Certified: | No |
| Recommended Application: | Home Use |