|
|
| (12 intermediate revisions by 4 users not shown) |
| Line 1: |
Line 1: |
| − | The Gaggia Classic is a [https://en.wikipedia.org/wiki/Espresso_machine#Automation semi-automatic] espresso machine which has been a favorite in the industry for home espresso brewing.{{Description-Table
| + | {{Getting-Started |
| − | |title = Gaggia Classic | + | |brand = Gaggia |
| − | |machine_image = [[File:GAGGIA CLASSIC.jpg|400px|none]] | + | |machine_type = Semi-Automatics |
| − | |manufacturer = [[:Category:Gaggia|Gaggia]] | + | |product_page_title = Gaggia Classic |
| − | |model_name = Classic | + | |product_banner = [[File:Wiki_ProductPageBanner_1200x175_GaggiaClassic_v1.jpg| link=]] |
| − | |model_number = 14101 | + | |page_type = set up |
| − | |type = [[:Category:Semi-Automatics|Semi-Automatic]] | + | |section1 = The Unboxing |
| − | |buy_button = Yes | + | |anchor1 = Install |
| − | |button_size = 400px | + | |section2 = Get the Water Flowing |
| − | |button_link = https://www.wholelattelove.com/products/gaggia-classic-ss-brushed-stainless-steel-semi-automatic-espresso-machine | + | |anchor2 = Priming |
| | + | |section3 = Get it Good & Hot |
| | + | |anchor3 = Heating |
| | + | |section4 = Get Brewing |
| | + | |anchor4 = Brewing |
| | + | |section5 = Get Frothing |
| | + | |anchor5 = Frothing |
| | + | |section6 = The Latte Art Wand |
| | + | |anchor6 = Latte Art Wand |
| | }} | | }} |
| | + | ---- |
| | + | ===The Unboxing=== |
| | + | {{Content-Columns |
| | + | |column_1 = |
| | + | # Get the power cord and the accessories out of the water tank. |
| | + | #* Remove the drip tray. |
| | + | #* Remove the metal tube sticking down on the left side of the machine, between the drip tray and the top of the machine. |
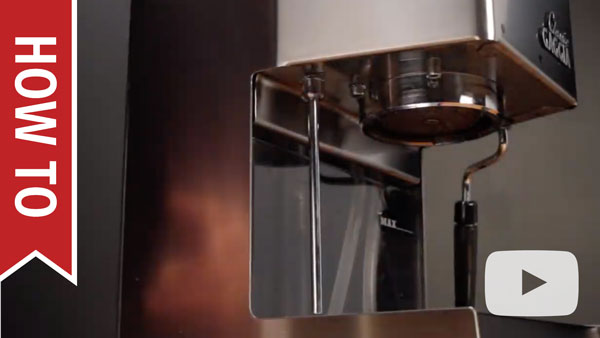
| | + | #:Be careful not to twist the metal tube, rather pull straight down. If you accidentally twist and the decompression duct becomes disconnected, follow the instructions in the video on the right to reinstall it. |
| | + | #* Remove the water tank and retrieve the accessories. Plug the cord into the back of the machine. |
| | + | # Plug the machine directly into an outlet. Don't plug it into surge protectors, extension cords, or timers. |
| | + | # Fill the water tank to the max fill line, making sure the inlet/outlet tubes are submerged. |
| | + | |column_2 = |
| | + | [[File:Wiki-YT-HowToReplaceGaggiaDecompressionDuct.jpg|center|link=https://www.youtube.com/watch?v=e5Rhnu5FC2c&feature=youtu.be]] |
| | + | |media_caption = |
| | + | How to Attach the Decompression Duct |
| | + | }} |
| | + | ---- |
| | + | {{Content-Columns |
| | + | |column_1 = |
| | + | ===Get the Water Flowing=== |
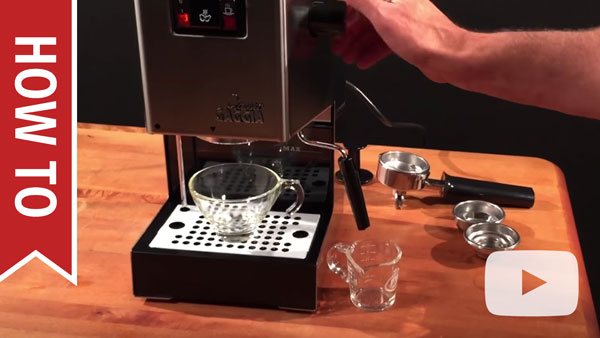
| | + | # Place a cup under the steam wand. Turn the steam knob to the open position. |
| | + | # Flip the power, brew, and steam switches so they're all on. |
| | + | # Dispense water until 3-4 oz. has been dispensed into the cup. |
| | + | <!-- Hiding this for now, until we get better force priming instructions. #* If no water is coming out after 30 seconds, is water leaving the tank? |
| | + | #* If water is not leaving the tank, power off the machine and begin force priming. This is normal. It happens. |
| | + | #* Take the priming pump and insert it into the inlet line. Facing the machine, the inlet line is the leftmost of the two. --> |
| | + | # Once the machine is primed, close the knob and switch the steam and brew buttons off. |
| | + | |column_2 = [[File:Wiki-YT-HowToPrimeYourGaggiaClassic.jpg|center|link=https://youtu.be/ca0LOoReSY8?t=339]] |
| | + | |media_caption =Gaggia Classic: Installation |
| | + | }} |
| | + | ---- |
| | + | {{Content-Columns |
| | + | |column_1 = |
| | + | ===Get it Good & Hot=== |
| | + | It's time to get heated. |
| | | | |
| − | ==Machine Set-Up/New Users==
| |
| | | | |
| − | A key advantage of Semi-Automatic and Prosumer over Super-Automatic units is that you have much more direct control over the unit. For the same reason there is a learning curve for getting the best results. Having a working knowledge of the machine before using it will help ensure a satisfying experience, increase the longevity of the unit, and prevent possible issues/damage that can result from misuse. The information in this section will cover machine set up and basic use. To start the video below provides five useful tips to help you understand your semi-automatic unit:
| + | With the machine on, the boiler will be at temperature within a few minutes. We suggest waiting 10-15 minutes before using the machine, with the portafilter attached while the machine heats. Take this time to enjoy some light reading or call a friend to boast about your new espresso machine. |
| − | {{#ev:youtube|https://www.youtube.com/watch?v=o1iV6XAFgCg|480|center}}
| + | |
| | | | |
| − | ===Descaling===
| |
| | | | |
| − | Before going into the set up of the machine it's best to review this topic because of its importance. While not directly related to the setup of the machine it is the single most important aspect of owning a Semi-Automatic espresso machine. Keeping up with the regular maintenance of the machine will ensure that the machine will continue operating without issue. Descaling instructions and other maintenance information can be found in the [[#Cleaning & Maintenance|cleaning and maintenance]] section of this article.
| + | Just don't leave it on forever. The machine won't like that. |
| | + | |column_2 = [[File:Get_hot.jpg|center|600px|caption]] |
| | + | |media_caption = |
| | + | }} |
| | + | ---- |
| | + | {{Content-Columns |
| | + | |column_1 = |
| | + | ===Get Brewing=== |
| | + | # Grind your beans into the portafilter. |
| | + | # Tamp your grounds with about 30 lbs. of pressure. |
| | + | # Lock the portafilter into the brew group. |
| | + | # Flip the brew switch down to brew. |
| | + | #* Aim for 2 to 2.5 oz. in about 25 seconds. |
| | + | |column_2 = [[File:Wiki-YT-BasicEspressoTechnique-DialingGrindSize.jpg|center|link=https://youtu.be/iwHdm5GtNHI]] |
| | + | |media_caption = How To: Basic Espresso Technique - Dialing in Grind Size |
| | + | }} |
| | + | ---- |
| | | | |
| − | ===First Time Use=== | + | ===How to Use Gaggia Espresso Machine Filter Baskets=== |
| | + | {{Content-Columns |
| | + | |column_1 = |
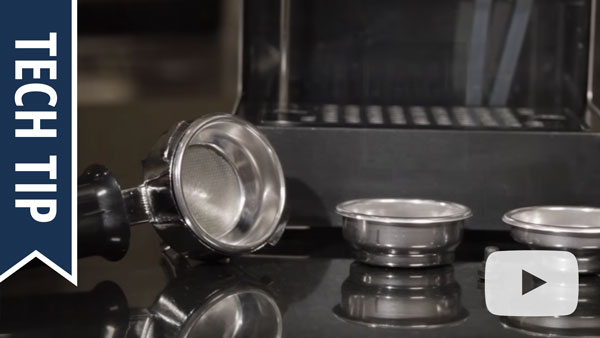
| | + | For new users, we recommend that you pop in the pressurized basket and 2-way pin into your portafilter. The 2-way pin is a small, black plastic piece that should be installed beneath the brew basket, with the tapered side down. The pressurized basket takes it easy on you when it comes to the nuance of tamping, grind size, and dosing. To swap baskets, you can use the lip of a spare basket to pry the installed basket out of the portafilter. |
| | | | |
| − | The machine manual provides a thorough walk-through of the set-up of the unit, but there's so much information it can be mystifying. In this section we will walk you through the most important points of the machine setup.
| + | For now, stick with double shots until you're comfortable pulling a shot. If you are having trouble getting good results, give us a call. We've got your back. |
| | + | |column_2 = |
| | + | [[File:Wiki-YT-HowToUseGaggiaEspressoMachineFilterBaskets.jpg |center|link=https://youtu.be/DSZR7YwPFvA]] |
| | + | |media_caption = |
| | + | How to Use Gaggia Filter Baskets |
| | + | }} |
| | | | |
| − | ====Initial Setup==== | + | ---- |
| | + | {{Content-Columns |
| | + | |column_1 = |
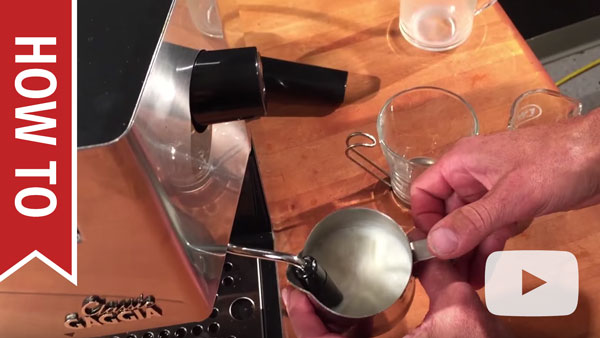
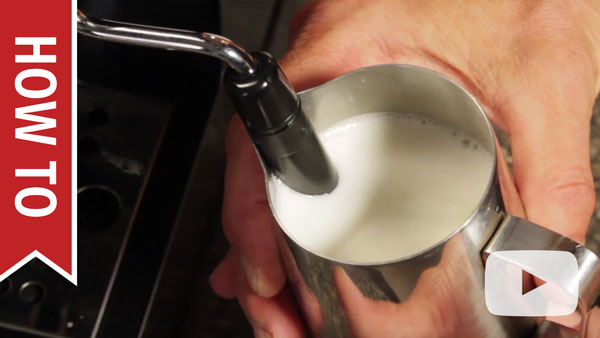
| | + | ===Get Frothing=== |
| | + | If you plan on steaming with the machine, but don't know how, we've got some tips for you. |
| | | | |
| − | When the machine is first unpacked there are several things to consider before even powering the unit on. When first unpacking the unit you may notice water or grounds in the machine. This is normal as all machines are manufacturer tested before leaving the factory.
| |
| | | | |
| − | #First the power cord will need to be retrieved and inserted into the back of the machine. The power cord is typically packaged in the water tank of the machine along with other accessories. | + | #Press the steam button. Wait to reach temperature. Easy. |
| − | ##Remove the drip tray from the machine. | + | #Purge the steam wand. |
| − | ##Remove the decompression duct. This is the metal tube sticking down on the left side of the machine. It blocks access to the water tank while inserted. Simply pull down on the tube and it will come out of the machine. Do not twist/turn the tube or it will cause the bolt that holds the tube into place to become unthreaded. Should you accidentally unthread the connecting bolt the video below shows how to re-attach the bolt. To reinstall the tube simply push it back into the same hole. {{#ev:youtube|https://www.youtube.com/watch?v=e5Rhnu5FC2c|480|center}} | + | #* Open the steam knob. Leave the steam knob open until mostly steam is jetting out. |
| − | ##Remove the water tank and take the accessories out of it. The power cord should also be here. Plug the cord into the back of the machine.
| + | #* Close the steam knob. |
| − | ##Before reinstalling all of the parts you may want to take this opportunity to fill the water tank. The water tank can also be filled after the parts are reinstalled using the funnel at the top back of the machine. Make sure to have both the inlet and outlet tubes sitting in the tank when you reinstall it.
| + | # You are now ready to begin frothing. |
| − | #Plug the machine directly into an outlet. Because this is a high power unit it should not be plugged into surge protectors, extension cords, or timers. The cord of the machine can be removed from the machine itself. Please make sure the cord is secure on the end attached to the machine.
| + | |column_2 =[[File:Wiki-YT-HowToFrothingWithYourGaggiaClassic.jpg|center|link=https://youtu.be/jCn9NjTuGLM?t=305]] |
| − | #Fill the water tank to the max fill line, making sure the inlet/outlet tubes are submerged. You are now ready to prime the machine using the instructions in the next section. Do not power the machine on until the priming instructions have been followed.
| + | |media_caption =Gaggia Classic: How to Use |
| | + | }} |
| | + | ---- |
| | + | {{Content-Columns |
| | + | |column_1 = |
| | + | ===The Latte Art Wand=== |
| | | | |
| − | ====Priming====
| + | For more stylish creations and finer control while frothing milk, the Latte Art Pannarello Wand attachment turns the Classic into a tiny Barista. |
| − | | + | |column_2 = [[File:Wiki-YT-HowToGaggiaLatteArtPannarelloWand.jpg|center|link=https://www.youtube.com/watch?v=Suk60t1Bdhk]] |
| − | Before the machine can be used it must be properly primed and filled with water. Do not power the machine on without first following the steps below.
| + | |media_caption =How To: The Gaggia Latte Art Pannarello Wand |
| − | | + | |
| − | #Place a cup under the steam wand.
| + | |
| − | #Check to make sure both the inlet/return lines are in the water tank and submerged.
| + | |
| − | #Turn the steam knob to the open position.
| + | |
| − | #Press the power, brew, and steam switches all on. This will put the machine into hot water dispensing mode. Water will dispense from the wand instead of steam.
| + | |
| − | #You should now hear the pump vibrating. After 30 seconds water should start to dispense from the steam wand. Let the water continue to flow out until 3-4 oz. has been dispensed into the cup. If no water is coming out after 30 seconds look into the water tank to see if water is leaving the tank. If there isn't, immediately power the machine off and follow the force priming instructions below. Force priming is normal and expected as the machines are drained to prevent leaking/freezing damage during shipping of the product. The main difference from the video instructions is that you will be inserting the priming pump into the inlet line instead of a socket. The inlet line is the line that has a flat edge, and goes into the left hole leading to the inside of the machine. {{#ev:youtube|https://www.youtube.com/watch?v=_-4bhF4UNVA|480|center}}
| + | |
| − | #Once the machine is primed close the knob and shut the steam/brew buttons off.
| + | |
| − | | + | |
| − | ====Heating====
| + | |
| − | | + | |
| − | The machine is now ready to heat. While the boiler will technically be at temperature within a few minutes and the brew indicator light will come on, the machine is not fully heated yet. We suggest waiting 10-15 minutes before using the machine, and having the portafilter attached during heating. This will allow sufficient time for heat to seep into the entire machine, resulting in less temperature loss from boiler to cup during brewing, and hotter shots.
| + | |
| − | | + | |
| − | One important thing to note is that the machine should not be left on for long periods of time without use. This is a small home unit and not designed to be left on for long periods of time. Doing so can cause premature wear of parts, particularly plastic/rubber gaskets and o-rings. It may also cause the machine to overheat and the boiler safety fuse to trip, which will prevent the machine from operating until the fuse is replaced.
| + | |
| − | | + | |
| − | ===Brewing & Baskets===
| + | |
| − | | + | |
| − | The video below discusses the baskets that the machine comes with and what their differences are. For new users the use of pressurized baskets is highly suggest, as it helps compensate any errors in tamp, grind, or dosing. If you are having trouble getting good shot results please consult the section of this article which discusses [[#No Crema or Bad Tasting Shots|brewing technique]].
| + | |
| − | {{#ev:youtube|https://www.youtube.com/watch?v=DSZR7YwPFvA|480|center}}
| + | |
| − | | + | |
| − | The literature that comes with the machine regarding the pressurized baskets is contradictory as instructions are included for both the US and European versions of the machine. The US version comes with pressurized baskets, which require the use of the 2 way pin (also known as the frothing jet device). This is a small black plastic piece that should be installed beneath the brew basket, with the tapered side down. Failure to use this pin with the pressurized baskets will cause coffee to spray from the machine during brewing.
| + | |
| − | | + | |
| − | We also suggest working with doubleshots specifically until you are familiar with the machine and pulling shots. Single shots are notoriously hard to brew, and should only be attempted once double shots can be consistently pulled.
| + | |
| − | | + | |
| − | The easiest way to swap baskets is to take one of the extra baskets and flip it over. Then use the lip of the extra basket to pry around the edges of the installed basket, which will help it pop out.
| + | |
| − | | + | |
| − | ===Pannarello & Steaming=== | + | |
| − | | + | |
| − | If you plan on steaming with the machine it is easy to activate the steam function and prepare the machine for frothing.
| + | |
| − | | + | |
| − | #Press the steam button. The machine will switch to using the steam thermostat, which will cause the boiler to heat to steam temperatures. The brew light will indicate when the machine has reached steam temperature.
| + | |
| − | #Before steaming you will want to purge the steam wand. Since the wand is room temperature the steam exiting the boiler will immediately condense back into water. To remove this water and reduce the amount of water mixed with steam during frothing we advise purging. To purge simply open the steam knob once the machine has reached steam temperature. Direct the wand into the drip tray or place a cup underneath it to catch the water. Leave the steam knob open until you have mostly steam coming out of the wand. Close the steam knob.
| + | |
| − | #The wand is now hot, and you are ready to begin frothing. A chilled frothing pitcher will give the best results for frothing.
| + | |
| − | #After frothing is completed the boiler needs to be replenished. This machine is not an auto-fill machine, so if the boiler is not manually refilled after frothing the machine can overheat. Activate the hot water function by making sure the brew, steam, and power buttons are all pressed down. Then open the knob and dispense 1-2 oz. of water through; this will replenish the boiler and clean the inside of the wand.
| + | |
| − | #Close the knob, and turn the steam and brew buttons off. Do not leave the steam button on for long periods of time as this can cause the machine to overheat.
| + | |
| − | | + | |
| − | If you plan on using the pannarello attachment during frothing it will need to be attached properly. Please refer to the video below for instructions on how to properly attach this nozzle.
| + | |
| − | {{#ev:youtube|https://www.youtube.com/watch?v=5yUuKvEtAkk|480|center}}
| + | |
| − | | + | |
| − | If you run into trouble getting a good froth please refer to the section of this article which covers [[#Difficulty Frothing|frothing technique]].
| + | |
| − | | + | |
| − | ===Portafilter Position=== | + | |
| − | | + | |
| − | On new machines the portafilter will not fit perpendicular to the machine. This is because the grouphead gasket requires time to wear in before this can happen. As long as you can get the portafilter hand tight onto the machine and brew without leaking then the machine is operating properly. Do not use excessive force when attaching the portafilter or it can damage or break the grouphead gasket. The grouphead gasket will wear in in 1-3 months of use, allowing the portafilter to sit perpendicular once worn enough.
| + | |
| − | | + | |
| − | ===Brew Unit/Pump Noises===
| + | |
| − | | + | |
| − | When the pump of the machine activated for brewing, refilling, and hot water dispensing it is going to make a loud humming noise. The machine utilizes a vibration style pump. This style pump produces high pressures despite being compact. The pump achieves this through rapid vibration of internal parts, which produces a loud humming noise.
| + | |
| − | | + | |
| − | == Cleaning & Maintenance ==
| + | |
| − | | + | |
| − | {{Maintenance-Gaggia-Semi-Automatic}}
| + | |
| − | | + | |
| − | == Troubleshooting ==
| + | |
| − | | + | |
| − | ===No Crema or Bad Tasting Shots===
| + | |
| − | | + | |
| − | {{Troubleshooting-No-Crema-Bad-Shots}}
| + | |
| − | | + | |
| − | | + | |
| − | ===Difficulty Frothing===
| + | |
| − | | + | |
| − | {{Troubleshooting-Pannarello-Frothing}}
| + | |
| − | | + | |
| − | | + | |
| − | ===Flow Issues===
| + | |
| − | | + | |
| − | The first place to start with any flow issue is cleaning the machine. Before going through these steps please make sure the machine is cleaned according to the [[#Cleaning & Maintenance|Cleaning & Maintenance]] section of this article.
| + | |
| − | | + | |
| − | {{Troubleshooting-Gaggia-Classic-No-Steam}}
| + | |
| − | | + | |
| − | {{Troubleshooting-Gaggia-Classic-Brew-Blocked}}
| + | |
| − | | + | |
| − | {{Troubleshooting-Gaggia-Classic-Steam-Blocked}}
| + | |
| − | | + | |
| − | {{Troubleshooting-Gaggia-Semi-Tube-Tank-No-Flow}}
| + | |
| − | | + | |
| − | | + | |
| − | ===Machine Is Leaking===
| + | |
| − | | + | |
| − | {{Troubleshooting-Gaggia-Semi-Missing-2Way}}
| + | |
| − | | + | |
| − | {{Troubleshooting-Gaggia-Classic-Bad-Gasket}}
| + | |
| − | | + | |
| − | {{Troubleshooting-Gaggia-Classic-Head-Leak}}
| + | |
| − | | + | |
| − | {{Troubleshooting-Gaggia-Classic-Foot-Leak}}
| + | |
| − | | + | |
| − | {{Troubleshooting-Gaggia-Classic-Wand-Leak}}
| + | |
| − | | + | |
| − | | + | |
| − | ===Machine Not Heating Or Powering On===
| + | |
| − | | + | |
| − | {{Troubleshooting-Gaggia-Classic-No-Power}}
| + | |
| − | | + | |
| − | {{Troubleshooting-Gaggia-Semi-Brew-Cold}}
| + | |
| − | | + | |
| − | {{Troubleshooting-Gaggia-Semi-Steam-Cold}}
| + | |
| − | | + | |
| − | {{Troubleshooting-Gaggia-Semi-On-No-Heat}}
| + | |
| − | | + | |
| − | | + | |
| − | ===Pannarello Nozzle Not Staying Attached===
| + | |
| − | | + | |
| − | If the pannarello nozzle attachment is not staying on the machine, or it keeps blowing off during steaming, then it is either not attached properly or is plugged with milk residues and needs to be cleaned. Please refer to the cleaning and attachment instructions covered in the [[#Difficulty Frothing|frothing issues]] section of this article.
| + | |
| − | | + | |
| − | | + | |
| − | ===Portafilter Handle Not Fitting On Machine===
| + | |
| − | | + | |
| − | {{Troubleshooting-Gaggia-Semi-Portafilter}}
| + | |
| − | | + | |
| − | | + | |
| − | ===Machine Is Making Loud Noises===
| + | |
| − | | + | |
| − | #If the noises are occurring specifically during steaming, and it sounds like a loud pinging, then the sleeve insert on the pannarello assembly is not in the proper position:[[File:ALL_MODELS_Pannarello_No_Froth_Fix.pdf]]
| + | |
| − | #If there is a knocking or metallic banging sound while the pump is activated then the pump is probably off of its mounting. You can use the pump replacement instructions as a guide to help reposition the pump correctly: [[File:CLASSIC_Replacing_The_Pump.pdf]]
| + | |
| − | | + | |
| − | | + | |
| − | ===Too Much Steam/Milk Boiling===
| + | |
| − | | + | |
| − | {{Troubleshooting-Super-Steam-Too-Hot
| + | |
| − | |steam_test_instr = [[File:ALL MODELS Steam Test.pdf|250px|thumbnail|center|Steam Test Instructions]]
| + | |
| | }} | | }} |
| − |
| |
| − |
| |
| − | ==Diagrams & Manuals==
| |
| − |
| |
| − | {{Support-Documents-Gaggia-Classic}}
| |
| − |
| |
| − | ==Specifications==
| |
| − |
| |
| − | {{Specifications-Gaggia-Classic}}
| |
| − |
| |
| − | <!-- Categories -->
| |
| | [[Category:Gaggia]] | | [[Category:Gaggia]] |
| − | [[Category:Semi-Automatics]]
| |