Difference between revisions of "Profitec Pro 500"
From Whole Latte Love Support Library
| Line 1: | Line 1: | ||
| − | The Profitec Pro 500 is a [[:Category:Prosumer|Prosumer]] espresso machine | + | The Profitec Pro 500 is a [[:Category:Prosumer|Prosumer]] espresso machine designed by Profitec to be both functional and user friendly. {{Description-Table |
|title = Profitec Pro 500 | |title = Profitec Pro 500 | ||
|machine_image = [[File:PROFITEC_PRO_500.jpg]] | |machine_image = [[File:PROFITEC_PRO_500.jpg]] | ||
|manufacturer = Profitec | |manufacturer = Profitec | ||
|model_name = Pro 500 | |model_name = Pro 500 | ||
| − | |||
|type = [[:Category:Prosumers|Prosumer]] | |type = [[:Category:Prosumers|Prosumer]] | ||
}} | }} | ||
| Line 10: | Line 9: | ||
== Machine Description == | == Machine Description == | ||
| − | + | As part of their endeavor to bridge the gap between professional technology and engineering, the Profitec Pro 500 includes numerous high quality components such as the much renowned E61 brew group, copper and braided steel water tubing, and an Ulka EX5 vibration pump. It is also wrapped in attractive and durable stainless steel housing, sporting two front mounted pressure gauges for brew and steam. The Pro 500 aims to impress with both form and function. Internally, everything rests on the one-piece steel frame that runs from the back of the machine all the way to the drip tray. On top is a large, passively heated cup warmer that you can remove to access the water reservoir. Lastly, Profitec has insulated the hot water and steam wands have also been similarly insulated to prevent accidental burns. | |
| + | |||
| + | Brewing is handled in a combined 1400 W stainless steel boiler, Ulka EX5 vibration pump, and E61 group head. The E61 is made of solid brass and constantly heated by the heat exchanger and thermosiphon system which circulates hot water through the group head. The thermosiphon also ensures that you will always be brewing with fresh water, pulled from the reservoir instead of the boiler. Having an E61 brew group is advantageous in that it not only lends itself tremendously to maintaining temperature stability but also allows for pre-infusion of the grounds. This is all made possible by the built-in pre-infusion cylinder which allows water to be directed into the portafilter at subdued pressure, wetting the grounds first prior to reaching the ideal pressure for espresso extraction. | ||
| + | |||
| + | Steaming is accomplished by the Pro 500’s insulated two-hole steam wand and can be executed in tandem thanks to the heat exchanger system. Another feature of note are the spring loaded steam and hot water valves. These valves are unique because they don’t need to be fully opened or closed to regulate the flow of steam/water. The way it works is that by turning the knobs, pressure is either added to or released from a spring that holds the valves shut, this prevents you from having to rotate the knobs numerous times to open or close the valves. | ||
| + | |||
| + | To help prevent damage to the machine, the water reservoir is fitted with a low volume sensor that automatically shuts off the boiler to keep it from running dry. The Pro 500 will alert you of low water volume with the orange light located directly below the power switch. | ||
| Line 16: | Line 21: | ||
===Getting Started=== | ===Getting Started=== | ||
| + | |||
| + | {{#ev:youtube|https://www.youtube.com/watch?v=YjyE2B4o2Ak|480|center}} | ||
===Adjusting Brew Pressure=== | ===Adjusting Brew Pressure=== | ||
| − | = | + | {{#ev:youtube|https://www.youtube.com/watch?v=uYKDQ3Stb3k|480|center}} |
===Draining The Boilers=== | ===Draining The Boilers=== | ||
| − | === | + | {{#ev:youtube|https://www.youtube.com/watch?v=ln25nJbyQQc|480|center}} |
| + | |||
| + | ===Complete Tear-Down=== | ||
| + | |||
| + | {{#ev:youtube|https://www.youtube.com/watch?v=pYmwoACLuQc|480|center}} | ||
| Line 29: | Line 40: | ||
{{Maintenance-Prosumer | {{Maintenance-Prosumer | ||
| − | |single_heat_exchange = | + | |single_heat_exchange = Yes |
| − | + | |group_gasket_link = Replacement group gaskets can be purchased [https://www.wholelattelove.com/products/profitec-group-gasket here]. Instructions for replacing the group gasket can be found on pp.21-22 of the machine manual. | |
| − | + | |descaling_products = Alternatively, Profitec offers brewgroup cleaning tablets which can be used in the same way as backflushing powder. The brew unit cleaning tablets can be purchased [https://www.wholelattelove.com/products/profitec-brew-group-cleaning-tablets here]. | |
| − | |group_gasket_link = | + | |
| − | |descaling_products = | + | |
| − | + | ||
}} | }} | ||
| Line 54: | Line 62: | ||
{{Troubleshooting-Prosumer-No-Steam | {{Troubleshooting-Prosumer-No-Steam | ||
| − | |steam_gauge = | + | |steam_gauge = Yes |
| − | |vacuum_relief_instr = | + | |vacuum_relief_instr =####Unplug the machine and make sure it is cooled down. Remove the cover of the machines. |
| − | |hls_reset_instr = | + | ####Once the cover is removed the top of the vacuum relief valve will need to be removed. The vacuum relief valve is on top of the boiler, listed as part 20 on p.6 of the parts diagram. Because the vacuum relief valve is thread bonded into the boiler it will be easier to just remove the top of the valve, like shown in the photo below. This can be done with a socket wrench, or an open ended wrench. The relief valve will have two nuts, a thicker nut on top and a thinner nut on the bottom. Unscrew the thicker top nut. [[File:PRO 500 Vacuum Relief Top Removed.jpg|200px|thumbnail|center|Relief valve with top removed.]] |
| − | | | + | ####You will be able to access the internal valve components now. The separate valve components will look like this: [[File:PRO 500 Vacuum Relief Parts Blowout.jpg|200px|thumbnail|center|Vacuum Relief Parts]] |
| − | |pstat_adjust_instr = | + | ####:The video below discusses what these valve components do and how to clean them. {{#ev:youtube|https://www.youtube.com/watch?v=L9P0t7__9ZM|480|center|||start=137}} |
| − | | | + | |hls_reset_instr = Instructions for resetting the high limit switches are found in the video below: {{#ev:youtube|https://www.youtube.com/watch?v=pYmwoACLuQc|480|center|||start=475}} |
| + | |pstat_adjust_instr = Instructions for adjusting the pressure stat can be found in the video below: {{#ev:youtube|https://www.youtube.com/watch?time_continue=1&v=KHFeX2VHu74|480|center}} | ||
}} | }} | ||
Revision as of 12:51, 19 April 2016
The Profitec Pro 500 is a Prosumer espresso machine designed by Profitec to be both functional and user friendly.
| Profitec Pro 500 |
|---|

|
| Manufacturer: Profitec |
| Model Name: Pro 500 |
| Type: Prosumer |
Machine Description
As part of their endeavor to bridge the gap between professional technology and engineering, the Profitec Pro 500 includes numerous high quality components such as the much renowned E61 brew group, copper and braided steel water tubing, and an Ulka EX5 vibration pump. It is also wrapped in attractive and durable stainless steel housing, sporting two front mounted pressure gauges for brew and steam. The Pro 500 aims to impress with both form and function. Internally, everything rests on the one-piece steel frame that runs from the back of the machine all the way to the drip tray. On top is a large, passively heated cup warmer that you can remove to access the water reservoir. Lastly, Profitec has insulated the hot water and steam wands have also been similarly insulated to prevent accidental burns.
Brewing is handled in a combined 1400 W stainless steel boiler, Ulka EX5 vibration pump, and E61 group head. The E61 is made of solid brass and constantly heated by the heat exchanger and thermosiphon system which circulates hot water through the group head. The thermosiphon also ensures that you will always be brewing with fresh water, pulled from the reservoir instead of the boiler. Having an E61 brew group is advantageous in that it not only lends itself tremendously to maintaining temperature stability but also allows for pre-infusion of the grounds. This is all made possible by the built-in pre-infusion cylinder which allows water to be directed into the portafilter at subdued pressure, wetting the grounds first prior to reaching the ideal pressure for espresso extraction.
Steaming is accomplished by the Pro 500’s insulated two-hole steam wand and can be executed in tandem thanks to the heat exchanger system. Another feature of note are the spring loaded steam and hot water valves. These valves are unique because they don’t need to be fully opened or closed to regulate the flow of steam/water. The way it works is that by turning the knobs, pressure is either added to or released from a spring that holds the valves shut, this prevents you from having to rotate the knobs numerous times to open or close the valves.
To help prevent damage to the machine, the water reservoir is fitted with a low volume sensor that automatically shuts off the boiler to keep it from running dry. The Pro 500 will alert you of low water volume with the orange light located directly below the power switch.
Basic Usage
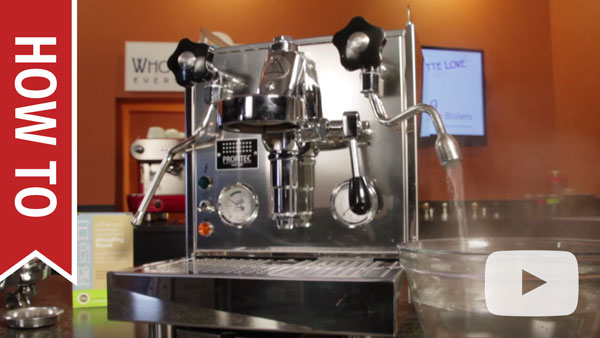
Getting Started
Adjusting Brew Pressure
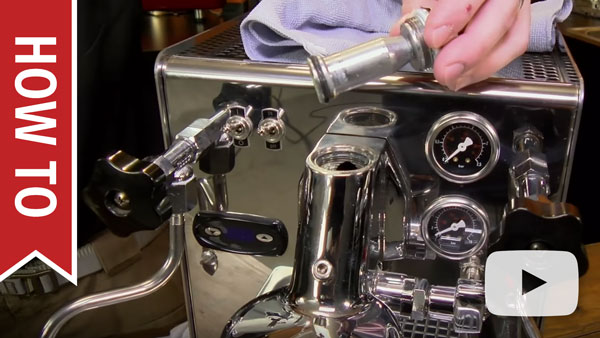
Draining The Boilers
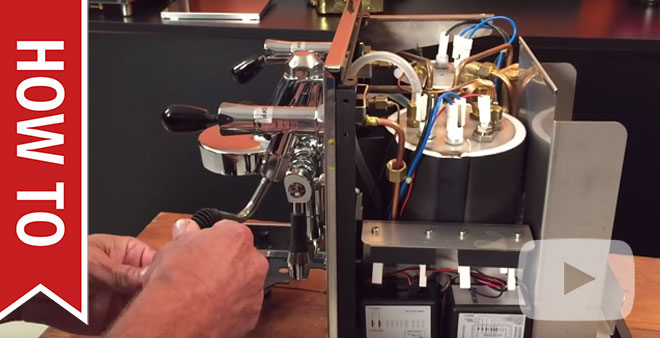
Complete Tear-Down
Cleaning & Maintenance
Proper machine maintenance is critical for machine function. Most machine failures are caused by lack of cleaning and many manufacturer warranties do not cover cleaning related breakdowns, so it is important to keep a regular maintenance schedule. Listed below is a suggested maintenance schedule for most Prosumer espresso machines:
Descaling
Single boiler heat exchange machines can be descaled by the consumer. Since descaling is not the primary cleaning method for prosumer style machines it does not need to be done frequently. Descaling can be done on a 3-4 month basis, or whenever the machine starts to display flow issues. If hard water is being used in the machine, or the machine gets heavy usage, the machine may need to be descaled more frequently. The video on the right describes the process for descaling a single boiler heat-exchange machine.
How to Descale a Heat Exchange Machine
Grouphead Cleaning
The grouphead should be taken apart on a monthly basis to remove scale buildup, remove coffee residues, and improve shot flavor.
How To Clean E61 Brew Group Mushroom, Jet and Top Valve
Steam Wand Cleaning
The steam wand should be cleaned daily once the machine is finished for the day. Milk residues quickly build up on the steam wand, so it's important to keep it clean to prevent blockages from forming.
How to Clean a Steam Wand
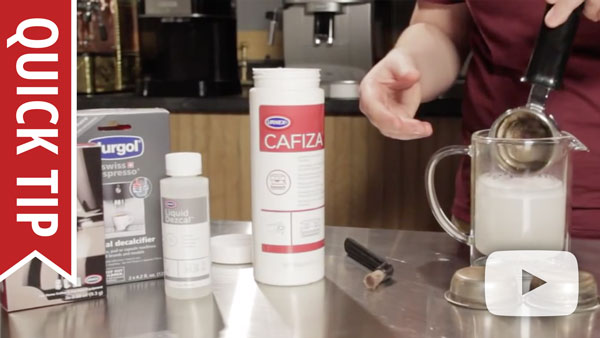
Recommended Cleaning Products
The best product for backflushing, cleaning grouphead components, and cleaning filter baskets is a backflushing powder like Urnex Cafiza. Alternatively, Profitec offers brewgroup cleaning tablets which can be used in the same way as backflushing powder. The brew unit cleaning tablets can be purchased here.
Cleaning Portafilter and Baskets
Troubleshooting
No Crema or Bad Tasting Shots
Typically, issues with crema or the flavor of the shot do not indicate a malfunction of the machine. Instead, this indicates that an adjustment needs to be made in the brewing process or that different beans need to be used.
The following articles review the different variables and offer solutions:
- Tamping The Correct Way and The Effects Of Tamping Pressure
- Grinding Coffee For Espresso
- It is important to use fresh beans, typically beans roasted within the past two weeks are best. Light and medium roasts are best for espresso brewing and richer crema. Storing beans properly is also important, more information can be found here.
If the behavior persists after reviewing these factors then the machine may need to be cleaned. Lack of cleaning can cause burned or bitter flavors, or create flow issues which can result in a weak shot. Navigate to the Cleaning & Maintenance icon above for more information.
Difficulty Frothing
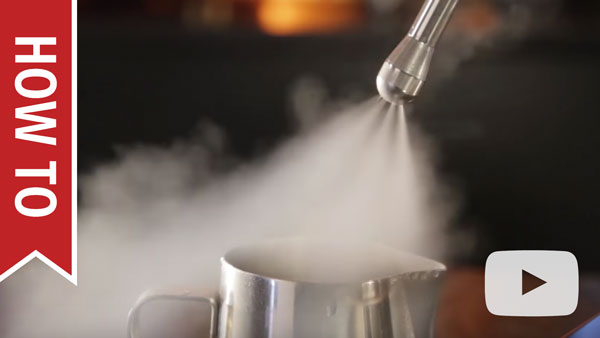
As with brewing, technique is critical to frothing well. Frothing is very sensitive to technique, which has a steep learning curve. If the machine is producing steam then an adjustment to technique may need to be made. The video on the right shows proper frothing technique.
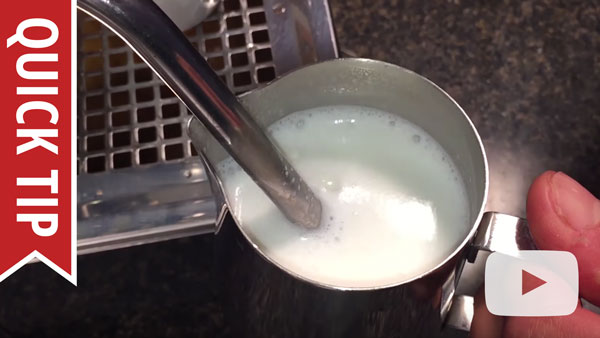
How to Froth and Steam Milk for Latte Art, Cappuccino and More
Many frothing mistakes are common missteps that result in poor or no froth. The video on the right identifies these mistakes and shows how to correct them.

6 Common Milk Frothing Mistakes
It is also important not to overheat your milk. The milk will have the sweetest and most velvety texture between 140-150 F°. As you froth past this point the milk will lose its sweetness, the froth will take on a gummier texture, and eventually the milk will scald and begin to taste burnt. The video on the right explains how to use a frothing thermometer so that the milk is kept within the ideal range.
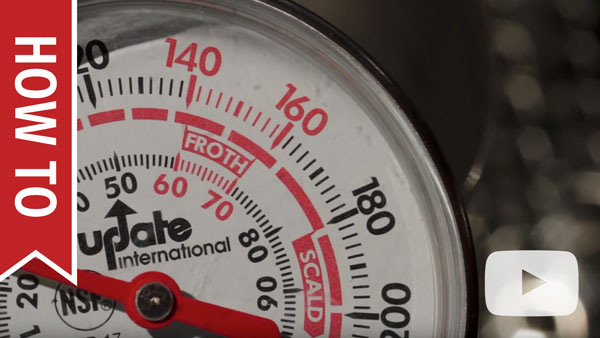
How To Use a Thermometer to Froth Milk
Flow Issues
The first place to start with any flow issue is cleaning the machine. Before going through these steps please make sure the machine is cleaned according to the Cleaning & Maintenance section of this article.
No Steam From Wand / No Hot Water From Hot Water Tap
- Check the brew function on the machine and see if water is able to flow through the machine for this function.
- If the brew water is not flowing, either refer to the No Flow At All section of this article
- If the brew water flows but is not hot, refer to the On But Not Heating section of this article.
- If there's no hot water from the hot water tap, check the steam function of the machine. If you are able to draw steam from the steam wand then the steam boiler must be pressurizing and heating.
- If there's no steam from the steam wand, check the hot water function of the machine. If you are able to draw hot water then the steam boiler must be pressurizing and heating, because hot water is expelled from the machine by steam pressure.
- Check the steam gauge of the machine. Does it show pressure? Typical range for the steam gauge should be 1-1.2 Bar.
- If the gauge is within the 1-1.2 Bar range, then the steam wand is likely blocked.
- Remove the tip from the steam wand and test the flow. If flow is restored, then the tip needs to be cleaned and reattached.
- If the flow is still blocked, then there may be a blockage in the steam wand itself. Clean the wand by using a pipe brush that has synthetic or plastic bristles; metal bristles can damage the wand. Then soak the wand in a solution of hot water and backflushing powder for ten minutes. Test flow again.
- If there still isn't flow, then there may be a blockage farther back in the steam circuit. The machine may need to be professionally cleaned to remove the blockage.
How to Diagnose Hot Water and Steam System Obstructions
- If the gauge is not reaching 1-1.2 Bar, but it is pressurizing some, then the steam pressurestat may just need to be adjusted.
- When adjusting the pressurestat, only slight adjustments should be made. Small adjustments will make a large difference in the pressure.
How To Adjust the Pressurestat
- If adjusting the pressurestat the first time did not raise the pressure, try adjusting it a few more times. If the pressure is still not raising after several adjustments then the pressurestat is likely broken and will need to be replaced.
- If the gauge sometimes reaches 1-1.2 Bar, but flicks around a lot or randomly drops to zero, or is always sitting at zero, then the steam boiler is not building pressure for some reason.
- If the machine is spewing a lot of steam from the top as it is heating up, then the vacuum relief valve may be stuck open. This valve is supposed to close once the machine produces enough steam pressure.
- Unplug the machine and make sure it is cooled down. Remove the cover of the machines.
- Once the cover is removed the top of the vacuum relief valve will need to be removed. The vacuum relief valve is on top of the boiler, listed as part 20 on p.6 of the parts diagram. Because the vacuum relief valve is thread bonded into the boiler it will be easier to just remove the top of the valve, like shown in the photo below. This can be done with a socket wrench, or an open ended wrench. The relief valve will have two nuts, a thicker nut on top and a thinner nut on the bottom. Unscrew the thicker top nut.
- You will be able to access the internal valve components now. The separate valve components will look like this:
- The video below discusses what these valve components do and how to clean them.


Vacuum Relief Tear Down Instructions
- The high limit switch may be tripped. The high limit switch is an internal killswitch which prevents damage to the machine caused by power surges or the machine overheating. Instructions for resetting the high limit switches are found in the video below:
- While the machine is open for resetting the high limit switch, check to make sure the wiring to the pressurestat isn't loose or disconnected. Reconnect the wires and see if the steam circuit pressurizes properly.
- If there weren't any disconnected wires, then the pressurestat will need to be replaced.
Poor Or No Flow From Grouphead
If the steam/hot water for the machine is working fine then there is likely something causing a blockage or pressure issue in the brew circuit. Otherwise refer to the section of this article that discusses the machine not flowing at all.
- If a water softener is attached to the inlet line of the machine, it may be preventing water from flowing. Please remove the softener and see if the flow improves.
- The grouphead is dirty and needs to be cleaned.
- Taking apart the grouphead for manual cleaning is the first step. This should be done on a monthly basis. The instructions can be found here.
- If cleaning the grouphead restores flow to the grouphead, the machine should be immediately backflushed to prevent further flow issues.
- There might be a kinked, broken, or loose line somewhere in the machine. Remove the top of the machine and take a look inside to see if you see any obvious issues.
- There might be an issue with one of the internal valve assemblies, which may need to be cleaned or replaced.
How To Clean E61 Brew Group Mushroom, Jet and Top Valve
No Hot Water From Tap
- Check the brew function on the machine and see if water is able to flow through the machine for this function.
- If the brew water and steam are not flowing either refer to the No Flow At All section of this article
- If the brew water flows but is not hot refer to the On But Not Heating section of this article.
- Check the steam function of the machine. If you are able to draw steam form the steam wand then the steam boiler must be pressurizing and heating.
- Remove the tip from the hot water tap and test the flow. If flow is restored then the tip needs to be cleaned and reattached. Mineral deposits can easily collect in the screen/holes of the hot water tap, so be sure to clean these thoroughly. Soaking the tip in a solution of hot water and backflushing powder will help remove residues more effectively.
- If the flow is still blocked then there may be a blockage in the wand of the hot water tap. Clean the wand by using a pipe brush that has synthetic or plastic bristles; metal bristles can damage the wand. Then soak the wand in a solution of hot water and backflushing powder for ten minutes. Test flow again.
- If the machine is spewing a lot of steam from the top as it is heating up then the vacuum relief valve may be stuck open. This valve is supposed to close once the machine produces enough steam pressure.
- The high limit switch may be tripped. The high limit switch is an internal killswitch which prevents damage to the machine caused by power surges or the machine overheating.
- While the machine is open for resetting the high limit switch, check to make sure the wiring to the pressurestat isn't loose or disconnected. Reconnect the wires and see if the steam circuit pressurizes properly.
- The steam pressurestat may just need to be adjusted. When adjusting the pressurestat only slight adjustments should be made. Small adjustments will make a large difference in the pressure. If adjusting the pressurestat the first time did not raise the pressure try adjusting it a few more times. If the pressure is still not raising after several adjustments then the pressurestat is likely broken and will need to be replaced.
No Flow At All
{Troubleshooting-Prosumer-No-Flow-At-All |water_supply = |sensor_instr = |pump_instr = |valve_instr = }
Machine Is Leaking
Between Portafilter & Grouphead
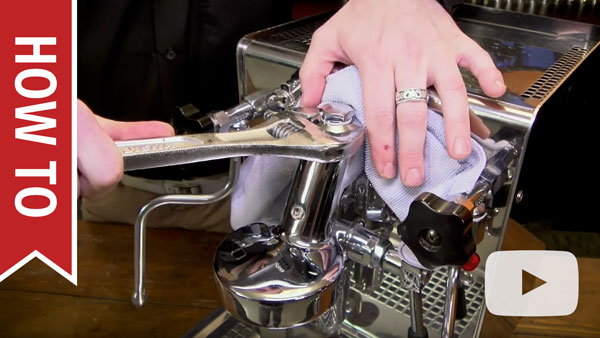
If the machine is leaking from between the grouphead and the portafilter then the grouphead gasket is either pushed out of place and needs to be reinserted properly, or the gasket is worn out. Typically, grouphead gaskets will wear out in approximately 6 months to a year depending on how heavily the machine is used. Premature wear to this gasket can be caused by using excessive force when attaching the portafilter. It is important to distinguish where the leaking is occurring. If the leaking is originating from farther up on the grouphead assembly and then draining down to where the portafilter is attached, then refer to the section of this article which discusses leaking from the grouphead.
If the leaking is coming from between the portafilter and grouphead where you twist the handle on, then the gasket will need to be replaced. You can try using the instructions to clean and reseat the current gasket. If that does not resolve the leak then the gasket will need to be replaced.
The gasket can get stuck in the grouphead from wear or excessive heat exposure. To remove the gasket take some self-tapping screws and partially screw them into the group gasket. Make sure not to go all the way through the gasket because you can scratch/dent the grouphead if you go too far. Then use a pair of pliers to pull on the screws and the gasket will pull out with them.
Replacing the Group Gasket on Your E61 Group Head
From The Grouphead
This section addresses leaking which is coming directly from the grouphead, known as the E-61 style. If the machine is experiencing leaking between the grouphead and the portafilter refer to the section of this article which discusses grouphead gasket issues.
- There are multiple valves and o-rings which are part of the E-61 itself. Depending on where the leak is coming from, it may indicate an issue with one or more of these assemblies.
- If the leak is coming from the top bolt assembly, then there is an o-ring that is loose, dirty, or worn out.
- If the leak is coming from the relief valve on the bottom of the E-61, then there may be an o-ring that is loose/dirty or a valve inside the E-61 that is stuck open.
- If cleaning and repairing a particular vale assembly has not worked, then it may be prudent to do a complete cleaning of the E-61 grouphead assembly.
- If the machine is leaking between the grouphead and the faceplate of the machine where the grouphead attaches, then there may be a bad gasket or loose bolts.
From Bottom Of Machine
- Check the water tank and drip tray to make sure there are no crack or breaks where water can escape. Make sure they are properly positioned on the machine. Check the water tank check valve at the bottom of the tank to make sure it is not broken or cracked.
- Open the machine and check all of the connections to make sure they are securely attached.
- Examine the pump and boiler assemblies to see if there are any cracks in them. If the machine was exposed to subfreezing conditions without being properly drained it can cause these components to crack. These parts will need to be replaced if they are cracked.
- Make sure both the inlet line and the outlet line on the pump are securely connected.
- Check the various valves located on top of the boiler assembly.
- If water is leaking from the relief valves, then the boiler may be overfilling. Distilled, reverse osmosis, and zero water are not compatible with this style of machine as the water level probe depends on minerals in the water to detect its presence. These water types do not contain minerals, and so the machine will continuously fill until it overflows, usually resulting in water leaking from the relief valves.
- If water is leaking from the relief valves even though you are using a water that contains minerals, then you may need to clean the water level probe.
- If the valves are leaking directly from where they screw into the boiler, then they may have a broken seal. Try resealing the valves by using white teflon plumbers tape or food safe permabond and screwing them back into the boiler.
- If there are any broken or cracked hoses, or hoses with pinhole leaks, they will need to be replaced.
- If you cannot find the source of the leak, it's possible the water you are seeing is from water spilled when refilling the machine, or from the drip tray being out of position. It is also possible to run the unit with the casing off to help identify the source of the leak; precautions should be taken to protect yourself from any exposed wiring or hot water or steam that comes from the machine if you attempt this.
From Steam Wand Or Hot Water Tap
- If either wand is leaking from the end of the wand, it means the steam/hot water valve is not fully closed.
- Make sure the knob is securely in the closed position.
- If the knob feels loose, or doesn't appear to be properly engaging, then there may be a loose or broken part in the knob assembly.
- If the leaking persists, then the corresponding valve may need to be replaced.
- If the wand is leaking between the tip and the arm of the wand during use, there is an o-ring that is broken, missing, or out of position.
- If the wand is leaking from the ball joint, then there may an o-ring that is worn out or out of position.
Machine Not Heating Or Powering On
No Power
- Make sure the machine is plugged into an appropriate power source.
- Do not use the machine on a surge protector. This machine has a high power draw, more than a typical kitchen appliance such as a refrigerator or a microwave. Surge protectors are typically not rated to handle the amperage this machine requires.
- Try using the machine on a different outlet, and make sure the machine is the only appliance plugged into that outlet.
- Make sure the power switches are functioning properly and not broken. If the machine isn't powering on try pressing and holding the power button in the on position to see if the machine turns on. If you are able to power the machine on this way then the power switch needs to be replaced.
- If the machine recently had a leak, had water spilled on it, or any other exposure to moisture then the machine may be shorting out. Try letting the machine sit unplugged for 48 hours to make sure there isn't a short caused by moisture.
Brew Not Heating
- Give the machine sufficient time to heat up. A heating time of 20-30 minutes is recommended for prosumer style machines for it to be sufficiently heated for brewing. Make sure the portafilter is attached during heating.
- Make sure the heating indicator is on. If the heating indicator is not on, then the machine will not heat. Typically this light will be off if the machine is out of water or not able to fill the boiler.
- The pressurestat may be set too low resulting in a lower temperature. Be cautious when adjusting the pressurestat. Setting it too high can cause the machine to overheat, resulting in the pressure relief valve blowing off excess steam.
- The high limit switch may be tripped and needs to be reset.
- The heating element may be broken and may require replacement.
Steam Not Heating
- If the machine is producing steam, but you think it's not producing enough steam, make sure that you are purging the line before frothing. To purge the line simply open the steam knob and let steam come through until it changes from mostly water to mostly steam. When steam leaves the boiler and hits the cold wand it is going to condense back into water. If you do not purge the line it will affect the way the steam wand froths.
- Make sure the steam boiler is turned on for the machine. Most prosumer units feature a switch, button, or PID menu option to turn the steam boiler off.
- Give the machine sufficient time to heat up. A heating time of 20-30 minutes is recommended for prosumer style machines for it to be sufficiently heated for brewing. Make sure the portafilter is attached during heating.
- Make sure the heating indicator is on. If the heating indicator is not on, then the machine will not heat. Typically this light will be off if the machine is out of water or not able to fill the boiler.
- The pressurestat may be set too low resulting in a lower brew temperature. Be cautious when adjusting the pressurestat. Setting it too high can cause the machine to overheat, resulting in the pressure relief valve blowing off excess steam.
- The high limit switch may be tripped and needs to be reset.
- The heating element may be broken and may require replacement.
On But Not Heating
- There is a loose, disconnected, or broken wire inside the machine. Remove the top of the machine and inspect the wiring.
- The high limit switch of the machine may have tripped.
- The outlet the machine is plugged into is not rated to handle the power draw of the machine.
Portafilter Handle Not Fitting On Machine
- On all new machines, the portafilter may or may not fit perpendicular to the machine. This is perfectly normal. This is because the grouphead gasket requires time to wear in before this can happen. As long as you can get the portafilter hand tight onto the machine and brew without leaking, then the machine is operating properly.
- Too much coffee may be dosed into the portafilter. If there is too much coffee in the portafilter, it can press into the shower screen and prevent the portafilter tightening all the way. Reduce the amount of coffee in the portafilter and try again. If you see an indentation from the shower screen in the grounds, then you’ve added too much.
- Check the filter baskets for dings, dents, or any sort of warping. A filter basket that is malformed can prevent the filter basket from sealing up against the group gasket.
- The group gasket has slipped out of place or needs replacing. Please refer to the section of this article which discusses gasket issues for instructions on how to test the gasket or replace it.
Diagrams & Manuals
| Electrical Diagram: | |
| Hydraulic Diagram: | |
| Machine Manual: | |
| Parts Diagram: | |
| Service Manual | |
| Startup Guide: | |
Specifications