Difference between revisions of "Profitec Pro 700"
From Whole Latte Love Support Library
(→Cleaning & Maintenance) |
(→Machine Is Leaking) |
||
| Line 103: | Line 103: | ||
{{Troubleshooting-Prosumer-Bad-Gasket | {{Troubleshooting-Prosumer-Bad-Gasket | ||
| − | |gasket_instr = Instructions for replacing the group gasket can be found on pp.31-32 of the machine manual. Replacement group gaskets can be purchased [https://www.wholelattelove.com | + | |gasket_instr = Instructions for replacing the group gasket can be found on pp.31-32 of the machine manual. Replacement group gaskets can be purchased [https://www.wholelattelove.com/profitec-group-gasket here]. |
}} | }} | ||
Revision as of 11:05, 16 March 2017
The Profitec Pro 700 is a Prosumer espresso machine which features dual boilers and a PID.
| Profitec Pro 700 |
|---|
 |
| Manufacturer: Profitec |
| Model Name: Pro 700 |
| Type: Prosumer |
 |
Basic Usage
Getting Started
Adjusting Brew Pressure
Adjusting The PID
Draining The Boilers
Switching Between Reservoir/Plumb
Manual Pump Priming
Complete Tear-Down
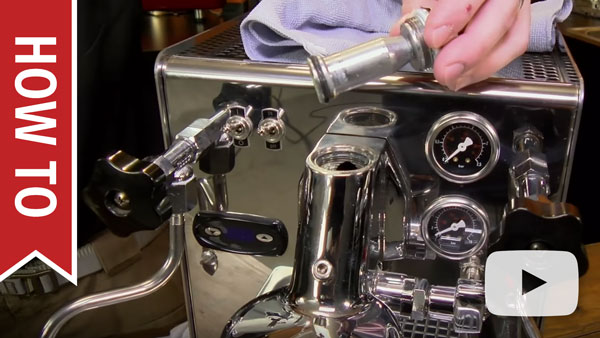
Reading The Brew Gauge
The brew pressure gauge is only meaningful when the machine is actively brewing. While the machine is standing by the gauge may move around, sit at zero, or show the the circuit is pressurized; this does not mean anything. This gauge is only accurate while the brew circuit is activated during brewing. A simple test of the machine's brew pressure can be completed by using the backflush disc.
- Insert the backflush disc into the portafilter and attach it to the machine.
- Activate the brew function. The gauge will fall to zero, and then begin pressurizing.
- After about 10-15 seconds the pressure should read 8-11 Bar pressure. If your machine does this then there is nothing wrong with the brew function or brew gauge, the machine is operating to spec.
Cleaning & Maintenance
Proper machine maintenance is critical for machine function. Most machine failures are caused by lack of cleaning and many manufacturer warranties do not cover cleaning related breakdowns, so it is important to keep a regular maintenance schedule. Listed below is a suggested maintenance schedule for most Prosumer espresso machines:
Descaling
Grouphead Cleaning
The grouphead should be taken apart on a monthly basis to remove scale buildup, remove coffee residues, and improve shot flavor.
How To Clean E61 Brew Group Mushroom, Jet and Top Valve
Steam Wand Cleaning
The steam wand should be cleaned daily once the machine is finished for the day. Milk residues quickly build up on the steam wand, so it's important to keep it clean to prevent blockages from forming.
How to Clean a Steam Wand
Water Softener
Because this machine should only be descaled professionally we recommend a filtration system, such as a BWT Inline Filter, be installed on the unit to prevent scale buildup. The machine does have a basic debris filter, but this will not soften the water or prevent scale buildup in any way.
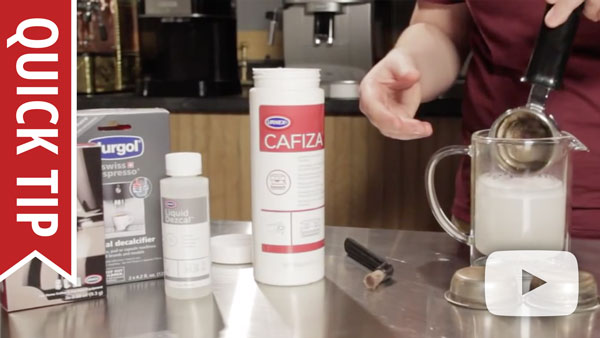
Recommended Cleaning Products
The best product for backflushing, cleaning grouphead components, and cleaning filter baskets is a backflushing powder like Urnex Cafiza. Alternatively, Profitec offers brewgroup cleaning tablets which can be used in the same way as backflushing powder. The brew unit cleaning tablets can be purchased here.
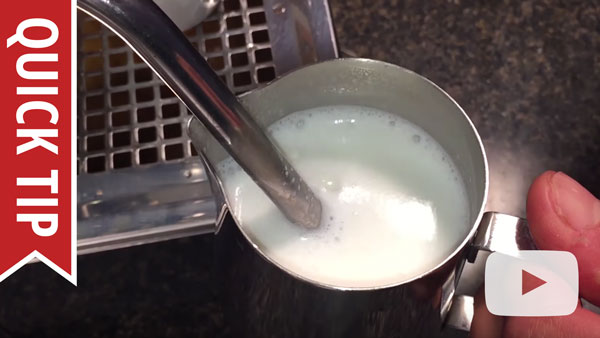
Cleaning Portafilter and Baskets
Troubleshooting
No Crema or Bad Tasting Shots
Typically, issues with crema or the flavor of the shot do not indicate a malfunction of the machine. Instead, this indicates that an adjustment needs to be made in the brewing process or that different beans need to be used.
The following articles review the different variables and offer solutions:
- Tamping The Correct Way and The Effects Of Tamping Pressure
- Grinding Coffee For Espresso
- It is important to use fresh beans, typically beans roasted within the past two weeks are best. Light and medium roasts are best for espresso brewing and richer crema. Storing beans properly is also important, more information can be found here.
If the behavior persists after reviewing these factors then the machine may need to be cleaned. Lack of cleaning can cause burned or bitter flavors, or create flow issues which can result in a weak shot. Navigate to the Cleaning & Maintenance icon above for more information.
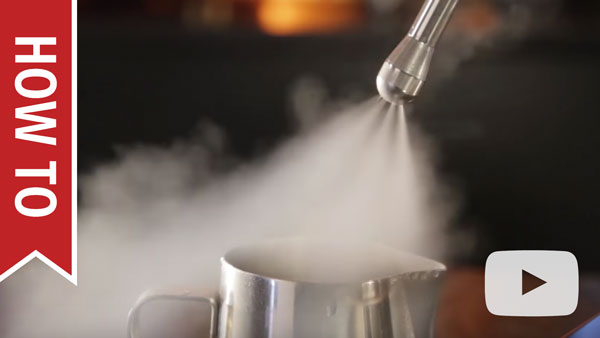
Difficulty Frothing
As with brewing, technique is critical to frothing well. Frothing is very sensitive to technique, which has a steep learning curve. If the machine is producing steam then an adjustment to technique may need to be made. The video on the right shows proper frothing technique.
How to Froth and Steam Milk for Latte Art, Cappuccino and More
Many frothing mistakes are common missteps that result in poor or no froth. The video on the right identifies these mistakes and shows how to correct them.

6 Common Milk Frothing Mistakes
It is also important not to overheat your milk. The milk will have the sweetest and most velvety texture between 140-150 F°. As you froth past this point the milk will lose its sweetness, the froth will take on a gummier texture, and eventually the milk will scald and begin to taste burnt. The video on the right explains how to use a frothing thermometer so that the milk is kept within the ideal range.
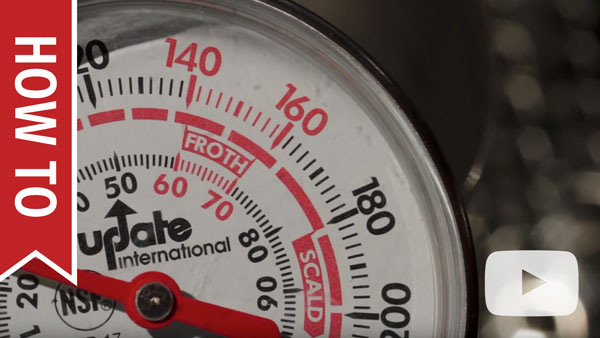
How To Use a Thermometer to Froth Milk
Flow Issues
The first place to start with any flow issue is cleaning the machine. Before going through these steps please make sure the machine is cleaned according to the Cleaning & Maintenance section of this article.
No Steam From Wand
- Check the brew function on the machine and see if water is able to flow through the machine for this function.
- If the brew water is not flowing either refer to the No Flow At All section of this article
- If the brew water flows but is not hot refer to the On But Not Heating section of this article.
- Check the hot water function of the machine. If you are able to draw hot water then the steam boiler must be pressurizing and heating, because hot water is expelled from the machine by steam pressure.
- Check the steam gauge of the machine. Does it show pressure? Typical range for the steam gauge should be 1-1.2 Bar.
High Limit Reset Instructions
- If the gauge is within the 1-1.2 Bar range then the steam wand is likely blocked.
- Remove the tip from the steam wand and test the flow. If flow is restored then the tip needs to be cleaned and reattached.
- If the flow is still blocked then there may be a blockage in the steam wand itself. Clean the wand by using a pipe brush that has synthetic or plastic bristles; metal bristles can damage the wand. Then soak the wand in a solution of hot water and backflushing powder for ten minutes. Test flow again.
- If there still isn't flow then there may be a blockage farther back in the steam circuit. The machine may need to be professionally cleaned to remove the blockage.
How to Diagnose Hot Water and Steam System Obstructions
- If the gauge is not reaching 1-1.2 Bar, but it is pressurizing some, then the steam temperature setting on the PID may need to be adjusted. Instructions for changing the PID settings can be found in the section of this article that discusses programming the PID.
- If the gauge is sitting at zero then the steam boiler is not building pressure for some reason.
- If the machine is spewing a lot of steam from the top as it is heating up then the vacuum relief valve may be stuck open. This valve is supposed to close once the machine produces enough steam pressure. Instructions for cleaning or replacing the vacuum relief valve are found in the video below:
- The high limit switch may be tripped. The high limit switch is an internal killswitch which prevents damage to the machine caused by power surges or the machine overheating.
Poor Or No Flow From Grouphead
If the steam/hot water for the machine is working fine then there is likely something causing a blockage or pressure issue in the brew circuit. Otherwise refer to the section of this article that discusses the machine not flowing at all.
- If a water softener is attached to the inlet line of the machine, it may be preventing water from flowing. Please remove the softener and see if the flow improves.
- The grouphead is dirty and needs to be cleaned.
- Taking apart the grouphead for manual cleaning is the first step. This should be done on a monthly basis. The instructions can be found here.
- If cleaning the grouphead restores flow to the grouphead, the machine should be immediately backflushed to prevent further flow issues.
Maintaining Your Espresso Machine - Backflushing
- There might be a kinked, broken, or loose line somewhere in the machine. Remove the top of the machine and take a look inside to see if you see any obvious issues.
- There might be an issue with one of the internal valve assemblies, which may need to be cleaned or replaced.
How To Clean E61 Brew Group Mushroom, Jet and Top Valve
- The brew pressure valve may need to be adjusted, it may be set too low. Instructions for adjusting this valve can be found in the video below:
- The plumb valve may be set to the incorrect position. Make sure the valve is turned to the appropriate position for the water supply option you are using.
No Hot Water From Wand
- Check the brew function on the machine and see if water is able to flow through the machine for this function.
- If the brew water is not flowing either refer to the No Flow At All section of this article
- If the brew water flows but is not hot refer to the On But Not Heating section of this article.
- Check the steam function of the machine. If you are able to steam then the hot water circuit must be heating and pressuring, since these functions share the same boiler, and hot water is expelled by steam pressure.
- Check the steam gauge of the machine. Does it show pressure? Typical range for the steam gauge should be 1-1.2 Bar.
- If the gauge is within the 1-1.2 Bar range then the hot water wand is likely blocked.
- Remove the tip from the hot water wand and test the flow. If flow is restored then the tip needs to be cleaned and reattached.
- If the flow is still blocked then there may be a blockage in the hot water wand itself. Clean the wand by using a pipe brush that has synthetic or plastic bristles; metal bristles can damage the wand. Then soak the wand in a solution of hot water and backflushing powder for ten minutes. Test flow again.
- If there still isn't flow then there may be a blockage farther back in the steam circuit. The machine may need to be professionally cleaned to remove the blockage.
- If the gauge is within the 1-1.2 Bar range then the hot water wand is likely blocked.
How to Diagnose Hot Water and Steam System Obstructions
- If the gauge is not reaching 1-1.2 Bar, but it is pressurizing some, then the steam temperature setting on the PID may need to be adjusted. Instructions for changing the PID settings can be found in the section of this article that discusses programming the PID.
- If the gauge is sitting at zero then the steam boiler is not building pressure for some reason.
- If the machine is spewing a lot of steam from the top as it is heating up then the vacuum relief valve may be stuck open. This valve is supposed to close once the machine produces enough steam pressure. Instructions for cleaning or replacing the vacuum relief valve are found in the video below:
- The high limit switch may be tripped. The high limit switch is an internal killswitch which prevents damage to the machine caused by power surges or the machine overheating. Instructions for resetting the high limit switches are found in the video below:
No Flow At All
If the machine is set to the plumbed mode:
- First try switching to the reservoir mode temporarily and see if it resolves the issue. If this resolves the flow issue, then the issue is specific to the inlet plumb line, and you should go to the next step. Otherwise keep the machine in reservoir mode and skip down to the next section which deals with testing the "No Flow" issue for the machine in reservoir mode.
- Return the machine to plumb mode. The next thing to check is to see if we can isolate where the flow issue is occurring for the plumb line. Try putting the plumb line hosing into an external bucket or container filled with water and see if the machine will draw water from this source. If it can't, then there may be a blockage somewhere in the plumb line itself.
- If you are able to draw water from the plumb line, then there may be an issue with the plumbing supplying this line.
If the machine is set to use the reservoir:
- If the pump does not sound like it is activating:
- Check to make sure the water tank is filled, and the machine isn't indicating that the water tank is empty.
- If the tank is empty, refill it.
- If the tank is full, but the machine thinks the water tank is empty then the tank may not be seated correctly. Make sure there isn't anything blocking the tank from sitting flush inside the machine.
- Remove the cover of the machine and check for any loose or disconnected wires.
- Make sure there aren't any kinked or pinched hoses.
- There may be an issue with the water tank sensor.
- Remove the drip tray from the front and make sure the plumb switch is turned off.
- Remove the reservoir and make sure the float magnet is facing the sensor. The magnet on the float should be facing the front left corner of the tank, where it meets up with the sensor.
- Check to make sure the wire for the water level sensor isn't loose/disconnected on the inside of the machine.
- There may be an issue with the pump powering on. Check to make sure the pump doesn't have any loose/disconnected wires.
- If the pump does sound like it is activating:
- Check the water tank to make sure it is filled and that both the inlet line and the return lines are inserted into the tank. Make sure the inlet line in particular is below the surface of the water.
- If you are using the water softener on the inlet line, try removing it and see if water can flow through the machine.
- Open up the machine. Make sure there aren't any kinked or pinched hoses anywhere.
- There may be a stuck valve inside the machine.
Machine Is Leaking
Between Portafilter & Grouphead
If the machine is leaking from between the grouphead and the portafilter then the grouphead gasket is either pushed out of place and needs to be reinserted properly, or the gasket is worn out. Typically, grouphead gaskets will wear out in approximately 6 months to a year depending on how heavily the machine is used. Premature wear to this gasket can be caused by using excessive force when attaching the portafilter. It is important to distinguish where the leaking is occurring. If the leaking is originating from farther up on the grouphead assembly and then draining down to where the portafilter is attached, then refer to the section of this article which discusses leaking from the grouphead.
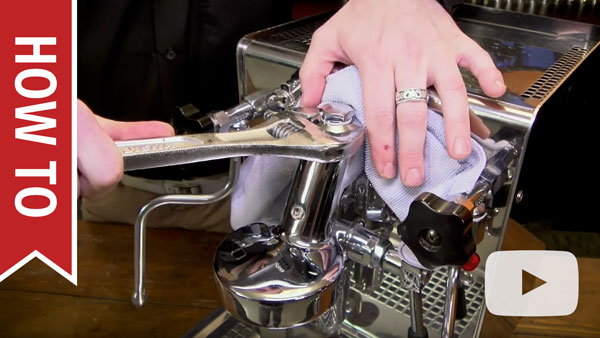
If the leaking is coming from between the portafilter and grouphead where you twist the handle on, then the gasket will need to be replaced. Instructions for replacing the group gasket can be found on pp.31-32 of the machine manual. Replacement group gaskets can be purchased here. You can try using the instructions to clean and reseat the current gasket. If that does not resolve the leak then the gasket will need to be replaced.
The gasket can get stuck in the grouphead from wear or excessive heat exposure. To remove the gasket take some self-tapping screws and partially screw them into the group gasket. Make sure not to go all the way through the gasket because you can scratch/dent the grouphead if you go too far. Then use a pair of pliers to pull on the screws and the gasket will pull out with them.
Replacing the Group Gasket on Your E61 Group Head
From The Grouphead
This section addresses leaking which is coming directly from the grouphead, known as the E-61 style. If the machine is experiencing leaking between the grouphead and the portafilter refer to the section of this article which discusses grouphead gasket issues.
- There are multiple valves and o-rings which are part of the E-61 itself. Depending on where the leak is coming from, it may indicate an issue with one or more of these assemblies.
- If the leaking is coming from the lever arm of the machine, then there is an o-ring that is loose, dirty, or worn out. A blowout of the lever assembly can be seen on p.13 of the machine's parts diagram. The o-rings that will need to be checked are listed as part 22 and part 8 on this page.
- To access these o-rings remove the end cap of the lever assembly using a flathead screwdriver.
- Once this is removed the other components of the grouphead assembly can begin to be slipped off. The bolts that the lever slides into can be removed with open ended wrenches or an adjustable wrench.
- Inspect the o-rings and make sure they are not damaged. It's possible that they are just dirty and need to be cleaned off and reseated. If they are damaged, broken, or shows signs of chaffing then they will need to be replaced.
- Inspect the valve components well to make sure they are intact.
- Reassemble the components and see if leaking is resolved.
- If the leak is coming from the top bolt assembly, then there is an o-ring that is loose, dirty, or worn out. A blowout of the top valve assembly, known as the mushroom or trumpet valve, can be found on p.13 of the machine's parts diagram. There are a few components which can be contributing to the leaking. There are three o-rings, listed as parts 2, 6, and 8 on this page of the diagram. There is also a valve assembly shown as part 10 on the same page.
- To access these parts use an open ended wrench or adjustable wrench to remove the smaller top bolt of the E-61. This will give you access to the first o-ring and spring assembly.
- To access further down into this part of the grouphead use a wrench to remove the large bolt. This will let you access the other two o-rings, another spring assembly, and the valve assembly.
- Inspect all of these components for integrity. Clean any dirty parts and replace any broken parts.
- Reassemble the grouphead and see if the leaking is resolved.
- If the leak is coming from the relief valve on the bottom of the E-61, then there may be an o-ring that is loose/dirty or a valve inside the E-61 that is stuck open. A blowout of the bottom valve assembly, known as the release valve, can be found on p.13 of the machine's parts diagram. There are two o-rings in this assembly, listed as parts 8 and 36 on the diagram, and two spring and valve assemblies, that can be causing the leak.
- To access these parts use an open ended wrench or adjustable wrench to remove the smaller bottom bolt. You will be able to access part 36, the o-ring, and the first spring and valve assembly. Inspect the parts. If they are dirty clean them off, if they are broken replace them.
- To access the next o-ring and valve assembly use a wrench to remove the larger of the bolts. Again, inspect the parts for cleanliness and damage. Clean or replace as needed.
- Reassemble the release valve and test to see if the leaking is resolved.
- If cleaning and repairing a particular valve assembly has not worked, then it may be prudent to do a complete cleaning of the E-61 grouphead assembly. Instructions for cleaning the entire E-61 can be found by clicking here.
- If the machine is leaking between the grouphead and the faceplate of the machine where the grouphead attaches, then there may be a bad gasket or loose bolts. There are two possible reasons for the machine to be leaking from here.
- The first is that one of the plumb lines connected to the back of the E-61 is not secure resulting in a leak. These will need to be tightened from the inside of the machine. You may see leaking from the bottom of the machine as well if this is the case. Remove the top of the machine and look towards the front of the machine. These lines will be located on the back of the faceplate, opposite to where the grouphead is seated. They are listed as parts 6 and 8 on p.7 of the machine's parts diagram. Use an open ended wrench or adjustable wrench to tighten these down. If the leaking persists you may need to apply white teflon plumbers tape or a sealing compound such as food safe permabond.
- The other possibility is that the E-61 group chassis gasket is not sealing tightly, or is worn out or damaged and will need to be replaced. The chassis gasket is listed as part 15 on p.13 of the parts diagram. There are two bolts which secure the E-61 to the machine chassis, causing it to press on the gasket and create a seal. First try tightening these two bolts down. The bolt assembly is shown on p.13 of the diagram as well, parts 11-14. If tightening these bolts does not resolve the leak, then the chassis gasket will need to be replaced.
From Bottom Of Machine
- Check the water tank and drip tray to make sure there are no cracks or breaks where water can escape. Make sure they are properly positioned on the machine.
- Open the machine and check all of the connections to make sure they are securely attached.
- Examine the pump and boiler assemblies to see if there are any cracks in them. If the machine was exposed to subfreezing conditions without being properly drained it can cause these components to crack. These parts will need to be replaced if they are cracked.
- Make sure both the inlet line and the outlet line on the pump are securely connected.
- Check the various valves located on top of the boiler assembly.
- If water is leaking from the relief valves, then the boiler may be overfilling. Distilled, reverse osmosis, and zero water are not compatible with this style of machine as the water level probe depends on minerals in the water to detect its presence. These water types do not contain minerals, and so the machine will continuously fill until it overflows, usually resulting in water leaking from the relief valves.
- If water is leaking from the relief valves even though you are using a water that contains minerals, then you may need to clean the water level probe.
- If the machine is plumbed, then there may be too much pressure at the inlet line. The pressure restrictor may need to be adjusted, or if you do not have a pressure restrictor installed you may need to install one.
- If the valves are leaking directly from where they screw into the boiler, then they may have a broken seal. Try resealing the valves by using white teflon plumbers tape or food safe permabond and screwing them back into the boiler.
- If there are any broken or cracked hoses, or hoses with pinhole leaks, they will need to be replaced.
- If you cannot find the source of the leak, it's possible the water you are seeing is from water spilled when refilling the machine, or from the drip tray being out of position. It is also possible to run the unit with the casing off to help identify the source of the leak; precautions should be taken to protect yourself from any exposed wiring or hot water or steam that comes from the machine if you attempt this.
Steam From Top Of Machine
If there is steam coming from the top of the machine then one of the relief valves is venting steam.
- If the steam is leaking from the machine while it is heating up, with more and more steam coming from the top as the machine heats more, then the steam is coming from the vacuum relief valve.
- The vacuum relief valve is meant to vent steam until a certain amount of pressure has built up in the boiler. It is normal for this valve to vent steam as the machine is heating. Once enough steam pressure is built up in the boiler the valve will pop closed.
- If the machine is fully heated and the vacuum relief valve is still not closing then it may need to be cleaned. Instructions for cleaning or replacing the vacuum relief valve are found in the video below:
- If cleaning the vacuum relief valve has not resolved the issue, then the vacuum relief valve may be broken and will need to be replaced.
- If the steam is leaking from the machine after it is fully heated, then the pressure relief valve may be relieving excess steam pressure.
- The steam boiler temperature may need to be lowered. If your machine features a pressure gauge it should not read any higher than 1.2 bar. Program the steam boiler temperature lower and lower until the relief valve stops opening and the pressure gauge reads 1.2 bar or lower.
- If lowering the temperature is not helping, then the pressure relief valve may be stuck open.
From Steam Wand Or Hot Water Tap
- If either wand is leaking from the end of the wand, it means the steam/hot water valve is not fully closed.
- Make sure the knob is securely in the closed position.
- If the knob feels loose, or doesn't appear to be properly engaging, then there may be a loose or broken part in the knob assembly. Instructions for taking apart the knob assembly can be found in the video below:
- There is also a seal in the steam valve that may be worn or dirty and is letting water through. The seal may need to be replaced, or it can also be flipped over and reused. The video below explains:
- If the leaking persists, then the corresponding valve may need to be replaced.
- If the wand is leaking between the tip and the arm of the wand during use, there is an o-ring that is broken, missing, or out of position.
- The steam tip o-ring is easy to access. Simply unscrew the steam tip and there will be a small o-ring between the tip the wand arm. Inspect this o-ring for damage and clean it.
- The hot water tip is a little more complicated, but still easily accessed and cleaned.
- First unscrew the tip assembly from the wand arm.
- There will be an o-ring between the tip assembly and the wand arm. If the leaking was coming from here, then this o-ring needs to be cleaned and repositioned, or if it is damaged it will need to be replaced.
- If the leaking was coming from farther down on the tip, then the tip will need to be disassembled further to troubleshoot. To disassemble the tip further simply twist the two halves of the tip assembly in opposite directions. Alternatively you can screw the tip back onto the machine and then just unscrew the bottom half of the tip; this will give you a better grip on the tip to unscrew the two halves.
- Once the tip is apart it will separate into three separate pieces. There will be three metal pieces and another o-ring. Inspect the o-ring for cleanliness and damage. The metal pieces can be soaked in a solution of hot water and backflushing powder to remove any scale buildup on them.
- If the wand is leaking from the ball joint, then there may an o-ring that is worn out or out of position.
- These instructions apply to both the steam and hot water wands. First remove the wand arm. This can be done by unscrewing the hex shaped nut at the top of the arm. Please note that this assembly is reverse threaded, so you will need to turn the nut clockwise to loosen it.
- Once the wand is removed you may have parts stick to the valve assembly. Do not lose these parts.
- If the leaking was coming from the top of the securing nut, check the white teflon o-ring to make sure it is in clean and in good condition.
- Inspect the tension spring to make sure it is in good condition. The spring should be really firm. If it is easily compressed then it may need to be replaced. The bottom of the spring will have a metal gasket, which helps the wand pivot on the spring Make sure these parts are clean and reinstall them.


Machine Not Heating Or Powering On
No Power
- Make sure the machine is plugged into an appropriate power source.
- Do not use the machine on a surge protector. This machine has a high power draw, more than a typical kitchen appliance such as a refrigerator or a microwave. Surge protectors are typically not rated to handle the amperage this machine requires.
- Try using the machine on a different outlet, and make sure the machine is the only appliance plugged into that outlet.
- Make sure the power switches are functioning properly and not broken. If the machine isn't powering on try pressing and holding the power button in the on position to see if the machine turns on. If you are able to power the machine on this way then the power switch needs to be replaced.
- If the machine recently had a leak, had water spilled on it, or any other exposure to moisture then the machine may be shorting out. Try letting the machine sit unplugged for 48 hours to make sure there isn't a short caused by moisture.
Brew Not Heating
- Give the machine sufficient time to heat up. A heating time of 20-30 minutes is recommended for prosumer style machines for it to be sufficiently heated for brewing. Make sure the portafilter is attached during heating.
- Make sure the heating indicator is on. If the heating indicator is not on, then the machine will not heat. Typically this light will be off if the machine is out of water or not able to fill the boiler.
- Make sure the brew temperature is programmed to an acceptable temperature. Optimum temperature for brewing is between 195-205 F°. Make sure the PID is programmed to a temperature in this range. Instructions for adjusting the PID can be found in the video below:
- Additionally the temperature probe may not be operating properly and may need to be cleaned. The brew temperature will usually wander several degrees or randomly drop if the probe is malfunctioning. The temperature probe is listed as part 17 on p.7 of the machine's parts diagram.
- Use an open ended wrench or adjustable wrench to unscrew the temperature probe from the boiler.
- Soak the temperature probe in a solution of hot water and backflushing powder.
- If there is considerable scale buildup on the probe use a scrubby sponge to help remove the scale. Do not use any sort of metal scrubbing pad to clean the probe as it can damage it.
- Reinstall the probe and see if the brew temperature improves.
- The high limit switch may be tripped and needs to be reset. Instructions for resetting the high limit switches are found in the video below:
- The heating element may be broken and may require replacement.
Steam Not Heating
- If the machine is producing steam, but you think it's not producing enough steam, make sure that you are purging the line before frothing. To purge the line simply open the steam knob and let steam come through until it changes from mostly water to mostly steam. When steam leaves the boiler and hits the cold wand it is going to condense back into water. If you do not purge the line it will affect the way the steam wand froths.
- Make sure the steam boiler is turned on for the machine. Most prosumer units feature a switch, button, or PID menu option to turn the steam boiler off.
- Give the machine sufficient time to heat up. A heating time of 20-30 minutes is recommended for prosumer style machines for it to be sufficiently heated for brewing. Make sure the portafilter is attached during heating.
- Make sure the heating indicator is on. If the heating indicator is not on, then the machine will not heat. Typically this light will be off if the machine is out of water or not able to fill the boiler.
- Make sure the steam temperature is programmed to an acceptable temperature. Instructions for adjusting the PID can be found in the video below:
- The high limit switch may be tripped and needs to be reset. Instructions for resetting the high limit switches are found in the video below:
- The heating element may be broken and may require replacement.
On But Not Heating
- If your machine is running off of the reservoir, make sure it is filled with water. Don't use distilled or reverse osmosis water, as the boilers rely on some minerals to detect water level.
- Make sure both the steam and the brew boilers are turned on. Most prosumer machines allow for individuals boilers to be turned off for energy efficiency.
- The steam boiler takes priority. If the steam boiler isn't heating for some reason, the brew boiler won't heat. Try turning the steam boiler off and see if the brew boiler starts heating.
- There is a loose, disconnected, or broken wire inside the machine. Remove the top of the machine and inspect the wiring.
- The high limit switch of the machine may have tripped. Instructions for resetting the high limit switches are found in the video below:
- The outlet the machine is plugged into is not rated to handle the power draw of the machine.
- In very rare cases both heating elements will have broken simultaneously. This will happen only if the machine is exposed to a severe power surge.
Portafilter Handle Not Fitting On Machine
- On all new machines, the portafilter may or may not fit perpendicular to the machine. This is perfectly normal. This is because the grouphead gasket requires time to wear in before this can happen. As long as you can get the portafilter hand tight onto the machine and brew without leaking, then the machine is operating properly.
- Too much coffee may be dosed into the portafilter. If there is too much coffee in the portafilter, it can press into the shower screen and prevent the portafilter tightening all the way. Reduce the amount of coffee in the portafilter and try again. If you see an indentation from the shower screen in the grounds, then you’ve added too much.
- Check the filter baskets for dings, dents, or any sort of warping. A filter basket that is malformed can prevent the filter basket from sealing up against the group gasket.
- The group gasket has slipped out of place or needs replacing. Please refer to the section of this article which discusses gasket issues for instructions on how to test the gasket or replace it.
Steam Coming From Grouphead
Some steam from a grouphead is normal, which is why a cooling flush is suggested. The video below discusses why cooling flushes are necessary and how to do them:
If a cooling flush does not fully resolve the "flash boiling" or excessive steam, then the grouphead is probably getting too hot. There are two things which can cause the grouphead to be too hot. The brew temperature setting can be too high. We don't recommend going higher than 202 F° on this unit, the manufacturer recommended setting, to prevent overheating. It is also possibly the E1 setting for the PID. Sometimes the machine won't have this issue in Celsius mode, but the default E1 setting may not work properly when the machine is in Fahrenheit mode. The E1 setting is essentially the conversion factor when switching between the Celsius and Fahrenheit modes. The default factory setting is 34; the issue is simply fixed by adjusting the E1 setting down to the 25-28 range.
Diagrams & Manuals
| Profitec Pro 700 | |
|---|---|
| Electrical Diagram: | Not Available |
| Hydraulic Diagram: | Not Available |
| Machine Manual: |  |
| Parts Diagram: |  |
| Service Manual | Not Available |
| Startup Guide: | Not Available |
Specifications
| Basic Specs | |
|---|---|
| Width: | 13.4 in. |
| Height: | 16.5 in. |
| Depth: | 18.7 in. |
| Weight: | 68.4 lbs |
| Wattage: | 1400 |
| Voltage: | 115 |
| Housing | |
| Housing Materials: | Stainless Steel |
| Drip Tray Material: | Stainless Steel |
| Drip Tray Cover Material: | Stainless Steel |
| Drip Tray Capacity: | 32 oz. |
| Drain Line Adaptable: | Yes |
| Power Cord Storage: | No |
| Tall Legs: | Yes |
| Power Cord Length: | 48 in. |
| Cup Height | |
| Max Cup Height: | 4 in. |
| Minimum Cup Height: | 3.25 in. |
| Frothing | |
| Material: | Stainless Steel |
| Steam Wand Style: | Commercial Style |
| Wand Movement: | Articulating |
| Number Of Holes: | 4 |
| No Burn Wand: | Yes |
| Water Source | |
| Reservoir Or Plumbed: | Switchable |
| Reservoir Capacity: | 101 oz. |
| Reservoir Material: | Plastic |
| Reservoir Access: | Top |
| Reservoir Removable: | Yes |
| Maximum Incoming Water Pressure: | 50 psi |
| Controls | |
| Type Of Controls: | Lever |
| Display Type: | PID |
| Power Light: | Yes |
| Temperature Control: | Yes |
| Pre-infusion: | Yes |
| Low Water Warning: | Yes |
| Energy Saving Mode: | Yes |
| Pressure Gauges: | Brew & Steam |
| Steam Control: | PID |
| Brew Temperature Display: | Yes |
| Cup Warmer | |
| Material: | Stainless Steel |
| Size: | 10 in. x 8 in. |
| Passive / Active: | Passive |
| Portafilter Data | |
| Material: | Chrome Plated Brass |
| Type: | Commercial Style |
| Quantity Included: | 2 |
| Diameter: | 58 mm. |
| Commercial Filter Baskets Included: | Single & Double |
| Bottomless Portafilter Available: | Yes |
| Tamper Size: | 58 mm. |
| Brew Group | |
| Material: | Chrome Plated Brass |
| Type: | E61 |
| Preheat: | Yes |
| Three-Way Valve: | Manual |
| Back Flush Capable: | Yes |
| Boiler Data | |
| Number Of Boilers: | 2 |
| Brew & Steam Simultaneously: | Yes |
| Brew Boiler Data | |
| Boiler Type: | Large Volume |
| Boiler Wattage: | 1200 |
| Boiler Voulme: | 0.75 Liter |
| Boiler Material: | Stainless Steel |
| Boiler Orientation: | Vertical |
| Element Location: | Internal |
| Brew Boiler Auto Fill: | Yes |
| Insulated: | Yes |
| Steam Boiler Data | |
| Boiler Type: | Large Volume |
| Boiler Wattage: | 1400 |
| Boiler Voulme: | 2 Liter |
| Boiler Material: | Stainless Steel |
| Boiler Orientation: | Vertical |
| Element Location: | Internal |
| Steam Boiler Vacuum Reliefe Valve: | Yes |
| Insulated: | Yes |
| Pump Data | |
| Pump Type: | Rotary |
| Wattage: | 120 |
| Max Pressure: | 16 Bar |
| Brew Pressure Adjustability: | Yes |
| Self Priming: | Yes |
| Performance | |
| Initial Heat Up: | 900 s. |
| Recommended Heat Up: | 1500 s. |
| Hot Water Temp (8 oz.): | 199 F° |
| Hot Water Time (8 oz.): | 7 s. |
| Sound Level Brewing: | 55 Db |
| Details | |
| Country Of Manufacture: | Italy |
| NSF Certified: | No |
| Recommended Application: | Home Use |