Difference between revisions of "Profitec Pro 800"
From Whole Latte Love Support Library
| Line 45: | Line 45: | ||
===Water Softener=== | ===Water Softener=== | ||
| − | Because this machine should only be descaled professionally we recommend a filtration system, such as a [https://www.wholelattelove.com/products/bwt-bestmax-premium-filter-package BWT Inline Filter], be installed on the unit to prevent scale buildup. The machine does have a basic debris filter, but this will not soften the water or prevent scale buildup in any way. | + | Because this machine should only be descaled professionally we recommend a filtration system, such as a [https://www.wholelattelove.com/products/bwt-bestmax-premium-filter-package BWT Inline Filter], be installed on the unit to prevent scale buildup. The machine does have a basic debris filter, but this will not soften the water or prevent scale buildup in any way. DO NOT use distilled, reverse osmosis, or zero water in this machine. It will cause sensors in the machine to malfunction and can be potentially damaging to metal components. {{#ev:youtube|https://www.youtube.com/watch?v=xLdQ66iaXAQ|480|center}} |
===Recommended Cleaning Products=== | ===Recommended Cleaning Products=== | ||
| Line 92: | Line 92: | ||
#Use a flathead screwdriver to pull the shower screen down and off the machine. Looking at the grouphead from below there will be a lip on the shower screen. Gently pry on this lip with the screwdriver from different angles until the shower screen comes off. The group gasket may come off with the screen. | #Use a flathead screwdriver to pull the shower screen down and off the machine. Looking at the grouphead from below there will be a lip on the shower screen. Gently pry on this lip with the screwdriver from different angles until the shower screen comes off. The group gasket may come off with the screen. | ||
| − | |||
#Use a grouphead brush or an old tooth brush to clean brush down any dirt or coffee residues from the grouphead. Dipping the brush in a solution of hot water and backflushing powder will assist in removing residues. | #Use a grouphead brush or an old tooth brush to clean brush down any dirt or coffee residues from the grouphead. Dipping the brush in a solution of hot water and backflushing powder will assist in removing residues. | ||
#Soak the shower screen and filter baskets in a solution of hot water and cafiza. Rinse of the gasket with plain water to remove and grinds or coffee buildup. | #Soak the shower screen and filter baskets in a solution of hot water and cafiza. Rinse of the gasket with plain water to remove and grinds or coffee buildup. | ||
| Line 118: | Line 117: | ||
====No Flow At All==== | ====No Flow At All==== | ||
| − | + | If the machine is set to the plumbed mode: | |
| − | + | ||
| − | + | #First try switching to reservoir mode temporarily and see if this resolves the issue. If it does, then the issue is limited to the plumb line and you should go to the next step. Otherwise keep the machine in reservoir mode and skip down to the next section which deals with testing no flow in reservoir mode. | |
| − | + | #Return the machine to plumb mode. The next thing to check is to see if we can isolate where the flow issue is occurring for the plumb line. Try putting the plumb line hosing into an external bucket or container filled with water and see if the machine will draw water from this source. If it can't then there may bea blockage somewhere in the plumb line itself. | |
| − | + | #If you are able to draw water from the plumb line, then there may be an issue with the plumbing supplying this line. | |
| − | + | ||
| + | If the machine is set to use the reservoir: | ||
| + | |||
| + | #If the pump does not sound like it is activating: | ||
| + | ##Check to make sure the water tank is filled and the machine isn't indicating that the water tank is empty. | ||
| + | ###If the tank is empty refill it. | ||
| + | ###If the tank is full, but the machine thinks the water tank is empty then the tank may not be seated correctly. Make sure there isn't anything blocked the tank from sitting flush inside the machine. Use of R/O, distilled, and zero waters will cause this sensor to malfunction, resulting in the machine thinking there is no water causing the pump not to activate. | ||
| + | ##Remove the cover of the machine and check for any loose or disconnected wires. | ||
| + | ##There may be an issue with the water tank sensor. | ||
| + | ###Remove the drip tray from the front and make sure the plumb switch is turned off. | ||
| + | ###Remove the reservoir and make sure the float magnet is facing the sensor. Magnet on the float should be facing the back left corner of the tank. | ||
| + | ###Check to make srue the wire for the water level sensor isn't loose/disconnected. | ||
| + | ##There may be an issue with the pump powering on. Check to make sure the pump doesn't have any loose/disconnected wires. | ||
| + | #If the pump does sound like it is activating make sure the plumb valve and the plumb switch are both set in the correct position. If they are set in opposite positions then the pump will activate, but water won't be able to come through the machine. | ||
| + | |||
===Machine Is Leaking=== | ===Machine Is Leaking=== | ||
| − | + | ====Leaking Between Portafilter & Grouphead==== | |
| − | + | If the grouphead leaks from the space in between the portafilter and the grouphead during brewing then the group gasket is either worn out or out of place. This gasket needs to be replaced typically every six months to a year. | |
| − | + | ||
| − | + | #Use a flathead screwdriver to pull the shower screen down and off the machine. Looking at the grouphead from below there will be a lip on the shower screen. Gently pry on this lip with the screwdriver from different angles until the shower screen comes off. The group gasket may come off with the screen. | |
| − | + | #Use a grouphead brush or an old tooth brush to clean brush down any dirt or coffee residues from the grouphead. Dipping the brush in a solution of hot water and backflushing powder will assist in removing residues. | |
| − | + | #Soak the shower screen and filter baskets in a solution of hot water and cafiza. | |
| − | + | #Once everything is clean insert the shower screen into the group gasket securely. | |
| − | + | #Press both the shower screen and gasket into the grouphead together. Then attach the portafilter firmly to secure these components into place. | |
| − | + | ||
| − | + | ||
| − | + | ||
{{Troubleshooting-Prosumer-Bottom-Leak | {{Troubleshooting-Prosumer-Bottom-Leak | ||
| − | | | + | |plumbed = Yes |
| − | | | + | |water_source = Reservoir |
| − | |level_probe_instr = | + | |level_probe_instr = The water level probe can be cleaned by removing it from the boiler. First make sure the machine is unplugged and fully cooled off. The level probe is located on top of the boiler; it has a red wire which is attached to it. |
| − | + | ####The probe is secured to the boiler by a two bolt assembly. Use an open ended wrench or adjustable wrench to loosen the smaller upper bolt. Once this nut is loosened the probe should be able to slide out. | |
| + | ####Once the probe is removed clean it off. Soak the probe in a solution of hot water and backflushing powder. | ||
| + | ####If the probe has a large amount of scale buildup on it a scrubby sponge can be used to remove the scale buildup. Do not use a metal scrubber as it can damage the probe. | ||
| + | ####Also examine the wiring of the probe to make sure it is intact and is attached to the power board of the machine. | ||
}} | }} | ||
Revision as of 11:42, 8 September 2016
The Profitec Pro 800 is a Prosumer espresso machine that features a stylish body, large 3-liter boiler, and a lever operated brew group.
| Profitec Pro 800 |
|---|
 |
| Manufacturer: Profitec |
| Model Name: Pro 800 |
| Type: Prosumer |
 |
Contents
Basic Usage
Getting Started
Adjusting The PID
The PID for this machine is located behind the drip tray. Please note that this machine will only have a "t1" setting for the PID, since this is a single boiler machine. This is for steam temperature, and should be set around 250 °F.
Pre-Infusing
Pre-infusion on this style of machine is simple. Simply pull down the lever and water will seep into the grouphead pre-wetting the grounds. When you are ready to start the shot lift the lever up.
Cleaning & Maintenance
Backflushing/Descaling
Because of internal and group components in this machine it should not be descaled or backflushed. The pump does not actively come on other than to refill the boiler, and there is not a relief for backflushing pressure. To prevent cleaning agents from becoming trapped inside the machine, this machine should only be manually cleaned by a professional repair technician. As such the use of carbon and mineral filtration for the water put into the machine is highly suggested.
Grouphead Cleaning
On a daily basis the shower screen and group gasket should be wiped down and any visible grounds/dirt should be removed.
On a monthly the shower screen and gasket should be removed, and the grouphead cleaned on a monthly basis. Take extra care in cleaning the grouphead thoroughly, brush the grouphead down with a grouphead cleaning brush, and soak the shower screen in a solution of hot water and backflushing powder. Rinse off any buildup on the group gasket with plain water.
Steam Wand Cleaning
Steam wands, steam tips, and nozzle attachments should be cleaned daily after the machine is finished being used for the day. Milk residues quickly build up on steam wands and frothing nozzles, so it is important to keep these clean to prevent blockages from forming.
Replacing Group Gasket
The group gasket will typically need to be replaced about every six months to a year. It is not necessary to replace the gasket until leaking at the grouphead occurs, but it is good to have a gasket on hand since the machine cannot be used with a broken gasket. The shower screen should also be cleaned and inspected at this time. If there is considerable scale/coffee buildup or wear it should also be replaced.
Water Softener
Because this machine should only be descaled professionally we recommend a filtration system, such as a BWT Inline Filter, be installed on the unit to prevent scale buildup. The machine does have a basic debris filter, but this will not soften the water or prevent scale buildup in any way. DO NOT use distilled, reverse osmosis, or zero water in this machine. It will cause sensors in the machine to malfunction and can be potentially damaging to metal components.Recommended Cleaning Products
The best product for cleaning grouphead components, and cleaning filter baskets is a backflushing powder like Urnex Cafiza. Again, this machine should not be backflushed, and this cleaning agent is for the purpose of cleaning removable metal components only.
Troubleshooting
No Crema or Bad Tasting Shots
Typically, issues with crema or the flavor of the shot do not indicate a malfunction of the machine. Instead, this indicates that an adjustment needs to be made in the brewing process or that different beans need to be used.
The following articles review the different variables and offer solutions:
- Tamping The Correct Way and The Effects Of Tamping Pressure
- Grinding Coffee For Espresso
- It is important to use fresh beans, typically beans roasted within the past two weeks are best. Light and medium roasts are best for espresso brewing and richer crema. Storing beans properly is also important, more information can be found here.
If the behavior persists after reviewing these factors then the machine may need to be cleaned. Lack of cleaning can cause burned or bitter flavors, or create flow issues which can result in a weak shot. Navigate to the Cleaning & Maintenance icon above for more information.
Difficulty Frothing
As with brewing, technique is critical to frothing well. Frothing is very sensitive to technique, which has a steep learning curve. If the machine is producing steam then an adjustment to technique may need to be made. The video on the right shows proper frothing technique.
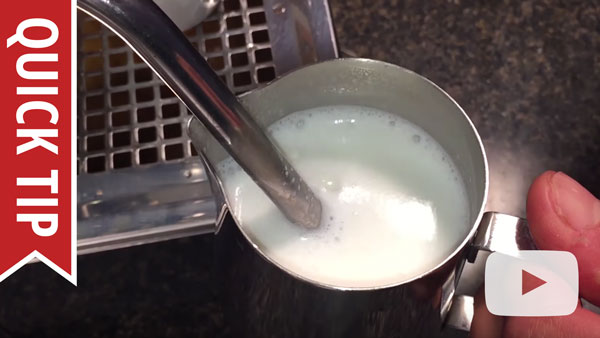
How to Froth and Steam Milk for Latte Art, Cappuccino and More
Many frothing mistakes are common missteps that result in poor or no froth. The video on the right identifies these mistakes and shows how to correct them.

6 Common Milk Frothing Mistakes
It is also important not to overheat your milk. The milk will have the sweetest and most velvety texture between 140-150 F°. As you froth past this point the milk will lose its sweetness, the froth will take on a gummier texture, and eventually the milk will scald and begin to taste burnt. The video on the right explains how to use a frothing thermometer so that the milk is kept within the ideal range.
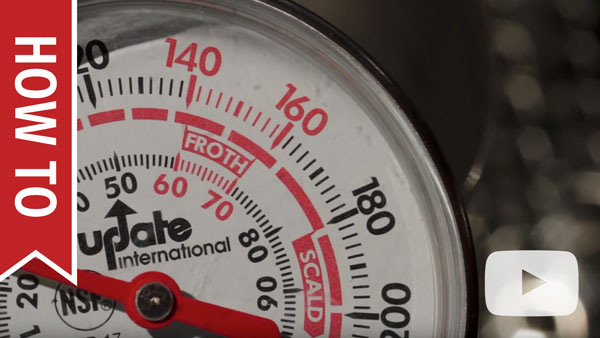
How To Use a Thermometer to Froth Milk
Flow Issues
The first place to start with any flow issue is cleaning the machine. Before going through these steps please make sure the machine is cleaned according to the Cleaning & Maintenance section of this article.
No Steam From Wand
- Check the brew function on the machine and see if water is able to flow through the machine for this function.
- If the brew water is not flowing either refer to the No Flow At All section of this article
- If the brew water flows but is not hot refer to the On But Not Heating section of this article.
- Check the hot water function of the machine. If you are able to draw hot water then the steam boiler must be pressurizing and heating, because hot water is expelled from the machine by steam pressure.
- Remove the tip from the steam wand and test the flow. If flow is restored then the tip needs to be cleaned and reattached.
- If the flow is still blocked then there may be a blockage in the steam wand itself. Clean the wand by using a pipe brush that has synthetic or plastic bristles; metal bristles can damage the wand. Then soak the wand in a solution of hot water and backflushing powder for ten minutes. Test flow again.
- If there still isn't flow then there may be a blockage farther back in the steam circuit. The machine may need to be professionally cleaned to remove the blockage.
- If the machine is spewing a lot of steam from the top as it is heating up then the vacuum relief valve may be stuck open. This valve is supposed to close once the machine produces enough steam pressure.
- Unplug the machine and make sure it is cooled down. Remove the cover of the machine.
- Once the cover is removed the top of the vacuum relief valve will need to be removed. The vacuum relief valve is on top of the boiler. Because the vacuum relief valve is thread bonded into the boiler it will be easier to just remove the top of the valve, like shown in the photo below. This can be done with a socket wrench, or an open ended wrench. The relief valve will have two nuts, a thicker nut on top and a thinner nut on the bottom. Unscrew the thicker top nut.
- You will be able to access the internal valve components now. The separate valve components will look like this:
- The video below discusses what these valve components do and how to clean them.
- The high limit switch may be tripped. The high limit switch is an internal killswitch which prevents damage to the machine caused by power surges or the machine overheating.
- Unplug the machine and make sure it is cooled down. Remove the cover of the machine.
- Once the cover is removed look at the left hand side of the machine and you will find the electrical connections for the boiler. The high limit switches are the two white cylinders with the black push button in the center.
- Reset the switches by pressing on the button on each switch several times. The switch will not click or signal it has been reset, but the act of pressing it several times will reset it.


Poor Or No Flow From Grouphead
If there is little to no flow from the grouphead then it will need to be taken apart for cleaning.
- Use a flathead screwdriver to pull the shower screen down and off the machine. Looking at the grouphead from below there will be a lip on the shower screen. Gently pry on this lip with the screwdriver from different angles until the shower screen comes off. The group gasket may come off with the screen.
- Use a grouphead brush or an old tooth brush to clean brush down any dirt or coffee residues from the grouphead. Dipping the brush in a solution of hot water and backflushing powder will assist in removing residues.
- Soak the shower screen and filter baskets in a solution of hot water and cafiza. Rinse of the gasket with plain water to remove and grinds or coffee buildup.
- If this does not solve the flow issue then the machine will require professional service.
No Hot Water From Tap
- Check the brew function on the machine and see if water is able to flow through the machine for this function.
- If the brew water is not flowing either refer to the No Flow At All section of this article
- If the brew water flows but is not hot refer to the On But Not Heating section of this article.
- Check the steam function of the machine. If you are able to draw steam then the boiler must be pressurizing and heating, because hot water is expelled from the machine by steam pressure.
- Remove the tip from the hot water wand and test the flow. If flow is restored then the tip needs to be cleaned and reattached.
- If the flow is still blocked then there may be a blockage in the hot water wand itself. Clean the wand by using a pipe brush that has synthetic or plastic bristles; metal bristles can damage the wand. Then soak the wand in a solution of hot water and backflushing powder for ten minutes. Test flow again.
- If there still isn't flow then there may be a blockage farther back in the hot water circuit. The machine may need to be professionally cleaned to remove the blockage.
- If the machine is spewing a lot of steam from the top as it is heating up then the vacuum relief valve may be stuck open. This valve is supposed to close once the machine produces enough steam pressure.
- Unplug the machine and make sure it is cooled down. Remove the cover of the machine.
- Once the cover is removed the top of the vacuum relief valve will need to be removed. The vacuum relief valve is on top of the boiler. Because the vacuum relief valve is thread bonded into the boiler it will be easier to just remove the top of the valve, like shown in the photo below. This can be done with a socket wrench, or an open ended wrench. The relief valve will have two nuts, a thicker nut on top and a thinner nut on the bottom. Unscrew the thicker top nut.
- You will be able to access the internal valve components now. The separate valve components will look like this:
- The video below discusses what these valve components do and how to clean them.
- The high limit switch may be tripped. The high limit switch is an internal killswitch which prevents damage to the machine caused by power surges or the machine overheating.
- Unplug the machine and make sure it is cooled down. Remove the cover of the machine.
- Once the cover is removed look at the left hand side of the machine and you will find the electrical connections for the boiler. The high limit switches are the two white cylinders with the black push button in the center.
- Reset the switches by pressing on the button on each switch several times. The switch will not click or signal it has been reset, but the act of pressing it several times will reset it.
No Flow At All
If the machine is set to the plumbed mode:
- First try switching to reservoir mode temporarily and see if this resolves the issue. If it does, then the issue is limited to the plumb line and you should go to the next step. Otherwise keep the machine in reservoir mode and skip down to the next section which deals with testing no flow in reservoir mode.
- Return the machine to plumb mode. The next thing to check is to see if we can isolate where the flow issue is occurring for the plumb line. Try putting the plumb line hosing into an external bucket or container filled with water and see if the machine will draw water from this source. If it can't then there may bea blockage somewhere in the plumb line itself.
- If you are able to draw water from the plumb line, then there may be an issue with the plumbing supplying this line.
If the machine is set to use the reservoir:
- If the pump does not sound like it is activating:
- Check to make sure the water tank is filled and the machine isn't indicating that the water tank is empty.
- If the tank is empty refill it.
- If the tank is full, but the machine thinks the water tank is empty then the tank may not be seated correctly. Make sure there isn't anything blocked the tank from sitting flush inside the machine. Use of R/O, distilled, and zero waters will cause this sensor to malfunction, resulting in the machine thinking there is no water causing the pump not to activate.
- Remove the cover of the machine and check for any loose or disconnected wires.
- There may be an issue with the water tank sensor.
- Remove the drip tray from the front and make sure the plumb switch is turned off.
- Remove the reservoir and make sure the float magnet is facing the sensor. Magnet on the float should be facing the back left corner of the tank.
- Check to make srue the wire for the water level sensor isn't loose/disconnected.
- There may be an issue with the pump powering on. Check to make sure the pump doesn't have any loose/disconnected wires.
- Check to make sure the water tank is filled and the machine isn't indicating that the water tank is empty.
- If the pump does sound like it is activating make sure the plumb valve and the plumb switch are both set in the correct position. If they are set in opposite positions then the pump will activate, but water won't be able to come through the machine.
Machine Is Leaking
Leaking Between Portafilter & Grouphead
If the grouphead leaks from the space in between the portafilter and the grouphead during brewing then the group gasket is either worn out or out of place. This gasket needs to be replaced typically every six months to a year.
- Use a flathead screwdriver to pull the shower screen down and off the machine. Looking at the grouphead from below there will be a lip on the shower screen. Gently pry on this lip with the screwdriver from different angles until the shower screen comes off. The group gasket may come off with the screen.
- Use a grouphead brush or an old tooth brush to clean brush down any dirt or coffee residues from the grouphead. Dipping the brush in a solution of hot water and backflushing powder will assist in removing residues.
- Soak the shower screen and filter baskets in a solution of hot water and cafiza.
- Once everything is clean insert the shower screen into the group gasket securely.
- Press both the shower screen and gasket into the grouphead together. Then attach the portafilter firmly to secure these components into place.
From Bottom Of Machine
- Check the water tank and drip tray to make sure there are no cracks or breaks where water can escape. Make sure they are properly positioned on the machine.
- Open the machine and check all of the connections to make sure they are securely attached.
- Examine the pump and boiler assemblies to see if there are any cracks in them. If the machine was exposed to subfreezing conditions without being properly drained it can cause these components to crack. These parts will need to be replaced if they are cracked.
- Make sure both the inlet line and the outlet line on the pump are securely connected.
- Check the various valves located on top of the boiler assembly.
- If water is leaking from the relief valves, then the boiler may be overfilling. Distilled, reverse osmosis, and zero water are not compatible with this style of machine as the water level probe depends on minerals in the water to detect its presence. These water types do not contain minerals, and so the machine will continuously fill until it overflows, usually resulting in water leaking from the relief valves.
- If water is leaking from the relief valves even though you are using a water that contains minerals, then you may need to clean the water level probe.
- If the machine is plumbed, then there may be too much pressure at the inlet line. The pressure restrictor may need to be adjusted, or if you do not have a pressure restrictor installed you may need to install one.
- If the valves are leaking directly from where they screw into the boiler, then they may have a broken seal. Try resealing the valves by using white teflon plumbers tape or food safe permabond and screwing them back into the boiler.
- If there are any broken or cracked hoses, or hoses with pinhole leaks, they will need to be replaced.
- If you cannot find the source of the leak, it's possible the water you are seeing is from water spilled when refilling the machine, or from the drip tray being out of position. It is also possible to run the unit with the casing off to help identify the source of the leak; precautions should be taken to protect yourself from any exposed wiring or hot water or steam that comes from the machine if you attempt this.
Steam From Top Of Machine
If there is steam coming from the top of the machine then one of the relief valves is venting steam.
- If the steam is leaking from the machine while it is heating up, with more and more steam coming from the top as the machine heats more, then the steam is coming from the vacuum relief valve.
- The vacuum relief valve is meant to vent steam until a certain amount of pressure has built up in the boiler. It is normal for this valve to vent steam as the machine is heating. Once enough steam pressure is built up in the boiler the valve will pop closed.
- If the machine is fully heated and the vacuum relief valve is still not closing then it may need to be cleaned.
- If cleaning the vacuum relief valve has not resolved the issue, then the vacuum relief valve may be broken and will need to be replaced.
- If the steam is leaking from the machine after it is fully heated, then the pressure relief valve may be relieving excess steam pressure.
- The pressurestat may need to be lowered. If the pressure is set too high the relief valve may open.
- The pressure relief may be stuck open.
- If the relief valve is still opening, then either the pressurestat or the relief valve may be broken and will need to be replaced.
From Steam Wand Or Hot Water Tap
- If either wand is leaking from the end of the wand, it means the steam/hot water valve is not fully closed.
- Make sure the knob is securely in the closed position.
- If the knob feels loose, or doesn't appear to be properly engaging, then there may be a loose or broken part in the knob assembly.
- If the leaking persists, then the corresponding valve may need to be replaced.
- If the wand is leaking between the tip and the arm of the wand during use, there is an o-ring that is broken, missing, or out of position.
- If the wand is leaking from the ball joint, then there may an o-ring that is worn out or out of position.
Machine Not Heating Or Powering On
No Power
- Make sure the machine is plugged into an appropriate power source.
- Do not use the machine on a surge protector. This machine has a high power draw, more than a typical kitchen appliance such as a refrigerator or a microwave. Surge protectors are typically not rated to handle the amperage this machine requires.
- Try using the machine on a different outlet, and make sure the machine is the only appliance plugged into that outlet.
- Make sure the power switches are functioning properly and not broken. If the machine isn't powering on try pressing and holding the power button in the on position to see if the machine turns on. If you are able to power the machine on this way then the power switch needs to be replaced.
- If the machine recently had a leak, had water spilled on it, or any other exposure to moisture then the machine may be shorting out. Try letting the machine sit unplugged for 48 hours to make sure there isn't a short caused by moisture.
Brew Not Heating
- Give the machine sufficient time to heat up. A heating time of 20-30 minutes is recommended for prosumer style machines for it to be sufficiently heated for brewing. Make sure the portafilter is attached during heating.
- Make sure the heating indicator is on. If the heating indicator is not on, then the machine will not heat. Typically this light will be off if the machine is out of water or not able to fill the boiler.
- The pressurestat may be set too low resulting in a lower temperature. Be cautious when adjusting the pressurestat. Setting it too high can cause the machine to overheat, resulting in the pressure relief valve blowing off excess steam.
- The high limit switch may be tripped and needs to be reset.
- The heating element may be broken and may require replacement.
Steam Not Heating
- If the machine is producing steam, but you think it's not producing enough steam, make sure that you are purging the line before frothing. To purge the line simply open the steam knob and let steam come through until it changes from mostly water to mostly steam. When steam leaves the boiler and hits the cold wand it is going to condense back into water. If you do not purge the line it will affect the way the steam wand froths.
- Make sure the steam boiler is turned on for the machine. Most prosumer units feature a switch, button, or PID menu option to turn the steam boiler off.
- Give the machine sufficient time to heat up. A heating time of 20-30 minutes is recommended for prosumer style machines for it to be sufficiently heated for brewing. Make sure the portafilter is attached during heating.
- Make sure the heating indicator is on. If the heating indicator is not on, then the machine will not heat. Typically this light will be off if the machine is out of water or not able to fill the boiler.
- The pressurestat may be set too low resulting in a lower brew temperature. Be cautious when adjusting the pressurestat. Setting it too high can cause the machine to overheat, resulting in the pressure relief valve blowing off excess steam.
- The high limit switch may be tripped and needs to be reset.
- The heating element may be broken and may require replacement.
On But Not Heating
- There is a loose, disconnected, or broken wire inside the machine. Remove the top of the machine and inspect the wiring.
- The high limit switch of the machine may have tripped.
- The outlet the machine is plugged into is not rated to handle the power draw of the machine.
Portafilter Handle Not Fitting On Machine
- On all new machines, the portafilter may or may not fit perpendicular to the machine. This is perfectly normal. This is because the grouphead gasket requires time to wear in before this can happen. As long as you can get the portafilter hand tight onto the machine and brew without leaking, then the machine is operating properly.
- Too much coffee may be dosed into the portafilter. If there is too much coffee in the portafilter, it can press into the shower screen and prevent the portafilter tightening all the way. Reduce the amount of coffee in the portafilter and try again. If you see an indentation from the shower screen in the grounds, then you’ve added too much.
- Check the filter baskets for dings, dents, or any sort of warping. A filter basket that is malformed can prevent the filter basket from sealing up against the group gasket.
- The group gasket has slipped out of place or needs replacing. Please refer to the section of this article which discusses gasket issues for instructions on how to test the gasket or replace it.
Diagrams & Manuals
| Electrical Diagram: | |
| Hydraulic Diagram: | |
| Machine Manual: | |
| Parts Diagram: | |
| Service Manual | |
| Startup Guide: | |
Specifications