|
|
| (6 intermediate revisions by 3 users not shown) |
| Line 1: |
Line 1: |
| − | The ROK Espresso Maker is a [[:Category:Manuals|manual]] espresso machine which uses a simple, but effective, design. {{Description-Table
| + | {{Getting-Started |
| − | |title = ROK Espresso Maker | + | |brand = ROK |
| − | |machine_image = [[File:ROK ESPRESSO MAKER.gif|400px|none]] | + | |machine_type = manuals |
| − | |manufacturer = [[:Category:ROK|ROK]] | + | |product_banner = [[File:Wiki_productpagebanner_1200x175_rokespressomaker_r1.jpg]] |
| − | |model_name = Espresso Maker | + | |product_page_title = ROK Espresso Maker |
| − | |type = [[:Category:Manuals|Manual]] | + | |page_type = set up |
| − | |buy_button = Yes | + | |section1 = Getting Started |
| − | |button_size = 400px | + | |anchor1 = Getting Started |
| − | |button_link = https://www.wholelattelove.com/products?utf8=%E2%9C%93&keywords=ROK+Espresso+Maker | + | |section2 = Pre-Infusing |
| | + | |anchor2 = Pre-Infusing |
| | }} | | }} |
| − | | + | ---- |
| − | == Machine Description ==
| + | |
| − | | + | |
| − | Spotlighted by GQ magazine as one of the “Best Stuff of 2012,” the ROK Espresso Maker is an environmentally friendly manual espresso maker created with durable engine-grade metal guaranteed to last at least 10 years. Going above and beyond simple espresso, the innovative ROK comes with a stainless steel frother to produce foamy milk for lattes, cappuccinos and macchiatos – all without using electricity.
| + | |
| − | | + | |
| − | Created with traditionalists and espresso enthusiasts in mind, this London-designed espresso maker lets users exact complete control over brewing pressure using the two levers located on the sides of the ROK. Since this espresso maker brews with ground coffee, so you're not limited by capsule and pod selection.
| + | |
| − | | + | |
| − | <div style="margin-right: 450px>{{#ev:youtube|https://www.youtube.com/watch?v=iJ3VTdy5dJ4|480|center}}</div>
| + | |
| − | | + | |
| − | The ROK comes packaged in a modern reusable storage tin, complete with accessories including a tamper/measuring spoon, and detachable double-shot spout.
| + | |
| − | | + | |
| − | | + | |
| − | ==Basic Usage==
| + | |
| | ===Getting Started=== | | ===Getting Started=== |
| − | | + | {{Content-Columns |
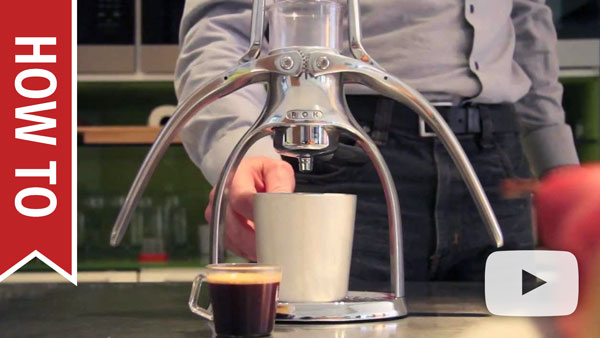
| − | The designer of the ROK describes the basic usage of the ROK Espresso Maker in the following video. | + | |column_1 = The designer of the ROK describes the basic usage of the ROK Espresso Maker in the following video. |
| − | | + | |column_2 = [[File:Wiki-yt-rokespressomaker_overwiew.jpg|center|link=https://www.youtube.com/watch?v=eWEDUOsuxS4]] |
| − | {{#ev:youtube|https://www.youtube.com/watch?v=eWEDUOsuxS4|480|center}}
| + | |media_caption = ROK Espresso Maker |
| − | | + | }} |
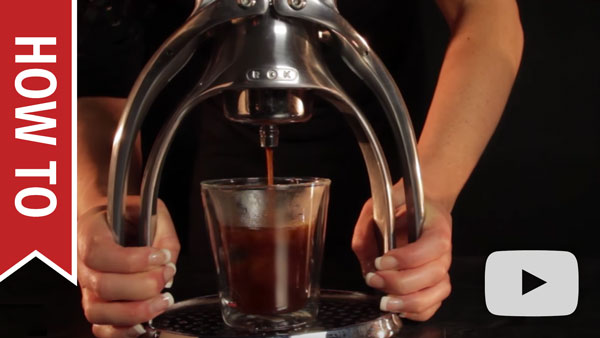
| − | Once you are familiar with the basic espresso brewing process various other espresso based drinks can be made using the equipment received with the ROK Espresso Maker. The video below shows just a few of the possible drinks that can be made: | + | {{Content-Columns |
| − | | + | |column_1 = Once you are familiar with the basic espresso brewing process various other espresso based drinks can be made using the equipment received with the ROK Espresso Maker. The video below shows just a few of the possible drinks that can be made: |
| − | {{#ev:youtube|https://www.youtube.com/watch?v=z00074vW19I|480|center}}
| + | |column_2 = [[File:Wiki-yt-howtomakecoffeedrinkswithrokespressomaker.jpg|center|link=https://www.youtube.com/watch?v=z00074vW19I]] |
| − | | + | |media_caption =How to Make Coffee Drinks on the ROK Espresso Maker |
| | + | }} |
| | + | ---- |
| | ===Pre-Infusing=== | | ===Pre-Infusing=== |
| | | | |
| | The ROK can do a pre-infusion by simply lowering the handles down until you just meet resistance. Let go of the handles, and pre-infuse for your preferred amount of time, and then continue the shot by reapplying pressure to the handles. | | The ROK can do a pre-infusion by simply lowering the handles down until you just meet resistance. Let go of the handles, and pre-infuse for your preferred amount of time, and then continue the shot by reapplying pressure to the handles. |
| | | | |
| − | ==Cleaning & Maintenance==
| |
| − | ===Flushing The Screen===
| |
| − |
| |
| − | At the end of each day the machine is used we suggest flushing the grouphead with plain water several times to clear out any coffee grinds/residues. Simply follow the same procedure as pulling a shot, but do not add any coffee to the portafilter basket. The group gasket and shower screen are the same part on this machine, so it is important to keep this part clean so that the machine can continue flowing/extracting properly, and so that the portafilter will seal properly when attached.
| |
| − |
| |
| − | ===Grouphead Cleaning===
| |
| − |
| |
| − | Once a month the grouphead should be taken apart for a more thorough cleaning. Bad flavors and coffee residues will buildup in the grouphead over time, so it is important to clean the grouphead regularly.
| |
| − |
| |
| − | #Tip the machine on its side and remove the four allen screws from the bottom of the grouphead assembly. A 3 mm. allen key will be needed to remove the screws. [[File:ESPRESSO MAKER Grouphead Screws.jpg|480px|thumbnail|center|Remove the four screws circled in red.]]
| |
| − | #Once the screws are removed the portafilter holding plate and the shower screen can be removed. [[File:ESPRESSO MAKER Group Components.jpg|480px|thumbnail|center|The portafilter holding plate is pictured on the left and the shower screen/group gasket is pictured on the right.]]
| |
| − | #Use a grouphead brush or an old tooth brush to brush down the grouphead where these components were removed from. Gently clean the shower screen as well using warm water and soap. While you clean these components the portafilter, filter baskets, and the portafilter holding plate should all be soaked in a solution of hot water and [[https://www.wholelattelove.com/products/urnex-cafiza-espresso-machine-cleaner backflushing powder]] for 5-10 minutes to remove old coffee residues. Do not soak any plastic components in this solution as backflushing powder can deteriorate plastic.
| |
| − | #Reassemble the machine and run a few blank shots of just plain water through the machine.
| |
| − |
| |
| − | ===Milk Frother Cleaning===
| |
| − |
| |
| − | After each use the milk frothing device should be cleaned to prevent milk residues from building up on the screen the create the froth, and to keep the device sanitary.To clean the milk frothing simply take a solution of warm water and dish soap or vinegar, and use the frother like you are frothing milk. Then rinse the device thoroughly with warm water.
| |
| − |
| |
| − | ===Screen/Gasket Replacement===
| |
| − |
| |
| − | The screen/gasket should be replaced every 6 months to a year, depending on how heavily the machine is used. Instructions for accessing this part can be found in the [[#Grouphead Cleaning|grouphead cleaning]] portion of this article. Since the gasket is the same on both sides you may be able to use the same gasket for longer by simply flipping it over.
| |
| − |
| |
| − | ==Troubleshooting==
| |
| − | ===No Crema or Bad Tasting Shots===
| |
| − |
| |
| − | {{Troubleshooting-No-Crema-Bad-Shots}}
| |
| − |
| |
| − | ===Portafilter Issues===
| |
| − |
| |
| − | ====Leaking====
| |
| − | If the machine is leaking from between the grouphead and the portafilter then the grouphead gasket is either pushed out of place and needs to be reinserted properly, or the gasket is worn out. Typically grouphead gaskets will wear out from 6 months to a year depending on how heavily the machine is used. Premature wear to this gasket can be caused by using excessive force when attaching the portafilter. Refer to the [[#Grouphead Cleaning|grouphead cleaning]] instructions portion of this article for information on how to access this gasket. The gasket may be able to be used for a longer time by simply flipping it over, otherwise if the leaking continues, it will need to be replaced.
| |
| − |
| |
| − | ====Not Fitting====
| |
| − | #On new machines, or machines where the group gasket has been recently replaced, the portafilter will not fit perpendicular to the machine. This is because the grouphead gasket requires time to wear in before this can happen. As long as you can get the portafilter hand tight onto the machine and brew without leaking then the machine is operating properly. Do not use excessive force when attaching the portafilter or it can damage or break the grouphead gasket.
| |
| − | #Check the filter basket for dings, dents, or any sort of warping. A filter basket that is malformed can prevent the portafilter from attaching. Try attaching the portafilter with the basket removed, or with a different basket to see if it fits on correctly.
| |
| − | #The group gasket has slipped out of place or needs replacing. Instructions for accessing the gasket can be found in the [[#Grouphead Cleaning|grouphead cleaning]] portion of this article.
| |
| − |
| |
| − | ===No Pressure/Water Spraying From Cup===
| |
| − |
| |
| − | If the ROK Espresso Maker is not pressurizing when the handles are pressed down, or if there is water spraying from between the plunger and the cup, then the o-ring on the plunger assembly may be twisted out of place or is worn out.
| |
| − |
| |
| − | #To remove the plunger the screws at the top of the arms will need to be removed. Take two flathead screwdrivers. Use one to hold one screw in place and another screwdriver to turn the other screw.
| |
| − | #Once the screws are removed the arms of the machine will fold back, so that the plunger mechanism can be lifted out. There will be an o-ring on the plunger, which can be slipped off. Inspect this o-ring for damage; replace if needed. [[File:ESPRESSO MAKER Plunger Removed.jpg|480px|thumbnail|center|The Espresso Maker with the arms opened and the plunger/o-ring removed.]]
| |
| − | #Reinstall the o-ring onto the plunger. It is important that the o-ring is not twisted, otherwise it may not seal properly. We suggest placing the o-ring towards the bottom of the plunger, like shown in the picture below. [[File:ESPRESSO MAKER O-ring Positioning.jpg|480px|thumbnail|center|O-ring correctly installed on plunger mechanism.]]
| |
| − | #Reassemble the machine. The plunger mechanism will need to be partially inserted, about a half an inch, in order for the arms of the machine to match up with it. Once these components are lined up the screws can be inserted and tightened down.
| |
| − |
| |
| − | ==Diagram & Manuals==
| |
| − |
| |
| − | {| class="wikitable"
| |
| − | !colspan=2|ROK Espresso Maker
| |
| − | |-
| |
| − | |'''Machine Manual:'''
| |
| − | |''Not Available''
| |
| − | |-
| |
| − | |'''Parts Diagram:'''
| |
| − | |[[File:ESPRESSO MAKER Simplified Parts Diagram.jpg|150px|none]]
| |
| − | |-
| |
| − | |}
| |
| − |
| |
| − | <!-- Categories -->
| |
| − | [[Category:Manuals]]
| |
| | [[Category:ROK]] | | [[Category:ROK]] |
The ROK can do a pre-infusion by simply lowering the handles down until you just meet resistance. Let go of the handles, and pre-infuse for your preferred amount of time, and then continue the shot by reapplying pressure to the handles.