|
|
| Line 1: |
Line 1: |
| − | The Rocket Espresso R58 V2 is a [[:Category:Prosumers|Prosumer]] espresso machine featuring a programmable, detachable PID, and the ability to brew coffee and steam milk simultaneously. {{Description-Table
| + | {{Getting-Started |
| − | |title = Rocket Espresso R58 V2 | + | |brand = Rocket |
| − | |machine_image = [[File:ROCKET_ESPRESSO_R58_V2.jpg|400px|none]] | + | |machine_type = Prosumer |
| − | |manufacturer = [[:Category:Rocket Espresso]] | + | |product_banner = [[File:Wiki_ProductPageBanner_1200x175_RocketR58V_v1.jpg|link=]] |
| − | |model_name = R58 V2 | + | |product_page_title = Rocket R58 |
| − | |type = [[:Category:Prosumers|Prosumer]] | + | |page_type = set up |
| − | |buy_button = Yes | + | |section1 = Install It |
| − | |button_size = 400px | + | |anchor1 = Install |
| − | |button_link = https://www.wholelattelove.com/products/rocket-espresso-r58-v2 | + | |section2 = Get it Good & Hot |
| | + | |anchor2 = Heating |
| | + | |section3 = Get a Handle on your Tamp |
| | + | |anchor3 = Tamping |
| | + | |section4 = Brew Better |
| | + | |anchor4 = Brew Better |
| | + | |section5 = Brew the Best You Can Brew |
| | + | |anchor5 = Brew Best |
| | + | |section6 = Preinfusion and You |
| | + | |anchor6 = Preinfusion |
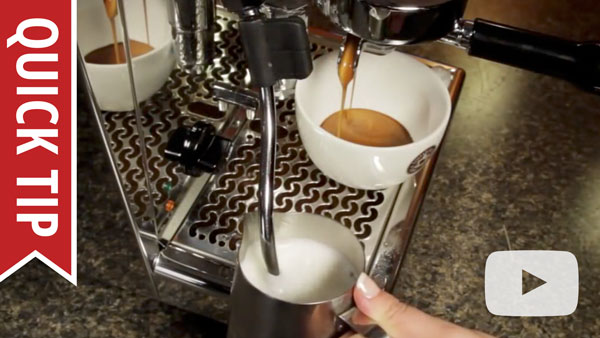
| | + | |section7 = Get Frothing |
| | + | |anchor7 = Get Frothing |
| | + | |section8 = Froth Better |
| | + | |anchor8 = Froth Better |
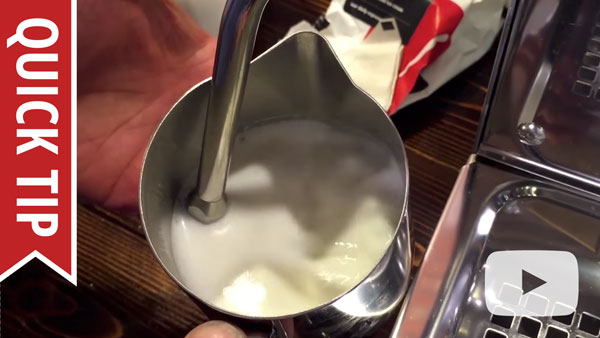
| | + | |section9 = Frothing and Habits to Avoid |
| | + | |anchor9 = Frothing Mistakes |
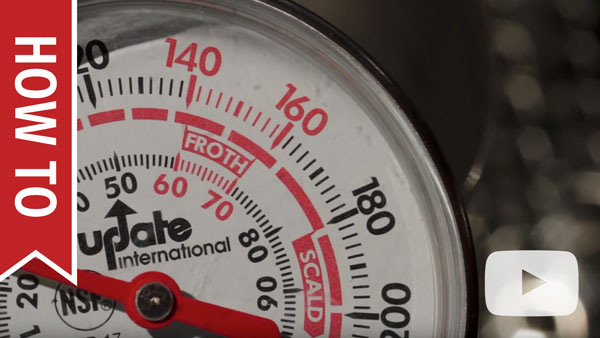
| | + | |section10 = Steam & the Heating Sweet Spot |
| | + | |anchor10 = Steaming Temperature |
| | + | |section11 = Steam with Thermometers |
| | + | |anchor11 = Steam with Thermometers |
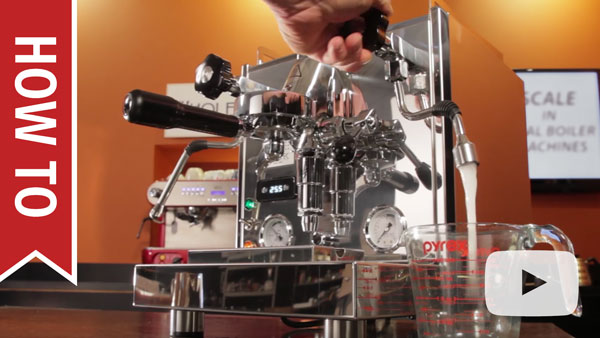
| | + | |section12 = Don't Break It |
| | + | |anchor12 = Preventative Maintenance |
| | }} | | }} |
| − | ==Basic Usage==
| + | {{Set-Up-Content |
| − | ===Getting Started===
| + | |dual_boiler = yes |
| − | | + | |
| − | {{#ev:youtube|https://www.youtube.com/watch?v=68zRki0W6rw|480|center}} | + | |
| − | | + | |
| − | ===Adjusting Brew Pressure===
| + | |
| − | | + | |
| − | {{#ev:youtube|https://www.youtube.com/watch?v=WqBSfikYp7U|480|center|||start=448}}
| + | |
| − | | + | |
| − | ===Adjusting The PID===
| + | |
| − | | + | |
| − | https://www.youtube.com/watch?v=_PVtP1NRcKE|480|center|||start=52
| + | |
| − | | + | |
| − | More detailed information on adjusting the PID can be found in the machine manual. The PID programming instructions are on pp.10-12 of the digital PDF copy, and on pp.17-21 of the hard copy.
| + | |
| − | | + | |
| − | ===Draining The Boilers===
| + | |
| − | | + | |
| − | {{#ev:youtube|https://www.youtube.com/watch?v=TFUwuGJWny4|480|center}}
| + | |
| − | | + | |
| − | ===Inside The R58===
| + | |
| − | | + | |
| − | {{#ev:youtube|https://www.youtube.com/watch?time_continue=1&v=WqBSfikYp7U|480|center}}
| + | |
| − | | + | |
| − | ===Removing The Case===
| + | |
| − | | + | |
| − | Instructions for removing the casing of the machine can be found in the video below. The machine pictured in the video is slightly different than the R 60V, but the procedure is identical for most Rocket Espresso machines.
| + | |
| − | {{#ev:youtube|https://www.youtube.com/watch?v=KJwq4wR8vds|480|center|||start=36}}
| + | |
| − | | + | |
| − | | + | |
| − | == Cleaning & Maintenance ==
| + | |
| − | | + | |
| − | {{Maintenance-Prosumer}}
| + | |
| − | | + | |
| − | {{Maintenance-Draining-Dual-Boiler}}
| + | |
| − | | + | |
| − | == Troubleshooting ==
| + | |
| − | | + | |
| − | ===No Crema or Bad Tasting Shots===
| + | |
| − | | + | |
| − | {{Troubleshooting-No-Crema-Bad-Shots}}
| + | |
| − | | + | |
| − | | + | |
| − | ===Difficulty Frothing===
| + | |
| − | | + | |
| − | {{Troubleshooting-Frothing}}
| + | |
| − | | + | |
| − | | + | |
| − | ===Flow Issues===
| + | |
| − | | + | |
| − | The first place to start with any flow issue is cleaning the machine. Before going through these steps please make sure the machine is cleaned according to the [[#Cleaning & Maintenance|Cleaning & Maintenance]] section of this article.
| + | |
| − | | + | |
| − | {{Troubleshooting-Prosumer-No-Steam-PID
| + | |
| − | |vacuum_relief_instr = Instructions for cleaning the vacuum relief valve on Rocket style machines can be found in the video below. The video shows a different Rocket unit, but the same vacuum relief can be used. The vacuum relief valve on the R58 is located on the top of the steam boiler, listed as part 17 on p.6 of the machine's parts diagram. {{#ev:youtube|https://www.youtube.com/watch?v=KJwq4wR8vds|480|center|||start=524}}
| + | |
| − | |hls_reset_instr = Instructions for cleaning the steam high limit switch can be found in the video below: {{#ev:youtube|https://www.youtube.com/watch?v=WqBSfikYp7U|480|center|||start=178}}
| + | |
| | }} | | }} |
| − |
| |
| − | {{Troubleshooting-Prosumer-Brew-Blocked
| |
| − | |grouphead_instr = Instructions for cleaning the grouphead can be found in the document below: [[File:ALL MODELS Cleaning and Backflushing Grouphead.pdf|250px|thumbnail|center|Group Cleaning Instructions]]
| |
| − | |backflush_instr = Instructions for backflushing the machine can be found in the video below: {{#ev:youtube|https://www.youtube.com/watch?v=k1Vkfj83uyg|480|center}}
| |
| − | }}
| |
| − |
| |
| − | {{Troubleshooting-Prosumer-No-Hot-Water-PID
| |
| − | |vacuum_relief_inst = Instructions for cleaning the vacuum relief valve on Rocket style machines can be found in the video below. The video shows a different Rocket unit, but the same vacuum relief can be used. The vacuum relief valve on the R58 is located on the top of the steam boiler, listed as part 17 on p.6 of the machine's parts diagram. {{#ev:youtube|https://www.youtube.com/watch?v=KJwq4wR8vds|480|center|||start=524}}
| |
| − | |hls_reset_instr = Instructions for cleaning the steam high limit switch can be found in the video below: {{#ev:youtube|https://www.youtube.com/watch?v=WqBSfikYp7U|480|center|||start=178}}
| |
| − | }}
| |
| − |
| |
| − | ====No Flow At All====
| |
| − |
| |
| − | {{Troubleshooting-Prosumer-No-Flow-At-All
| |
| − | |socket_style = Yes
| |
| − | |sensor_instr = The tank's level sensor is not compatible with reverse osmosis or zero waters because of their lack of mineral content. The sensor depends on minerals being in the water to pass an electrical signal which tells the machine that water is present in the tank. Waters that don't have enough mineral content will not be able to pass this electrical signal, so the machine will not think water is present.
| |
| − | }}
| |
| − |
| |
| − | {{#ev:youtube|https://youtu.be/dAdv_e8fXhw|480|center}}
| |
| − |
| |
| − | ===Machine Is Leaking===
| |
| − |
| |
| − | {{Troubleshooting-Prosumer-Bad-Gasket
| |
| − | |gasket_instr = Instructions for replacing the gasket can be found in the document below: [[File:ALL MODELS Changing The Group Gasket.pdf|250px|thumbnail|center|Gasket Changing Instructions]]
| |
| − | }}
| |
| − |
| |
| − | {{Troubleshooting-Prosumer-E61-Leak
| |
| − | |lever_style = Lever
| |
| − |
| |
| − | |lever_leak_instr = A blowout of the lever assembly can be seen on p.12 of the machine's parts diagram. The o-rings that will need to be checked are listed as part 7 and part 14, and the valve assembly listed as part 12.
| |
| − | ###To access these o-rings remove the end cap of the lever assembly using a flathead screwdriver.
| |
| − | ###Once this is removed the other components of the grouphead assembly can begin to be slipped off. The bolts that the lever slides into can be removed with open ended wrenches or an adjustable wrench.
| |
| − | ###Inspect the o-rings and make sure they are not damaged. It's possible that they are just dirty and need to be cleaned off and reseated. If they are damaged, broken, or shows signs of chaffing then they will need to be replaced.
| |
| − | ###Inspect the valve components as well to make sure they are intact.
| |
| − | ###Reassemble the components and see if leaking is resolved.
| |
| − | |top_valve_leak_instr = A blowout of the top valve assembly, known as the mushroom or trumpet valve, can be found on p.12 of the machine's parts diagram. There are a few components which can be contributing to the leaking. There are two o-rings, listed as parts 2, 6, and 10 on this page of the diagram. There is also a valve assembly shown as part 9 on the same page.
| |
| − | ###To access these parts use an open ended wrench or adjustable wrench to remove the smaller top bolt of the E-61. This will give you access to the first o-ring and spring assembly.
| |
| − | ###To access further down into this part of the grouphead use a wrench to remove the large bolt. This will let you access the other o-ring, another spring assembly, and the other valve assembly.
| |
| − | ###Inspect all of these components for integrity. Clean any dirty parts and replace any broken parts.
| |
| − | ###Reassemble the grouphead and see if the leaking is resolved.
| |
| − | |bottom_valve_leak_instr = A blowout of the bottom valve assembly, known as the release valve, can be found on p.12 of the machine's parts diagram. There are two o-rings in this assembly, listed as parts 7 and 31 on the diagram, and two valve assemblies, listed as parts 25 and 28 on the diagram, that can be causing the leak.
| |
| − | ###To access these parts use an open ended wrench or adjustable wrench to remove the smaller bottom bolt. You will be able to access part 31, the o-ring, and part 28, one of the valve assemblies. Inspect the parts. If they are dirty clean them off, if they are broken replace them.
| |
| − | ###To access the next o-ring and valve assembly use a wrench to remove the larger of the bolts. Again, inspect the parts for cleanliness and damage. Clean or replace as needed.
| |
| − | ###Reassemble the release valve and test to see if the leaking is resolved.
| |
| − | |E61_group_cleaning_instr = Instructions for cleaning the entire E-61 can be found by clicking [http://coffeetimex.wikidot.com/e61-group-servicing here].
| |
| − | |E61_attach_instr = There are two possible reasons for the machine to be leaking from here.
| |
| − | ##The first is that one of the plumb lines connected to the back of the E-61 is not secure resulting in a leak. This will need to be tightened from the inside of the machine. You may see leaking from the bottom of the machine as well if this is the case. Remove the top of the machine and look towards the front of the machine. These lines will be located on the back of the faceplate, opposite to where the grouphead is seated. They are listed as parts 1 and 9 on p.6 of the machine's parts diagram. Use an open ended wrench or adjustable wrench to tighten these down. If the leaking persists you may need to apply white teflon plumbers tape or a sealing compound such as food safe permabond.
| |
| − | ##The other possibility is that the E-61 group chassis gasket is not sealing tightly, or is worn out or damaged and will need to be replaced. The chassis gasket is listed as part 10 on p.12 of the parts diagram. There are two bolts which secure the E-61 to the machine chassis, causing it to press on the gasket and create a seal. First try tightening these two bolts down. The bolt assembly is listed as part 11 on p. 12 of the diagram. If tightening these bolts does not resolve the leak, then the chassis gasket will need to be replaced.
| |
| − | }}
| |
| − |
| |
| − | {{Troubleshooting-Prosumer-Bottom-Leak
| |
| − | |plumbed = Yes
| |
| − | |water_source = Reservoir
| |
| − | |level_probe_instr = Instructions for removing the level probe for cleaning can be found in the video below. Once the probe is removed use a scrubby sponge to clean any scale build up on it. Soaking the tip of the probe in a solution of hot water and backflushing powder may help with removing the buildup. {{#ev:youtube|https://www.youtube.com/watch?v=WqBSfikYp7U|480|center|||start=135}}
| |
| − | |drain_line = Yes
| |
| − | }}
| |
| − |
| |
| − | {{Troubleshooting-Prosumer-Top-Steaming
| |
| − | |vacuum_cleaning_instr = Instructions for cleaning the vacuum relief valve on Rocket style machines can be found in the video below. The video shows a different Rocket unit, but the same vacuum relief can be used. The vacuum relief valve on the R58 is located on the top of the steam boiler, listed as part 17 on p.6 of the machine's parts diagram. {{#ev:youtube|https://www.youtube.com/watch?v=KJwq4wR8vds|480|center|||start=524}}
| |
| − | |steam_adjust_style = PID
| |
| − | }}
| |
| − |
| |
| − | {{Troubleshooting-Prosumer-Wand-Leak
| |
| − | |tip_instr = Unscrew the tip that is leaking and check the o-ring that seals the tip to the wand. Make sure all of the parts are clean and that the o-ring isn't damaged or broken. The metal steam tip or hot water tips can be soaked in a solution of hot water and backflushing powder for more effective cleaning.
| |
| − | |ball_joint_instr = <br />
| |
| − | ##These instructions apply to both the steam and hot water wands. First remove the wand arm. This can be done by unscrewing the hex shaped nut at the top of the arm using an adjustable or open-ended wrench.
| |
| − | ##Once the wand is removed you may have parts stick to the valve assembly. Do not lose these parts. A blowout of both wand assemblies can seen on p.8 of the parts diagram.
| |
| − | ##There are a few different o-rings in this assembly. Make sure everything is clean and that the o-ring aren't damaged or broken.
| |
| − | ##Inspect the tension spring, listed as part 7 on p.8, to make sure it is in good condition. The spring should be really firm. If it is easily compressed then it may need to be replaced. The bottom of the spring will have a metal gasket, which helps the wand pivot on the spring Make sure these parts are clean and reinstall them.
| |
| − | }}
| |
| − |
| |
| − | ===Machine Not Heating Or Powering On===
| |
| − |
| |
| − | {{Troubleshooting-Prosumer-No-Power}}
| |
| − |
| |
| − | {{Troubleshooting-Prosumer-Brew-Cold
| |
| − | |temp_adjust_style = PID
| |
| − | |pid_adjust_instr = Instructions for adjusting the PID can be found of this article that discusses [[#Adjusting The PID|PID adjustment]].
| |
| − | |hls_instr = <br />
| |
| − | ##First unplug the machine, let it cool off, and then [[#Removing The Case|remove the casing]].
| |
| − | ##The high limit switch can be found on the brew boiler on the left hand side of the machine once the casing is removed, behind the control board.[[File:ROCKET_ESPRESSO_R58_Brew_Hight_Limit_Switch.png|580px|thumbnail|center|The high limit switch is circled in red; the red button in the center is the reset.]]
| |
| − | ##To reset the high limit switch press on the red reset button in the center of the high limit switch several times.
| |
| − | }}
| |
| − |
| |
| − | {{Troubleshooting-Prosumer-Steam-Cold
| |
| − | |steam_test_instr = Instructions for doing a steam test for the machine can be found in the video below: {{#ev:youtube|https://www.youtube.com/watch?v=iM_kVx-Fr3M|480|center}}
| |
| − | #:The machine in the video will be of a different brand, but the same procedure will apply to this machine.
| |
| − | |temp_adjust_style = PID
| |
| − | |pid_adjust_instr = Instructions on how to adjust the PID can be found in the section of this article that discusses [#Adjusting The PID]adjusting the PID].
| |
| − | |hls_instr = Instructions for cleaning the steam high limit switch can be found in the video below: {{#ev:youtube|https://www.youtube.com/watch?v=WqBSfikYp7U|480|center|||start=178}}
| |
| − | }}
| |
| − |
| |
| − | {{Troubleshooting-Prosumer-No-Heat
| |
| − | |tank_instructions = The tank's level sensor is not compatible with reverse osmosis or zero waters because of their lack of mineral content. The sensor depends on minerals being in the water to pass an electrical signal which tells the machine that water is present in the tank. Waters that don't have enough mineral content will not be able to pass this electrical signal, so the machine will not think water is present, and will not heat as a result.
| |
| − | |dual_boiler = Yes
| |
| − | |hls_reset_instr = <br />
| |
| − | ##First unplug the machine, let it cool off, and then [[#Removing The Case|remove the casing]].
| |
| − | ##There are two high limit switches in the machine. Instructions for cleaning the steam high limit switch can be found in the video below: {{#ev:youtube|https://www.youtube.com/watch?v=WqBSfikYp7U|480|center|||start=178}}
| |
| − | ##:The brew high limit switch can be found on the brew boiler on the left hand side of the machine, behind the control board.[[File:ROCKET_R_60V_High_Limit_Brew.png|580px|thumbnail|center|The high limit switch is circled in red; the red button in the center is the reset.]]
| |
| − | ##To reset the high limit switches press on the red reset button in the center of the high limit switch several times.
| |
| − | }}
| |
| − |
| |
| − | ===Portafilter Handle Not Fitting On Machine===
| |
| − |
| |
| − | {{Troubleshooting-Prosumer-Portafilter}}
| |
| − |
| |
| − | ===PID Blinking Three Dashes===
| |
| − |
| |
| − | If the PID is blinking three dashes when it is turned on there are a few things to check:
| |
| − | #First, only connect and disconnect the PID while the machine is powered off.
| |
| − | #Make sure the connector is firmly attached to the machine. The three dashes will appear if the PID is powered, but data isn't transmitting. This is typically because the connector is only partially attached.
| |
| − | #If the previous steps did not resolve the behavior then there may be a loose cord inside the machine. Unplug the machine and [[#Removing The Case|remove the case]]. Once the case is removed check the connection from the PID module to the control board.
| |
| − |
| |
| − | ==Diagrams & Manuals==
| |
| − |
| |
| − | {{Support-Documents
| |
| − | |title = Rocket Espresso R58 V2
| |
| − | |machine_manual = [[File:ROCKET ESPRESSO R 60V Machine Manual.pdf|150px|none]]
| |
| − | |parts_diagram = [[File:R58 V2 Parts Diagram.pdf|150px|none]]
| |
| − | }}
| |
| − |
| |
| − | ==Specifications==
| |
| − |
| |
| − | {{Specifications-Prosumer
| |
| − | |basic_specs = yes
| |
| − | |width = 12.25 in.
| |
| − | |height = 16.25 in.
| |
| − | |depth = 17.5 in.
| |
| − | |weight = 64 lbs
| |
| − | |watts = 1400
| |
| − | |volts = 120
| |
| − |
| |
| − | |housing = yes
| |
| − | |housing_material = Stainless Steel
| |
| − | |drip_tray_material = Stainless Steel
| |
| − | |drip_tray_cover_material = Stainless Steel
| |
| − | |drain_line_adaptable = Yes
| |
| − | |frame = Stainless Steel
| |
| − | |power_cord_storage = No
| |
| − | |tall_legs = Yes
| |
| − | |power_cord_length = 56 in.
| |
| − |
| |
| − | |cup_height = Yes
| |
| − | |adjustable_cup_height = No
| |
| − |
| |
| − | |frothing = yes
| |
| − | |wand_material = Stainless Steel
| |
| − | |wand_style = Commercial
| |
| − | |wand_movement = Articulating
| |
| − | |usable_length = 4.5 in.
| |
| − | |number_of_holes = 1
| |
| − | |no_burn_wand = Yes
| |
| − | |optional_tips = Yes
| |
| − |
| |
| − | |water_source = yes
| |
| − | |source_type = Reservoir & Plumbed
| |
| − | |reservoir_capacity = 2.5 Liter
| |
| − | |reservoir_material = Plastic
| |
| − | |reservoir_removable = Yes
| |
| − | |reservoir_access = Top
| |
| − | |filter_life = 3 Months
| |
| − | |level_gauge = Yes
| |
| − | |level_visible = No
| |
| − | |water_filter = Yes
| |
| − |
| |
| − | |controls = yes
| |
| − | |control_type = Knobs & Toggles
| |
| − | |display_type = PID
| |
| − | |power_light = Yes
| |
| − | |brewing_light = Yes
| |
| − | |program_power_on = No
| |
| − | |aroma_control = Yes
| |
| − | |auto_shut_off = Yes
| |
| − | |brew_complete = No
| |
| − | |clock_timer = No
| |
| − | |cup_volume_control = Manual
| |
| − | |programmable_brewing = No
| |
| − | |temp_control = PID
| |
| − | |pre_infusion = Yes
| |
| − | |low_water_warning = No
| |
| − | |energy_saving = No
| |
| − | |pressure_gauges = Yes
| |
| − | |steam_control = Knob
| |
| − | |brew_temp_display = PID
| |
| − |
| |
| − | |cup_warmer = yes
| |
| − | |warmer_material = Stainless Steel
| |
| − | |warmer_size = 10 x 6 in.
| |
| − | |warmer_type = Passive
| |
| − |
| |
| − | |portafilter = yes
| |
| − | |portafilter_material = Chrome Plated Brass
| |
| − | |portafilter_type = Commercial Style
| |
| − | |quantity_included = 2
| |
| − | |portafilter_weight = 1.25 lbs
| |
| − | |portafilter_diameter = 58 mm.
| |
| − | |commercial_baskets = Single & Double
| |
| − | |bottomless_portafilter = Yes
| |
| − | |tamper_size = 58 mm.
| |
| − |
| |
| − | |brew_group = yes
| |
| − | |group_material = Chrome Plated Brass
| |
| − | |group_type = E61
| |
| − | |preheat = Yes
| |
| − | |solenoid = Manual
| |
| − | |back_flushable = Yes
| |
| − |
| |
| − | |boiler_data = yes
| |
| − | |num_boilers = 2
| |
| − | |brew_steam_simultaneous = Yes
| |
| − |
| |
| − | |brew_boiler = yes
| |
| − | |brew_boiler_type = Dual Boiler
| |
| − | |brew_boiler_wattage = 1400
| |
| − | |brew_boiler_volume = .5 Liter
| |
| − | |brew_boiler_material = Copper
| |
| − | |brew_boiler_orientation = Angled
| |
| − | |brew_element_location = Internal
| |
| − | |brew_boiler_autofill = Yes
| |
| − | |brew_boiler_insulated = Yes
| |
| − |
| |
| − | |steam_boiler = yes
| |
| − | |steam_boiler_type = Large Volume
| |
| − | |steam_boiler_wattage = 1400
| |
| − | |steam_boiler_volume = 1.8 Liters
| |
| − | |steam_boiler_material = Brass / Copper
| |
| − | |steam_boiler_orientation = Vertical
| |
| − | |steam_element_location = Internal
| |
| − | |steam_boiler_insulated = Yes
| |
| − |
| |
| − | |pump_data = yes
| |
| − | |pump_type = Rotary
| |
| − | |pump_pressure = 18 Bar
| |
| − | |pump_pressure_adjust = Yes
| |
| − | |pump_self_prime = 8-9 Bar
| |
| − |
| |
| − | |performance = yes
| |
| − | |heat_up = 1080 secs
| |
| − | |recommended_heat_up = 1800 secs
| |
| − |
| |
| − | |details = yes
| |
| − | |manufacture_country = Italy
| |
| − | |recommended_application = Home / Commercial
| |
| − | }}
| |
| − |
| |
| − | <!-- Categories -->
| |
| − | [[Category:Prosumers]]
| |
| | [[Category:Rocket Espresso]] | | [[Category:Rocket Espresso]] |