Difference between revisions of "Gaggia Anima Deluxe"
From Whole Latte Love Support Library
(→Basic Usage) |
(added specific anima line startup video) |
||
| (13 intermediate revisions by 5 users not shown) | |||
| Line 1: | Line 1: | ||
| − | + | {{Getting-Started | |
| − | + | |brand = Gaggia | |
| − | = | + | |machine_type = Super-Automatics |
| − | + | |product_banner = [[File:Wiki_ProductPageBanner_1200x175_GaggiaAnimaDeluxe_v1.jpg]] | |
| − | + | |product_page_title = Gaggia Anima Deluxe | |
| − | + | |page_type = set up | |
| − | + | |section1 = How to Setup and Startup Your Machine | |
| − | + | |anchor1 = Setup and Startup | |
| − | == | + | |section2 = Install It |
| − | + | |anchor2 = Install It | |
| − | + | |section3 = Educate Yourself | |
| − | + | |anchor3 = Educate Yourself | |
| − | === | + | |section4 = Get the Right Beans |
| − | + | |anchor4 = Get the Right Beans | |
| − | + | |section5 = Find the Right Grind | |
| − | + | |anchor5 = Find the Right Grind | |
| − | + | }} | |
| − | + | ===How to Setup and Startup Your Machine=== | |
| − | + | {{Content-Columns | |
| − | + | |column_1 = | |
| − | + | Congratulations on your new machine! In the video on the right, Marc takes you through the initial setup and startup of the Gaggia Anima line of machines. | |
| − | + | |column_2 = | |
| − | + | [[File:Wiki-YT-GaggiaHowtoSetupStartupGaggiaAnima.jpg|center|link=https://youtu.be/37LeHgH0mUo]] | |
| − | + | |media_caption = | |
| − | + | How to Setup and Startup Gaggia Anima Espresso Machines | |
| − | + | }} | |
| − | + | {{Super-Set-Up-Content | |
| − | + | |pannarello = | |
| − | + | ||
| − | + | ||
| − | + | ||
| − | + | ||
| − | + | ||
| − | + | ||
| − | + | ||
| − | + | ||
| − | + | ||
| − | + | ||
| − | + | ||
| − | + | ||
| − | + | ||
| − | + | ||
| − | + | ||
| − | + | ||
| − | + | ||
| − | + | ||
| − | + | ||
| − | + | ||
| − | + | ||
| − | + | ||
| − | + | ||
| − | + | ||
| − | + | ||
| − | + | ||
| − | + | ||
| − | + | ||
| − | + | ||
| − | + | ||
| − | + | ||
| − | + | ||
| − | + | ||
| − | {{ | + | |
| − | + | ||
| − | + | ||
| − | + | ||
| − | + | ||
| − | + | ||
| − | + | ||
| − | + | ||
| − | + | ||
| − | + | ||
| − | + | ||
| − | | | + | |
}} | }} | ||
| − | |||
| − | |||
| − | |||
| − | |||
| − | |||
| − | |||
| − | |||
| − | |||
| − | |||
| − | |||
| − | |||
[[Category:Gaggia]] | [[Category:Gaggia]] | ||
| − | |||
Latest revision as of 11:17, 20 March 2019


How to Setup and Startup Your Machine
Congratulations on your new machine! In the video on the right, Marc takes you through the initial setup and startup of the Gaggia Anima line of machines.
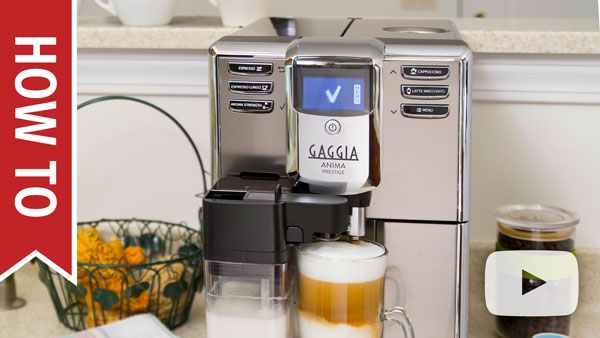
How to Setup and Startup Gaggia Anima Espresso Machines
Install It
- Find a swanky spot in your home for your new machine to live, preferably where the morning sun shine down on your new, personal barista.
- Get the power cord and the accessories out of the box.
- Plug the machine directly into an outlet. Don't plug it into surge protectors, extension cords, or timers.
- Fill the water tank.
Educate Yourself
There are a few things you should know before heating up your super-auto for the first time to keep the the espresso flowing and the milk frothing. In the video on the right, you'll learn all about recommended roasts, water hardness, grind settings, milk frothing and the brew group—or, as we like to think of it, your super-auto's inner barista.
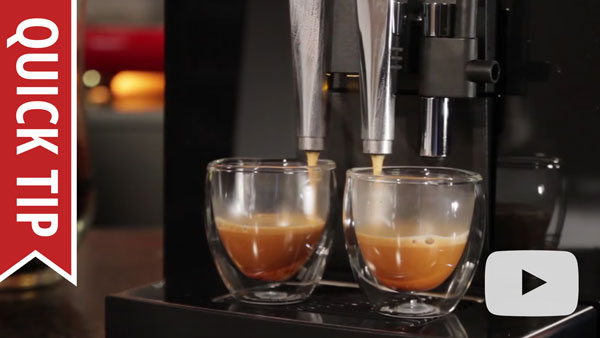
5 Things New Super Automatic Espresso Machine Owners Should Know
Get the Right Beans
Coffee is all about the caffeine (er... flavor), and super-autos don't disappoint, though, they are a teensy bit picky when it comes to certain roasts. In particular, super-autos are oily-bean-averse, meaning they don't like extra dark or flavored beans, as they tend to gunk up the grinder. Watch the video on the right to learn how to choose the beans of your dreams and keep your grinder clean.
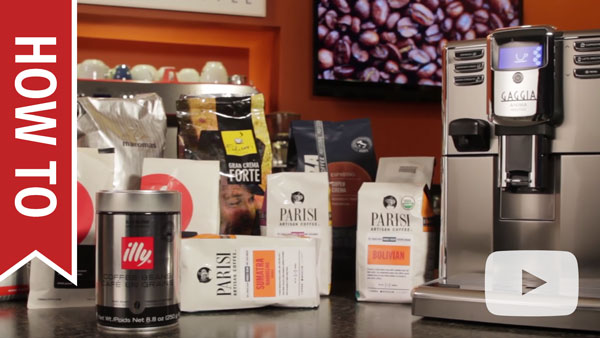
How To: Coffee Bean Selection and Grind Settings for Bean to Cup Machines
Find the Right Grind
Consistency is key when it comes to grind size. With super-autos, you can just set it and forget it, but it's good to know how to fine tune for your favorite roasts. A good rule of thumb to keep in mind: light roasts and small volumes such as in espresso need a finer grind, while dark roasts and long coffees favor a coarser grind. Watch the video on the right to learn more.
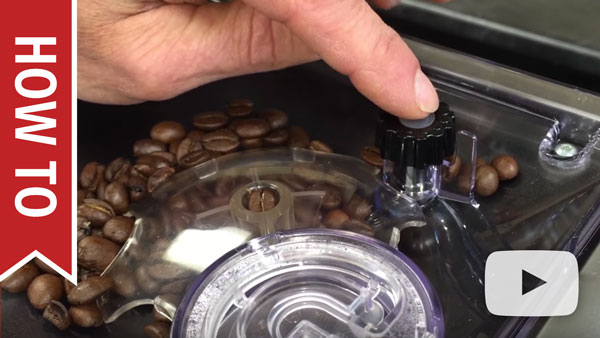
How To Adjust Grind Size on a Super Automatic Espresso Machine